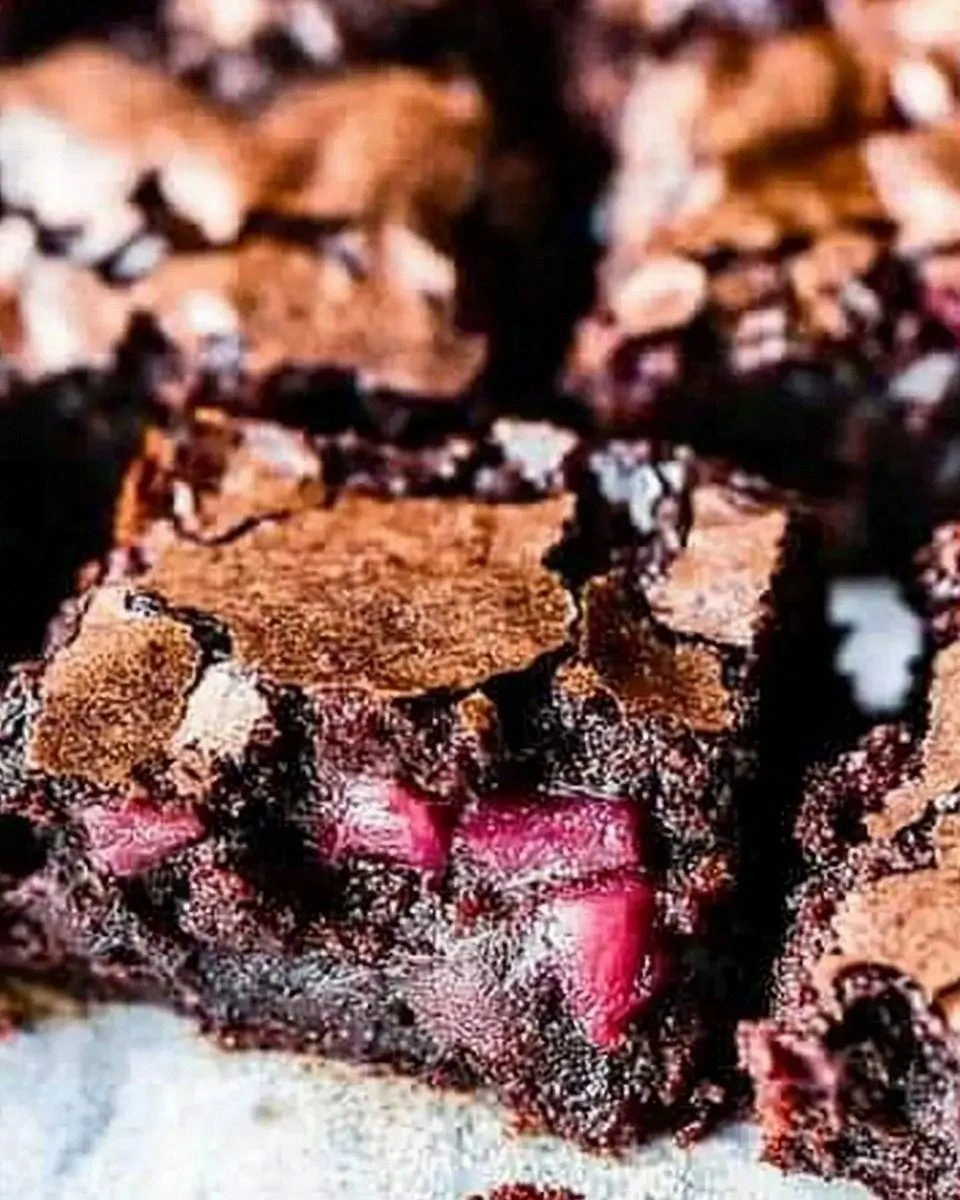
There was a moment in my kitchen that still makes my stomach do a happy little dance—an accidental disaster that turned into a culinary revelation. I had been whipping up a batch of chocolate cake for Easter, and the oven betrayed me by setting the temperature 20 degrees higher than I’d set. The cake emerged as a charred, caramelized crust with a gooey center that looked like a crater on a moon. I stared at it, half laughing, half lamenting, when a friend called me over and said, “Hey, you could make a cake out of that.” That was the spark that led me to experiment with a no‑bake, Oreo‑laden dessert that feels like dirt—sweet, crunchy, and utterly addictive.
Picture this: you’re in a sunny kitchen, the scent of chocolate and toasted cookies filling the air, and a pot of chocolate sauce bubbling like a calm lake. The sound of the spoon stirring is the only thing that breaks the silence. You take a bite and the first thing you taste is the crunch of Oreo crumbs, followed by a smooth, velvety chocolate coating that melts instantly. The marshmallow fluff floats on top like clouds, and the whole thing feels like a dessert that’s both a playground and a comfort zone. If you’ve ever tried a traditional Easter cake and found it too dry or too sweet, this is the antidote you’ve been waiting for.
What makes this version stand out is not just the ingredients but the way they’re assembled. The recipe is a masterclass in balancing textures: the gritty cookie base, the creamy marshmallow, the glossy chocolate, and a subtle hint of sea salt that pulls everything together. I dare you to taste this and not go back for seconds. The first bite is a revelation—crunch, sweetness, and a hint of bitterness that keeps you coming back for more. And trust me, the moment you finish, you’ll want to dig in again before you even realize you’ve already had the first serving.
One thing that sets this apart from every other Easter dessert out there is the “no‑bake” factor. No oven, no mess, no waiting—just a few minutes of prep, and you have a showstopper that can be served at any time. The secret sauce is a homemade chocolate glaze that coats the casserole like velvet, and the Oreo crumbs are toasted to bring out a nutty flavor that you’d miss if you just crushed them raw. Picture yourself pulling this out of the fridge, the whole kitchen smelling incredible, and your guests’ eyes widening in delight. Let me walk you through every single step—by the end, you’ll wonder how you ever made it any other way.
What Makes This Version Stand Out
- Texture: The combination of crunchy Oreo crumbs, silky chocolate sauce, and fluffy marshmallow creates a multi‑layered mouthfeel that keeps you intrigued with every bite.
- Flavor Balance: A pinch of sea salt lifts the sweetness and adds depth, turning a simple dessert into a sophisticated treat.
- Ease of Preparation: No oven required—just a stovetop and a few minutes of whisking, making it a perfect last‑minute Easter indulgence.
- Make‑Ahead Friendly: The casserole can be assembled a day in advance; the flavors meld beautifully, and the texture stays crisp.
- Visual Appeal: The dark chocolate glaze against the light Oreo base resembles a night sky with stars, making it Instagram‑worthy.
- Kid‑Friendly: Children love the cookie crunch, while adults appreciate the gourmet chocolate finish.
Alright, let’s break down exactly what goes into this masterpiece…
Inside the Ingredient List
The Flavor Base
The foundation of this dessert is the chocolate glaze, which is the star that ties everything together. It’s made from a blend of dark chocolate chips and heavy cream, whisked until silky smooth. The cream’s fat content ensures the glaze coats the casserole like velvet, while the chocolate’s bitterness balances the sweetness of the marshmallow and Oreos. If you skip this step, you’ll end up with a dessert that feels flat and lacks the glossy finish that makes it irresistible.
The Texture Crew
Crushed Oreo cookies are the backbone of the casserole’s crunch. We use about two cups of finely crushed Oreos, which provide a buttery, cookie‑like bite that contrasts beautifully with the smooth chocolate. Toasting the crumbs slightly before adding them brings out a subtle nutty flavor and prevents them from becoming soggy. If you’re allergic to dairy, you can swap the regular Oreos for dairy‑free versions; just keep the texture in mind, as some varieties crumble differently.
The Unexpected Star
Marshmallow fluff is the unexpected star that adds a cloud‑like softness to the dish. It melts into the chocolate glaze, creating pockets of airy sweetness that contrast with the dense cookie base. The fluff’s lightness also keeps the casserole from feeling too heavy, making it a delightful treat for both kids and adults. If you can’t find marshmallow fluff, a homemade version made from sugar, water, and gelatin works just as well, though it takes a bit more time to whip.
The Final Flourish
Sea salt is the final flourish that elevates the entire dessert. Just a pinch on top of the finished casserole brings out the chocolate’s depth and balances the sweetness. It also adds a subtle crunch that enhances the overall mouthfeel. If you prefer a salt‑free version, you can omit it, but the dessert will taste slightly less complex.
Everything’s prepped? Good. Let’s get into the real action…

The Method — Step by Step
- Start by melting the butter in a medium saucepan over medium heat. Once the butter is fully melted, add the powdered sugar and whisk continuously until the mixture is smooth and glossy. This creates a base that will help the chocolate glaze set properly. Keep an eye on the mixture; if it begins to bubble, reduce the heat immediately to avoid scorching.
- Add the dark chocolate chips to the saucepan and stir until completely melted. The chocolate should coat the back of a spoon like a silky coat, indicating it’s ready. If the mixture appears lumpy, pour it through a fine mesh sieve to ensure a smooth texture. This step is crucial for achieving that glossy finish that makes the casserole look like a dark, chocolatey field.
- Pour the melted chocolate mixture into a large mixing bowl and let it cool for about five minutes. Then fold in the heavy cream slowly, whisking continuously until the glaze thickens to a pourable consistency. The cream’s fat content will help the glaze set into a firm yet creamy layer when it cools. The aroma of chocolate will fill the kitchen, setting the mood for a sweet celebration.
- While the glaze is cooling, toast the crushed Oreo crumbs in a dry skillet over medium heat for 2‑3 minutes. Stir constantly to prevent burning; you want a golden‑brown color without any bitter taste. This step releases the cookies’ natural oils, giving the crumbs a richer flavor and a crispier texture once they’re incorporated into the casserole.
- Add the toasted Oreo crumbs to the chocolate glaze and stir until evenly distributed. The crumbs should look like scattered chocolate specks across a dark, glossy surface. Let the mixture sit for a minute so the crumbs can absorb some of the glaze, creating a cohesive base that will hold the marshmallow fluff on top.
- Spread the chocolate‑Oreo mixture evenly in a 9‑inch square baking dish. Use the back of a spoon to press it down firmly, ensuring there are no air pockets. This creates a solid foundation that will support the fluffy marshmallow layer. The dish should smell like chocolate and toasted cookies, a promise of what’s to come.
- Spoon the marshmallow fluff over the chocolate base, spreading it into a smooth, even layer. The fluff should look like white clouds against the dark chocolate. The marshmallow will melt slightly when it meets the warm glaze, creating pockets of sweet, airy texture. This step is the moment of truth—watch as the fluff glistens under the kitchen lights.
- Finish by sprinkling a pinch of sea salt over the marshmallow layer. The salt should be just enough to be visible but not overpowering. It will enhance the chocolate’s depth and add a subtle crunch that complements the smoothness of the marshmallow. This final touch turns a simple dessert into a gourmet experience.
- Refrigerate the casserole for at least 2 hours, or until the chocolate is set and the marshmallow has firmed up. The refrigerator will help the flavors meld together, creating a cohesive and delicious dessert. Once set, cut into squares and serve chilled. The texture should be firm yet creamy, with a satisfying crunch from the Oreo crumbs.
That’s it— you did it. But hold on, I’ve got a few more tricks that’ll take this to another level…
Insider Tricks for Flawless Results
The Temperature Rule Nobody Follows
Chocolate can be temperamental. The trick is to keep the mixture just below the melting point of the chocolate—about 88°F (31°C). If you’re using a candy thermometer, aim for that sweet spot; if not, test with a small spoon. A properly tempered glaze will set firm yet remain glossy. I’ve found that letting the glaze cool slightly before adding the cream helps maintain this temperature.
Why Your Nose Knows Best
Before you pour the chocolate into the dish, inhale the aroma. A rich, chocolatey scent indicates the mixture is ready. If it smells slightly burnt or metallic, give it a few minutes to cool or stir again. Your nose is your best judge of readiness, and it will save you from a ruined dessert.
The 5‑Minute Rest That Changes Everything
After adding the toasted Oreos, let the mixture rest for five minutes. This rest allows the crumbs to absorb the glaze, preventing them from sinking into the marshmallow fluff later. It also gives the chocolate a chance to thicken slightly, creating a better base for the fluffy topping.
Use a Silicone Mold for Easy Serving
If you don’t have a square dish, a silicone loaf pan works beautifully. The non‑stick surface means you can lift the entire dessert out without cutting it into pieces first. This trick saves time and reduces mess, especially if you’re serving a large crowd.
Serve with a Whipped Cream Swirl
Just before serving, add a swirl of fresh whipped cream on top. It adds a light, airy finish that contrasts with the dense chocolate and cookie base. The whipped cream also helps balance the sweetness, making each bite more harmonious.
Creative Twists and Variations
This recipe is a playground. Here are some of my favorite ways to switch things up:
Chocolate‑Mint Explosion
Swap the dark chocolate chips for white chocolate and add a few drops of peppermint extract to the glaze. The mint will give a fresh twist that pairs wonderfully with the cookie crunch. This version is perfect for a holiday dessert that feels both classic and surprising.
Nutty Delight
Incorporate chopped toasted almonds or walnuts into the Oreo base. The nutty flavor adds another layer of complexity, while the crunch remains. This variation is ideal for those who love a bit of texture and a hint of earthy flavor.
Caramel Swirl
Drizzle caramel sauce over the marshmallow fluff before refrigerating. The caramel adds a buttery sweetness that balances the chocolate’s bitterness. The result is a dessert that feels like a caramel‑filled chocolate cake.
Vegan Version
Use dairy‑free chocolate chips, coconut cream instead of heavy cream, and a vegan marshmallow fluff. The texture remains creamy, and the chocolate flavor stays rich. This version is a win for anyone looking to enjoy the dessert without dairy.
Festive Fruit Twist
Stir in a handful of dried cranberries or raisins into the Oreo base. The fruit adds a burst of tartness that cuts through the sweetness. This variation works well for a holiday dessert that feels bright and lively.
Spiced Cinnamon Crunch
Add a teaspoon of ground cinnamon to the chocolate glaze. The warm spice elevates the chocolate’s flavor profile, giving the dessert a cozy, autumnal feel. This version is perfect for a cozy family gathering.
Storing and Bringing It Back to Life
Fridge Storage
Store the casserole in an airtight container in the refrigerator for up to five days. The chocolate base will stay firm, and the marshmallow fluff will remain fluffy. When you’re ready to serve, let it sit at room temperature for about ten minutes to soften slightly.
Freezer Friendly
For longer storage, wrap the casserole tightly in plastic wrap and freeze for up to two months. Thaw in the refrigerator overnight before serving. The chocolate may crystallize slightly, but it will melt back into a silky texture when you let it sit at room temperature for a few minutes.
Best Reheating Method
To revive a chilled or frozen casserole, place it in a preheated oven at 300°F (150°C) for 8‑10 minutes. Alternatively, microwave on low power for 30‑second intervals until it reaches a pleasant warmth. Add a tiny splash of water before reheating to create steam, which helps the marshmallow fluff soften without drying out.