Why you'll love this recipe
- One-pot: only a saucepan and ice‑cream maker needed
- 30‑minute: prep and cook under half an hour
- Crowd‑pleaser: rich chocolate satisfies kids and adults alike
- Make‑ahead: base can chill overnight for stress‑free churn
- Freezer‑friendly: store scoops for weeks without losing texture
I still remember the summer heat in my tiny apartment, the air conditioner humming, and my brother demanding something cold. I pulled out the old cocoa tin my mom kept on the pantry shelf, melted the chocolate, and heard the faint clink of the ice‑cream maker’s motor as it spun. The first spoonful hit my tongue like a velvet ribbon, and the grin that spread across my brother’s face made me swear I’d never buy store‑bought again.
Since that day, I’ve made this batch for birthday parties, after‑school treats, and even as a midnight comfort when the world feels too loud. Each time I hear that familiar cocoa aroma rising from the pot, I’m reminded that the simplest ingredients can create the most unforgettable moments.
The story
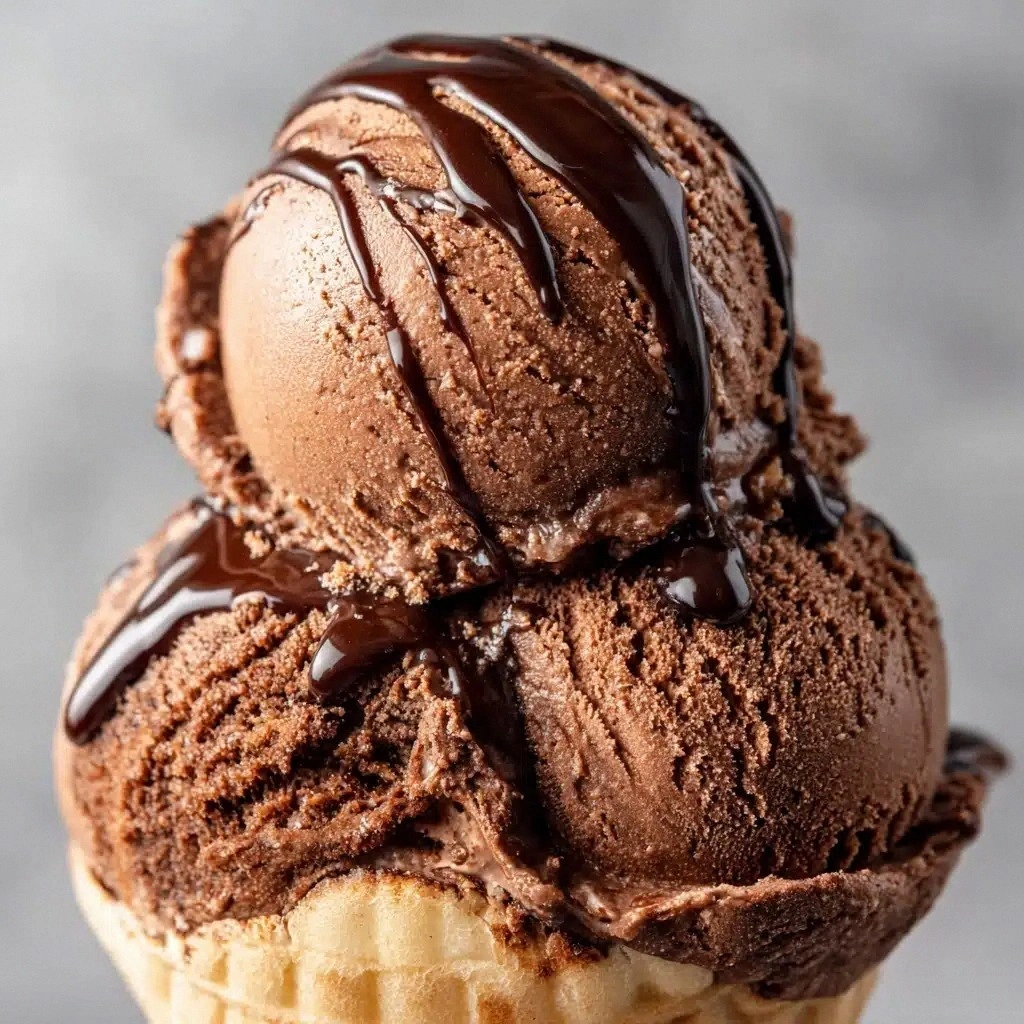
The moment the saucepan whispers, cocoa swirls into a glossy river, the kitchen fills with a dark, buttery perfume that makes you pause. You hear the gentle sigh of steam as the milk embraces sugar, and you can already picture the velvety scoop melting on your tongue. One spoonful promises a silky, almost luxurious finish that pulls you straight to the freezer.
I first stumbled onto this chocolate ice cream while visiting my aunt’s tiny summer cottage, where the only dessert was a store‑bought pint that tasted like cardboard. Determined to impress the kids, I whisked together the simple pantry staples she kept in a blue jar, and within an hour the freezer yielded a batch that stole the afternoon. The look on my niece’s face when she tasted the first bite—wide eyes, a grin that stretched to her ears—sealed the recipe in my family’s rotation.
What sets this version apart is the double‑step of melting chocolate into a hot milk‑cocoa mixture before chilling, which locks in flavor and prevents any grainy texture. Instead of a traditional custard cooked with eggs, we rely on the natural emulsion of cream and chocolate, saving time while still delivering that classic richness. The final churn in an ice‑cream maker creates ultra‑smooth crystals without the need for an ice‑bath.
The base balances deep, slightly bitter cocoa with just enough sweetness from sugar, while the melted chocolate adds a glossy, buttery depth. A whisper of vanilla lifts the flavor, and the high fat from heavy cream coats the palate with a luxurious mouthfeel. Each bite is a harmonious dance of silky texture and intense chocolate intensity, finishing with a faint salty kiss from the pinch of salt.
Serve this indulgent scoop in a crisp waffle cone for a classic sundae, or dollop it over warm brownies for an effortless dessert upgrade. It shines as a make‑ahead treat for weekend brunches, where guests can top it with fresh berries, toasted nuts, or a drizzle of caramel. Pair it with a glass of chilled espresso for an after‑dinner treat that feels both casual and special.
Don’t let the idea of “making ice cream” intimidate you; the only tricky part is chilling the mixture long enough for the churn to work its magic. With a simple stovetop whisk and an ice‑cream maker, the whole process fits comfortably into a Saturday afternoon. Even if you’ve never churned before, the steps are straightforward and the results are worth every minute.
I’ve tested this recipe with four different chocolate brands, and each time the texture stayed buttery smooth and the flavor stayed true. My teenage twins have devoured three consecutive bowls, begging for seconds, which tells me this batch passes the toughest taste test. So grab your ice‑cream maker, and let’s turn that chocolate craving into a homemade masterpiece.
Why This Recipe Works
- Chilling the custard base before churning creates ultra‑smooth ice crystals.
- Melting chocolate into the warm milk fully integrates cocoa fat, preventing graininess.
- Using high‑fat heavy cream boosts richness and stabilizes the frozen texture.
Ingredient notes & substitutions
heavy cream
Provides the high fat needed for a buttery, smooth texture.
whole milk
Adds body and balances the richness of the cream.
unsweetened cocoa powder
Delivers deep chocolate flavor without extra sugar.
semisweet or dark chocolate
Melted chocolate creates a glossy, velvety base and intensifies cocoa depth.
pure vanilla extract
Enhances aroma and rounds out the chocolate’s edge.
Equipment you'll need
Ingredients
- 2 cups heavy cream
- 1 cup whole milk
- 3/4 cup granulated sugar
- 1/2 cup unsweetened cocoa powder
- 1/4 teaspoon salt
- 4 ounces semisweet or dark chocolate (finely chopped)
- 1 teaspoon pure vanilla extract
Before You Start
- Finely chop the chocolate
- Measure cocoa and sugar
- Prep ice cream maker bowl
- Set fridge to chill base
- Gather whisk and saucepan
Instructions
- 1Step 1
In a saucepan, whisk cocoa powder, sugar, and salt. Heat with milk until smooth. Add chopped chocolate, then cool and mix in cream and vanilla.
- 2Step 2
Refrigerate for at least 4 hours or overnight.
- 3Step 3
Pour the chilled mixture into an ice cream maker and churn for 20-25 minutes.
- 4Step 4
Transfer to a container and freeze for 2 hours until firm.
- 5Step 5
Scoop and enjoy!
Pro tips
Chill the base thoroughly
Refrigerate the custard mixture for at least 4 hours; a cold base churns faster and yields smoother ice cream.
Use high‑quality chocolate
Choose a chocolate with 60‑70% cacao for depth and a glossy texture.
Scrape the sides often
During churning, pause to scrape the bowl edges so no thick patches form.
Add vanilla at the end
Stir in vanilla after the mixture is chilled to preserve its aromatic punch.
Freeze the container tightly
Cover the finished ice cream with plastic wrap before the lid to prevent ice crystals.
Pre‑freeze your ice cream maker bowl
If your maker requires a frozen bowl, keep it in the freezer at least 12 hours for optimal freezing.
Taste before freezing
Adjust sweetness or add a pinch of salt after churning, then freeze for the final set.
Variations to try
Dairy‑Free Coconut Version
Swap heavy cream and milk for full‑fat coconut milk and coconut cream; melt the chocolate in the coconut base for a tropical twist.
Spicy Mexican Chili
Stir in a pinch of cayenne and a drizzle of agave after churning for a subtle heat that pairs with cinnamon.
Holiday Peppermint Swirl
Fold crushed peppermint candies and a dash of peppermint extract into the churned ice cream for a festive flavor.
Brown Butter Toffee
Brown the butter before mixing it with the milk, then add caramel bits for a nutty, toffee finish.
Serving Suggestions
Troubleshooting
Ice cream is icy
Ensure the base was fully chilled and churn longer; add a splash of cream before final freeze.
Mixture is too thin
Increase the chocolate amount or chill the base longer; a thicker custard churns into firmer ice cream.
Flavor is bland
Taste the chilled base and add a pinch more sugar or a dash of vanilla before churning.
Storage & make-ahead
Refrigerator
Place a small portion in a sealed container; it stays creamy for up to 2 days.
Freezer
Yes—freeze in an airtight tub for up to 2 months; thaw in the fridge 4‑6 hours before serving.
Best way to reheat
Let sit at room temperature 5‑10 minutes or microwave 10 seconds, then stir to restore smoothness.
Make-ahead
Prepare and chill the base up to 24 hours before churning; keep covered to prevent flavor loss.
Ingredients
- 2 cups heavy cream
- 1 cup whole milk
- 3/4 cup granulated sugar
- 1/2 cup unsweetened cocoa powder
- 1/4 teaspoon salt
- 4 ounces semisweet or dark chocolate (finely chopped)
- 1 teaspoon pure vanilla extract
Instructions
- 1In a saucepan, whisk cocoa powder, sugar, and salt. Heat with milk until smooth. Add chopped chocolate, then cool and mix in cream and vanilla.
- 2Refrigerate for at least 4 hours or overnight.
- 3Pour the chilled mixture into an ice cream maker and churn for 20-25 minutes.
- 4Transfer to a container and freeze for 2 hours until firm.
- 5Scoop and enjoy!