Introduction
Picture this: a quiet Tuesday evening, the fridge humming, a craving for something that feels like a hug in a bowl. I was halfway through a bland stir‑fry when a neighbor knocked, demanding a quick dinner for their family. I glanced at my pantry, spotted a bottle of maple syrup, a jar of Dijon mustard, and a rack of chicken drumsticks, and thought, “Why not?” The result? A dish that sings with sweet‑savory harmony and crispy, caramelized edges that crack like thin ice.
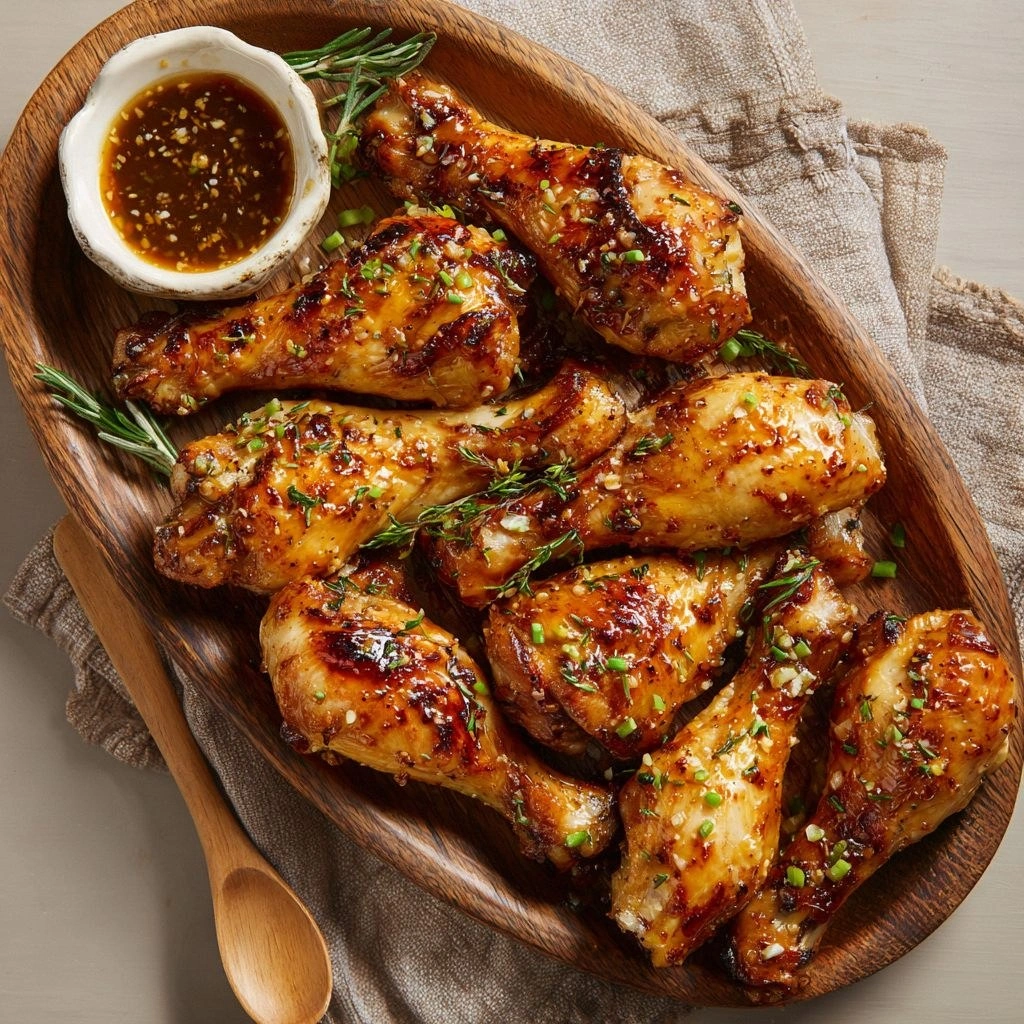
When the first drumstick hit the pan, the sizzle was music—an audible promise of flavor to come. The aroma that unfurled was a warm blend of maple sweetness, sharp mustard, and earthy thyme, filling the kitchen like a fragrant fog. Every bite was a revelation: the skin was blistered to a golden crust, the meat inside was tender, and the glaze clung like a silky velvet coat, each mouthful tingling with a subtle heat from the garlic. I swear, that first taste felt like a secret handshake between the sauce and the chicken, a partnership that left me craving a second plate.
What sets this version apart is that it doesn’t just rely on sweet or savory alone. It balances maple’s syrupy richness with Dijon’s piquant bite, and the gentle heat from garlic and thyme anchors the flavors. The technique—browning the chicken first, then simmering in the glaze—creates a depth that most quick‑fix recipes miss. The result is a dish that feels indulgent yet approachable, a crowd‑pleaser that can be whipped up in under an hour.
I’m about to walk you through every single step, from the first stir to the final garnish. By the end, you’ll wonder how you ever made it any other way, because this method will become your go‑to for a comforting yet impressive dinner. Let’s dive in.
What Makes This Version Stand Out
- Taste: The maple glaze caramelizes into a glossy, slightly crunchy coating that balances sweetness with a sharp mustard kick. The result is a flavor profile that feels both familiar and exciting.
- Texture: The chicken skin crisps up to a golden crunch while the meat stays juicy, creating a satisfying contrast that satisfies every bite.
- Simplicity: With only a handful of pantry staples, you can transform a basic drumstick rack into a showstopper. No fancy equipment or time‑consuming prep.
- Uniqueness: The blend of maple and Dijon is a sweet‑savory twist that’s rarely seen in mainstream chicken recipes, giving this dish a distinct identity.
- Crowd Reaction: Friends who’ve tried other maple‑based dishes often find this version too good to pass up. Expect compliments and a second plate.
- Ingredient Quality: Using fresh, high‑quality drumsticks and real maple syrup makes the difference between a decent and a memorable meal.
- Cooking Method: Searing before glazing locks in juices and builds a complex flavor base, ensuring every bite is packed with depth.
- Make‑Ahead Potential: The glazed chicken can be refrigerated for up to 48 hours, reheated to perfection, making it a great option for busy weeknights.
Alright, let's break down exactly what goes into this masterpiece…
Inside the Ingredient List
The Flavor Base
Maple syrup is the star that provides a natural sweetness, a subtle depth that complements the savory notes. It caramelizes when heated, forming a glossy glaze that sticks to the chicken like a second skin. If you skip maple, the dish loses its signature sweetness and the glaze becomes thin and watery. A good quality pure maple syrup, rather than a flavored or imitation, gives the dish a clean, authentic flavor. Swap with honey for a different sweet profile, but keep the ratio the same.
The Texture Crew
Chicken drumsticks are the backbone of the dish, offering a hearty, meaty bite that stands up to the glaze. The skin’s natural fat renders during cooking, creating a crisp exterior that contrasts with the tender interior. If you prefer boneless pieces, use thighs or breasts, but remember to adjust cooking time to avoid drying out. A pinch of salt and pepper enhances the meat’s natural flavors, while a touch of thyme adds an aromatic lift.
The Unexpected Star
Dijon mustard is more than a condiment; it brings a sharp, tangy bite that balances the maple’s sweetness. Its natural acidity cuts through the richness and prevents the glaze from becoming cloying. If Dijon is unavailable, a grainy mustard or even a splash of whole‑grain mustard works, but be mindful that the flavor profile will shift slightly. The mustard also helps emulsify the glaze, giving it a silky consistency.
The Final Flourish
Garlic and thyme are the aromatic duo that infuse the dish with depth. Fresh garlic provides a bright, sharp note that cuts through the sweetness, while thyme offers a subtle earthy undertone. A splash of butter at the end of cooking adds richness and a glossy sheen, enhancing the sauce’s mouthfeel. Garnish with chopped parsley for a pop of color and fresh flavor. If you’re vegan, replace butter with a drizzle of olive oil.
Everything's prepped? Good. Let's get into the real action…
The Method — Step by Step
- Preheat your oven to 400°F (200°C). Pat the drumsticks dry with paper towels—this step is crucial for a crisp skin. Season each piece generously with salt, pepper, and dried thyme, making sure the seasoning sticks to every nook. Let them rest at room temperature for 10 minutes; this helps the flavors penetrate the meat.
- Heat a large oven‑proof skillet (cast iron works best) over medium‑high heat. Add olive oil and swirl to coat the bottom. Place the drumsticks in a single layer, skin side down, and sear for 4–5 minutes until the skin is golden brown. Flip and sear the other side for 3 minutes. This step locks in juices and starts the caramelization process.
- While the chicken is searing, whisk together maple syrup, Dijon mustard, minced garlic, and a splash of water in a small bowl. The water helps thin the glaze slightly, ensuring it coats the chicken evenly. Taste the mixture; if you want a sharper bite, add a pinch of cayenne pepper.
- Pour the glaze over the seared drumsticks, making sure each piece is coated. Reduce the heat to medium, then transfer the skillet to the preheated oven. Bake for 20–25 minutes, or until the internal temperature reaches 165°F (74°C). The glaze should be thick, glossy, and slightly caramelized.
- Halfway through baking, use a basting brush to re‑apply the glaze. This ensures an even coating and a richer flavor. Watch for the glaze to thicken and develop a caramelized sheen—this is your cue that the dish is nearing perfection.
- Remove the skillet from the oven and let the drumsticks rest for 5 minutes. This allows the juices to redistribute, keeping the meat moist. While resting, melt a tablespoon of butter and drizzle it over the chicken for a glossy finish.
- Finish with a sprinkle of chopped parsley for color and freshness. Serve immediately with your favorite side—roasted veggies, a simple green salad, or creamy mashed potatoes. The dish is best enjoyed hot, when the glaze is still slightly sticky and the flavors are at their peak.
That's it—you did it. But hold on, I've got a few more tricks that'll take this to another level…
Insider Tricks for Flawless Results
The Temperature Rule Nobody Follows
Many cooks swear by high‑heat searing, but the real secret is to start medium‑high and then drop to medium when adding the glaze. This controlled heat prevents the sugars from burning while still achieving that coveted caramelization. I once tried searing at 500°F and ended up with charred edges and a bitter glaze. Stick to the 400°F oven and medium heat in the pan for a balanced result.
Why Your Nose Knows Best
Trust the aroma as your cooking guide. When the glaze starts to bubble and thicken, you’ll smell a sweet, buttery scent that signals the glaze is ready. If it smells overly sweet or burnt, lower the heat immediately. Your nose is a reliable indicator of doneness, especially when you’re juggling multiple dishes at once.
The 5‑Minute Rest That Changes Everything
Letting the drumsticks rest after baking is essential. During this brief pause, the internal temperature rises slightly, ensuring the meat is fully cooked without drying out. It also allows the juices to redistribute, giving you a moister bite every time. Skipping this step often results in a slightly dry center.
Use a Basting Brush for Even Coating
A silicone basting brush helps you apply the glaze evenly without squeezing out excess liquid. If you’re using a wooden spoon, you might end up with uneven spots and a less uniform flavor. A brush also lets you see how much glaze you’re applying, preventing a sticky mess.
Keep the Pan Covered While Baking
Covering the skillet with foil for the first 10 minutes locks in steam, helping the chicken cook through faster and stay juicy. Once you remove the foil, the glaze can reduce and caramelize. This trick is especially useful if you’re cooking a larger batch.
Creative Twists and Variations
This recipe is a playground. Here are some of my favorite ways to switch things up:
Spicy Maple Dijon
Add a teaspoon of crushed red pepper flakes to the glaze for a subtle heat that pairs well with the sweetness. The kick balances the maple, creating a complex flavor profile that’s perfect for spice lovers.
Herb‑Infused Glaze
Replace thyme with rosemary or sage for a different aromatic note. The herbs lend a Mediterranean feel to the dish, making it feel fresh and vibrant.
Honey Mustard Variation
Swap maple syrup for honey to give the dish a richer, deeper sweetness. Honey’s floral undertones complement the Dijon mustard beautifully, creating a new taste experience.
Cheesy Glazed Chicken
After baking, sprinkle grated Parmesan or shredded cheddar over the drumsticks and return them to the oven for 2 minutes. The cheese melts into a golden crust, adding a savory depth that pairs wonderfully with the sweet glaze.
Asian‑Inspired Glaze
Add a tablespoon of soy sauce and a splash of rice vinegar to the glaze. The umami and acidity cut through the sweetness, giving the dish an East Asian flair that’s both bold and balanced.
Vegetarian “Drumsticks”
Use large, thick slices of portobello mushrooms or cauliflower florets as the base. Coat them in the glaze and bake until tender. The result is a hearty, plant‑based alternative that still delivers the signature maple‑mustard flavor.
Storing and Bringing It Back to Life
Fridge Storage
Cool the cooked drumsticks to room temperature, then place them in an airtight container. Store in the refrigerator for up to 48 hours. The glaze will firm up slightly, but it will still taste fantastic.
Freezer Friendly
Wrap each drumstick individually in parchment paper, then place them in a freezer bag. This prevents freezer burn and makes portioning easy. Store for up to 3 months. When ready to eat, thaw overnight in the fridge.
Best Reheating Method
Preheat the oven to 350°F (175°C). Place the drumsticks on a baking sheet and heat for 10–12 minutes, or until warmed through. Add a splash of water before reheating to create steam; this keeps the meat moist and restores the glaze’s glossy sheen.