I was standing in a kitchen that felt more like a battlefield than a sanctuary, my stove screaming, the onions burning to a bitter blackness, and my patience evaporating faster than the steam from the pot. That night, I stared at my phone, scrolling through endless recipes, and found myself face‑to‑face with a single line: “Coconut lentil curry.” The moment I saw the word “coconut,” a craving that had been simmering for weeks erupted into a full‑blown, mouth‑watering obsession. I dared myself to cook something that would not just fill the void but obliterate the memory of that disastrous onion mishap.
Picture this: the kitchen is humming with the gentle clatter of the Instant Pot’s lid sealing, the aroma of toasted cumin seeds drifting like a warm hug, and a faint citrus tang from lime juice dancing in the air. Your eyes lock on the glossy, steaming can of coconut milk as it glistens beneath the pot’s lid, and you can almost hear the gentle hiss of the pressure building. The sight of the vibrant red lentils, now a soft, almost translucent hue, signals that the transformation is underway. The texture feels silky, the flavors promise depth, and the sound of the pot’s gentle whirring assures you that everything is on the right track.
What makes this version stand out isn’t just the creamy coconut base or the fiery whisper of chili flakes; it’s the way every component sings in harmony. The red lentils absorb the spices like a sponge, delivering a velvety mouthfeel that feels like a hug. The instant pot’s sealed environment locks in the aromatic oils, creating a depth of flavor that would otherwise take hours to develop. Most recipes treat lentils as a sidekick, but here they take center stage, turning a humble bean into a star that can be paired with rice, naan, or a simple side salad. I dare you to taste this and not go back for seconds.
Now, let’s walk through every single step together. By the end of this guide, you’ll wonder how you ever made it any other way, because this is hands down the best version you’ll ever make at home.
What Makes This Version Stand Out
- Flavor Explosion: The marriage of coconut milk with bold spices creates a rich, earthy base that lingers on the palate.
- Texture Mastery: Red lentils soften to a silky consistency without becoming mushy, thanks to the precise pressure timing.
- Simplicity: Only a handful of ingredients, no pre‑soaking, no elaborate prep—just add, press, and enjoy.
- Instant Pot Advantage: The sealed environment infuses every grain of lentil with flavor, cutting cooking time from hours to minutes.
- Freshness Boost: A splash of lime juice and a handful of cilantro finish the dish with bright, herbaceous notes that cut through the richness.
- Make‑Ahead Friendly: This dish tastes even better the next day, making it perfect for meal prep or a busy weeknight.
- Kid‑Friendly: The mild heat and creamy texture make it a hit with even the pickiest eaters.
- Versatile Pairing: Serve it over rice, with naan, or as a hearty soup; the options are endless.
Inside the Ingredient List
The Flavor Base
The heart of this dish is the aromatic blend that starts with cumin seeds and a splash of oil. Cumin seeds, when toasted, release a nutty, smoky aroma that grounds the entire curry. If you can’t find fresh cumin, a pinch of ground cumin works, but the toasted version delivers a richer depth. The ginger, freshly grated, adds a peppery zing that cuts through the coconut’s sweetness. If you’re vegan or allergic to ginger, a teaspoon of fresh galangal will give a similar bright bite.
The Texture Crew
Red lentils are the star of the show. They cook fast, turning tender and slightly sticky, creating a creamy base without the need for thickeners. If you prefer a firmer bite, switch to green or brown lentils, but keep in mind you’ll need to extend the cooking time by a few minutes. Coconut milk provides the luxurious mouthfeel; a full‑fat can ensures the curry stays silky. For a lighter version, use a low‑fat coconut milk, but the sauce will be less velvety.
The Unexpected Star
Turmeric isn’t just a color agent; it brings a subtle, earthy warmth that balances the coconut’s richness. It also offers anti‑inflammatory benefits—so you’re not just cooking, you’re nourishing. If you’re sensitive to turmeric’s strong taste, reduce the amount to half a teaspoon, but you’ll lose a bit of that golden glow.
The Final Flourish
Fresh cilantro and lime juice are the final touch that elevate the dish from comforting to unforgettable. The cilantro adds a herby brightness, while lime juice injects acidity that brightens the flavors. If cilantro is not your thing, a handful of fresh mint or basil can replace it, offering a different aromatic profile. Remember, the lime should be added at the end to preserve its bright citrus notes.
Everything’s prepped? Good. Let’s get into the real action.
The Method — Step by Step
- First, turn your Instant Pot to the “Sauté” setting. Add a splash of oil and wait until it shimmers. Drop in the cumin seeds; they’ll crackle and release a nutty aroma. Then toss in the finely chopped onion, minced garlic, and grated ginger, stirring until the onions turn translucent. This step builds the flavor base, and the scent should remind you of a warm, comforting kitchen.
- Add the red lentils and give everything a good stir so the lentils coat in the oil and spices. Sprinkle the curry powder, turmeric, and red chili flakes over the mixture. Stir again, ensuring the spices are evenly distributed. The mixture should smell toasty and fragrant—like a spice market in the middle of the night.
- Pour in the can of coconut milk and the cup of water. Stir gently to combine. The liquid should be a creamy, golden mixture, not a thick slurry. Seal the Instant Pot lid, set the valve to “Sealing,” and press the “Manual” or “Pressure Cook” button for 15 minutes at high pressure. This is where the lentils transform into silky clouds.
- Once the timer beeps, let the pressure release naturally for 10 minutes before carefully switching the valve to “Venting” to release any remaining steam. This gentle release prevents the lentils from overcooking and maintains their silky texture.
- Open the lid and give the curry a good stir. Taste and add salt to taste. The flavor should be well-balanced, with a hint of sweetness from the coconut and a subtle heat from the chili flakes.
- Now, add the fresh cilantro and lime juice. Stir quickly to distribute the bright flavors. The lime juice should brighten the dish without diluting the richness. If you prefer a milder lime taste, add half the amount and adjust later.
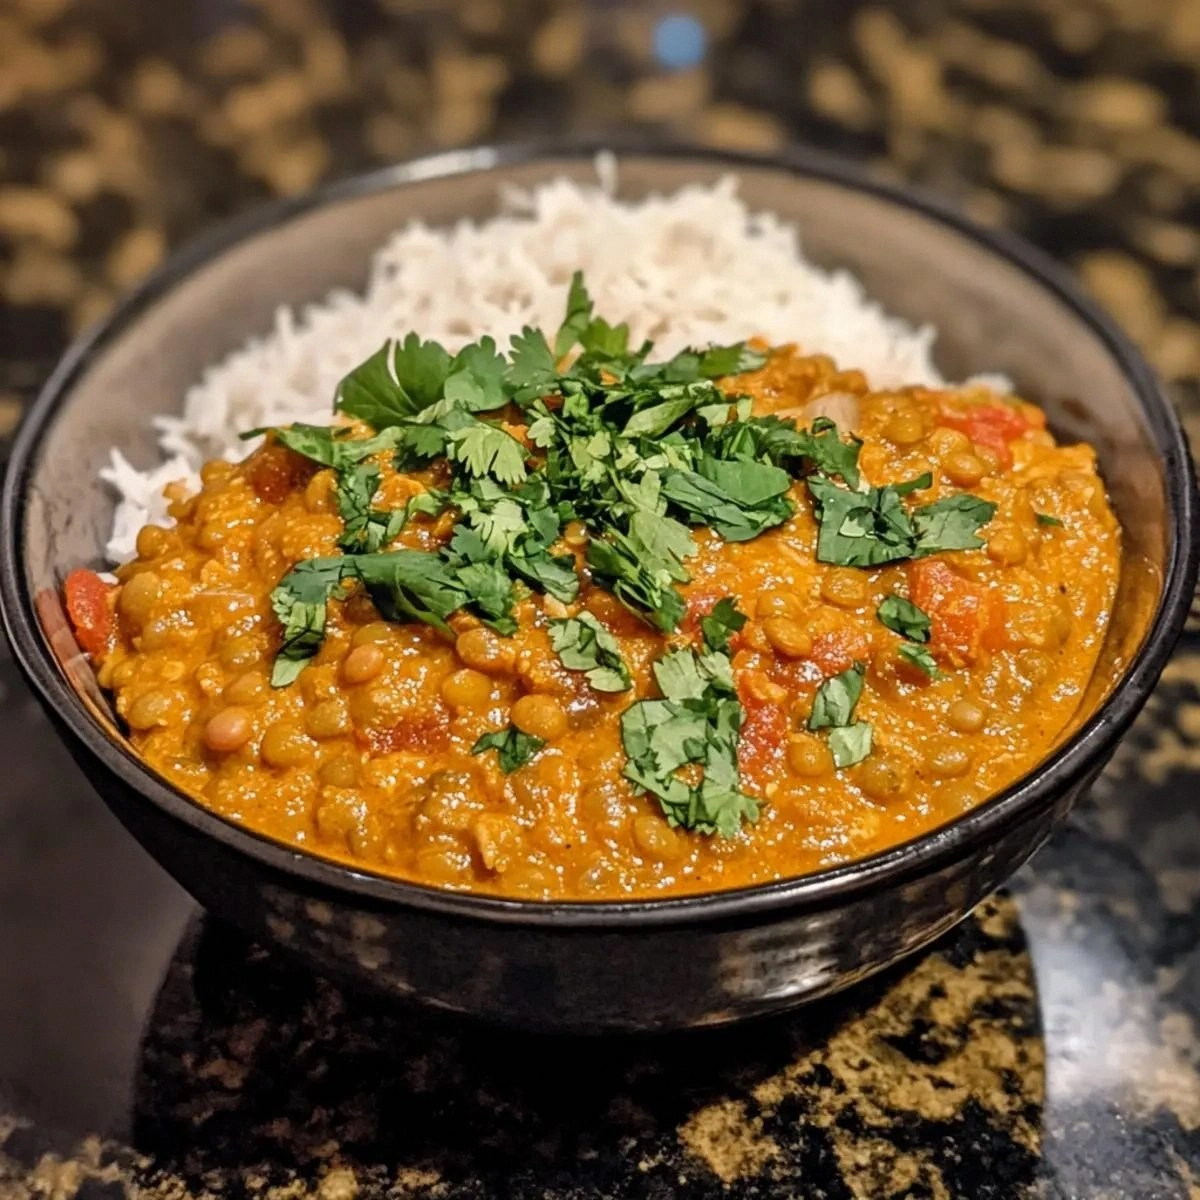
- Serve hot over steamed rice or with warm naan. Garnish with extra cilantro if desired. The dish should look glossy, with a subtle sheen from the coconut milk. The aroma will be intoxicating, inviting everyone to dig in.
- That’s it — you did it. But hold on, I’ve got a few more tricks that’ll take this to another level. Keep reading for insider secrets that will make your curry even more unforgettable.
Insider Tricks for Flawless Results
The Temperature Rule Nobody Follows
While the Instant Pot does the heavy lifting, the temperature of the ingredients matters. Start with ingredients at room temperature; this ensures even cooking and prevents the pot from lagging. If you’re adding cold coconut milk straight from the fridge, the pressure build‑up will be delayed, slightly extending the cooking time. A quick tip: let the coconut milk sit for 10 minutes before adding it to the pot.
Why Your Nose Knows Best
Before you seal the pot, give the mixture a quick sniff. A subtle, earthy aroma indicates the spices are properly toasted. If it smells flat, give it another minute of sautéing. Your nose is the best judge of flavor development, so trust it.
The 5-Minute Rest That Changes Everything
After the natural pressure release, let the curry rest for 5 minutes before stirring. This pause allows the flavors to settle, creating a richer taste profile. It also gives the lentils a chance to thicken slightly, improving the mouthfeel.
Keep It Cozy with a Touch of Cream
If you’re craving an even creamier texture, swirl in a tablespoon of coconut cream after the pressure release. This adds a luxurious thickness without altering the flavor balance. Just make sure to stir well so it integrates smoothly.
Make It Vegan-Friendly
For a fully plant‑based version, replace the can of coconut milk with a can of unsweetened almond milk and add a tablespoon of ground flaxseed mixed with 3 tablespoons of water to thicken. This substitution keeps the dish dairy‑free and still creamy.
Make It Spicier (or Less)
Adjust the red chili flakes to suit your heat tolerance. If you love heat, double the amount; if you’re heat‑averse, omit it entirely and replace with a pinch of paprika for color. The flexibility of spices is one of the recipe’s greatest strengths.
Creative Twists and Variations
This recipe is a playground. Here are some of my favorite ways to switch things up:
Spinach & Chickpea Powerhouse
Swap the red lentils for chickpeas and add a handful of fresh spinach in the last 5 minutes of cooking. The chickpeas add protein, while the spinach brings a subtle earthiness. Serve over quinoa for a complete meal.
Thai-Inspired Coconut Curry
Replace the curry powder with a Thai red curry paste and add a tablespoon of fish sauce (or soy sauce for a vegetarian version). Stir in a handful of sliced carrots and bell peppers. This version is bright, aromatic, and slightly sweeter.
Mexican Twist with Cilantro Lime Rice
Serve the curry over cilantro lime rice for a Mexican flair. Mix lime zest into the rice and garnish the curry with sliced jalapeños for an extra kick. The fresh cilantro ties both dishes together beautifully.
Indian-Style Dal
Add a teaspoon of garam masala and a pinch of asafoetida (hing) before adding the coconut milk. This gives the dish a deeper Indian flavor profile. Pair with naan or a side of raita for a complete Indian meal.
Breakfast Boost
Use the curry as a savory breakfast bowl by topping it with a fried egg, sliced avocado, and a drizzle of hot sauce. The creamy lentils pair wonderfully with the richness of the egg, creating a filling morning meal.
Gluten-Free Delight
Serve the curry over a bed of cauliflower rice for a gluten‑free option. The cauliflower’s mild flavor complements the spices without overpowering them. Add a sprinkle of toasted pumpkin seeds for crunch.
Storing and Bringing It Back to Life
Fridge Storage
Store the curry in an airtight container for up to 4 days in the refrigerator. The coconut milk base keeps the dish creamy and prevents it from drying out. When ready to eat, reheat gently on the stovetop over low heat, stirring frequently to maintain the silky texture.
Freezer Friendly
The curry freezes well for up to 3 months. Portion it into freezer‑safe containers or zip‑lock bags, labeling each with the date. Thaw overnight in the refrigerator before reheating. Add a splash of water or coconut milk to loosen the sauce if it’s thickened.
Best Reheating Method
The best way to reheat is on low heat in a saucepan, stirring until hot. Add a tablespoon of water or coconut milk to restore creaminess. Avoid microwaving, as it can cause the coconut milk to separate.