I still remember the year I ruined Christmas dessert. There I was, standing in my kitchen at 11:47 PM on December 23rd, staring at a pan of what looked like chocolate asphalt. My so-called "festive brownies" had the texture of a hockey puck and tasted like bitter disappointment with a hint of cinnamon. The frosting had separated into an oily mess that would make a chemist weep. My family was arriving in twelve hours, and I had nothing but a garbage can full of failed attempts and a heart full of holiday shame. That's when I decided enough was enough — I would crack the code for the perfect Christmas brownie if it took me all night and every bag of cocoa powder in the tri-state area.
What followed was a baking marathon that would make Santa's elves jealous. I tested seventeen different recipes, played with temperatures like a mad scientist, and discovered that most Christmas brownies fail because they're trying too hard to be everything at once. They want to be cakey and fudgy and spicy and sweet and decorated like a Victorian Christmas card. The result is usually a confused, overdone mess that tastes like someone blended a fruitcake with a chocolate bar and hoped for the best. But here's what nobody tells you — the perfect Christmas brownie knows exactly what it wants to be: rich, dense, and indulgent, with a frosting so silky it makes velvet feel like sandpaper.
The breakthrough came at 3:23 AM when I accidentally doubled the butter and cut the flour by a third. The batter looked wrong — too loose, too shiny, like it shouldn't work. But something told me to trust the process. Forty minutes later, I pulled out a pan of brownies that made me do a double-take. They had that gorgeous, paper-thin crust on top that crackled like thin ice when touched, revealing a fudgy interior so moist it practically sighed when cut. The real game-changer though? A frosting technique I learned from an old bakery owner who swore by whipping air into cream cheese until it reached cloud-like consistency, then folding in melted chocolate at just the right temperature. The result was a frosting that stayed soft even from the fridge, spreading like a dream and setting up with a professional sheen that made my amateur baking heart sing.
Picture this: it's Christmas morning, and you're pulling a pan of these beauties from the oven. The whole kitchen smells like a chocolate factory had a baby with a candy cane — rich cocoa mingling with hints of peppermint and vanilla. Your family gathers around as you slice through the glossy frosting, revealing the most perfect fudgy crumb that practically glows with chocolate intensity. Someone takes a bite and their eyes go wide, chewing slowly like they're afraid to break the spell. Then comes the inevitable reach for a second piece before the first is even finished. This, my friends, is what Christmas magic tastes like, and I'm about to hand you the keys to the kingdom.
What Makes This Version Stand Out
Fudgy Perfection: These aren't those cakey impostors that crumble like desert sand. We're talking dense, moist, almost truffle-like brownies that hold together like they mean business. The secret lies in the precise ratio of fat to flour and the temperature dance that happens in the oven. When you bite into one, your teeth sink through that thin, crackly top into a chocolate paradise that's somehow both rich and perfectly balanced.
Frosting That Behaves: Forget everything you know about frostings that slide off, crack, or turn grainy faster than you can say "holiday stress." This cream cheese-based wonder stays silky smooth even after refrigeration, pipes like a dream for decorating, and maintains that professional bakery shine that makes everyone think you secretly trained in Paris. The trick is in the temperature control and a stabilizing technique that keeps it perfect for days.
Christmas in Every Bite: We're not just dumping candy canes on top and calling it festive. The holiday magic is woven throughout — a touch of peppermint extract in the frosting, festive sprinkles that stay crisp, and a cocoa base that tastes like drinking hot chocolate by the fire. Every element works together to create something that tastes unmistakably like Christmas without being overwhelming.
Foolproof Technique: I've stripped away all the finicky steps that send most recipes into chaos. No water baths, no weird ingredients you've never heard of, no techniques that require a culinary degree. Just straightforward steps with built-in checkpoints so you know you're on track. Even if you've never made brownies from scratch, this recipe holds your hand through every single step.
Crowd Control Champion: These brownies scale beautifully, freeze like champions, and travel well to potlucks or cookie exchanges. I've made batches for office parties that disappeared in minutes and had colleagues hunting me down for the recipe. They're the kind of dessert that makes people remember your name — and ask you to bring dessert to every gathering forever.
Make-Ahead Magic: Here's where this recipe really shines — you can bake the brownies up to three days ahead, frost them the day before serving, and they'll taste like you just pulled them from the oven. The flavors actually deepen and improve overnight, making this perfect for busy holiday schedules when you need dessert handled but don't want to sacrifice quality.
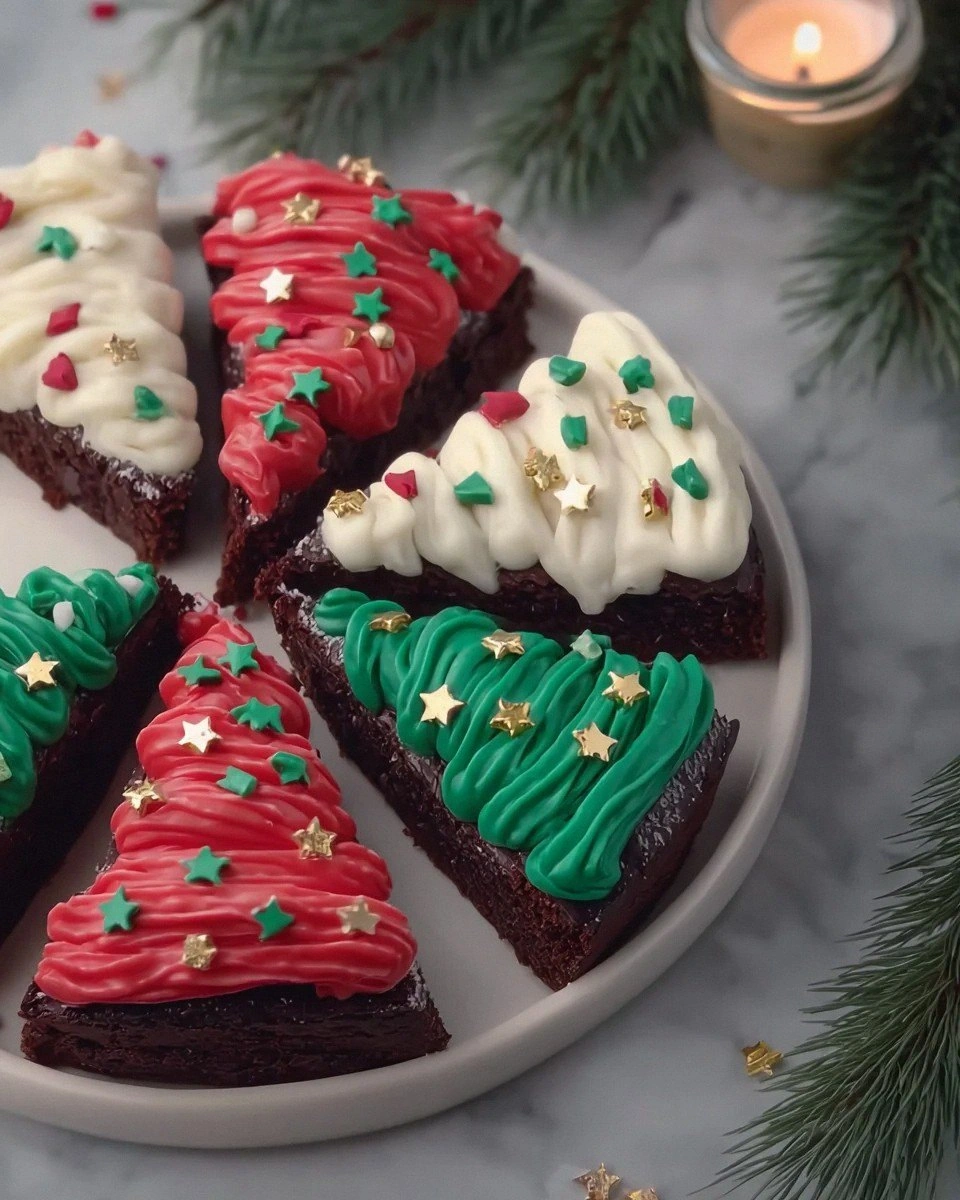
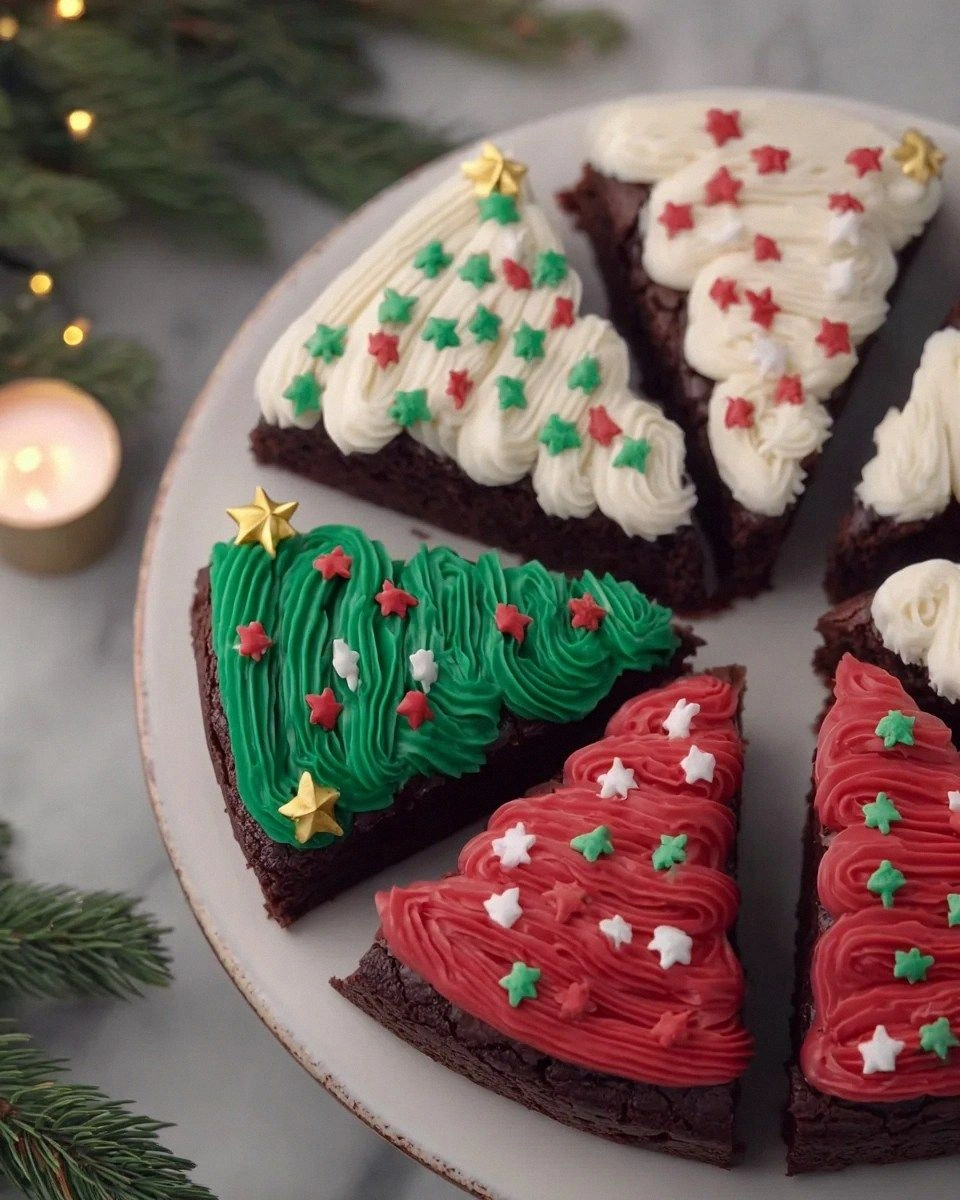
Instagram-Worthy Results: In our social media age, these brownies are photogenic celebrities. The contrast between the dark chocolate base and bright white frosting creates visual drama, while the Christmas sprinkles add pops of color that look professional without trying too hard. Your holiday food photos will look like they belong in a magazine spread.
Inside the Ingredient List
The Chocolate Foundation
Let's talk cocoa powder, because this is where most recipes go tragically wrong. You need Dutch-processed cocoa — not the natural stuff that tastes like cardboard and disappointment. Dutch-processed cocoa has been treated with an alkali to neutralize its acidity, giving it a smoother, more mellow flavor and that gorgeous dark color that makes chocolate lovers weak in the knees. I use Valrhona or Ghirardelli because they deliver that deep, complex chocolate flavor that tastes expensive even before you add the premium ingredients. The cocoa makes up the backbone of our brownies, so this is not the place to cheap out — skip the generic brand and invest in the good stuff. Your taste buds will throw a party, and your guests will taste the difference even if they can't articulate why.
Dark chocolate chips aren't just for show — they create those melty pockets of chocolate bliss throughout each brownie. I'm talking 60-70% cacao here, not those wimpy milk chocolate chips that disappear into the batter. The chips maintain their shape during baking but soften just enough to create these gorgeous chocolate lava moments when you bite in. Plus, they add textural interest that keeps things exciting, because nobody wants to eat chocolate-flavored cardboard. I've tested everything from expensive single-origin chocolate to grocery store brands, and honestly, Ghirardelli 60% chips deliver professional results without requiring a second mortgage.
The Texture Team
Unsalted butter is non-negotiable here, and here's why: butter is essentially 80% fat and 20% water, and that water content is crucial for creating steam that gives our brownies lift while keeping them fudgy. Salted butter throws off the delicate balance of flavors we're building, plus the salt level varies between brands like a game of Russian roulette. I use European-style butter with a higher fat content (like Plugra or Kerrygold) because it creates a more tender crumb and richer flavor. The butter needs to be just melted, not browned or clarified — we're not making cookies here. When you melt it, stop as soon as the last solid piece disappears; overheating butter can cook off the water we need for proper texture.
Brown sugar is our secret weapon for creating that perfect chewy texture and adding depth of flavor that white sugar simply can't deliver. The molasses in brown sugar adds moisture and creates a subtle caramel note that makes people close their eyes and sigh with pleasure. I use dark brown sugar because it has more molasses, which means more flavor and better moisture retention. The acid in the molasses also helps activate the baking soda, creating a better rise and more tender texture. Don't even think about substituting all white sugar unless you want bland, disappointing brownies that taste like every other mediocre recipe out there.
The Unexpected Game-Changer
Espresso powder might seem like an odd addition to Christmas brownies, but trust me on this one — it doesn't make them taste like coffee. Instead, it amplifies the chocolate flavor in ways that will make you question everything you thought you knew about baking. Just 1/2 teaspoon of instant espresso powder can make chocolate taste more chocolatey, like turning up the volume on your favorite song. It's the difference between good brownies and brownies that make people stop mid-conversation to process what they're tasting. I keep a jar specifically for chocolate baking, and it's become my not-so-secret weapon for creating desserts that taste professionally developed.
Corn syrup might raise some eyebrows, but before you write it off as unnatural, hear me out. A tablespoon of light corn syrup prevents sugar crystallization, keeping our brownies soft and fudgy for days instead of turning them into sweet bricks overnight. It creates a more stable structure that stays tender even when refrigerated, which is crucial for make-ahead holiday prep. If you're morally opposed to corn syrup, honey works too, but it will add a floral note that changes the flavor profile. The corn syrup is undetectable in the final product but makes a world of difference in texture and shelf life.
The Festive Finishers
Peppermint extract is where we start tasting like Christmas, but we're using it with a gentle hand — too much and your brownies taste like toothpaste. Just 1/4 teaspoon creates a subtle cooling sensation that makes the chocolate taste brighter and more interesting. It's like adding a whisper of winter to each bite, a reminder that these aren't just any brownies — they're holiday brownies. The key is using pure peppermint extract, not imitation, because the artificial stuff tastes like those red and white candies that have been sitting in grandma's purse since 1987. I add it to the frosting rather than the brownie base, so the mint stays bright and doesn't get muddled by the chocolate.
Christmas sprinkles aren't just decorative — they add tiny pops of sweetness and crunch that create textural interest in every bite. I'm picky about my sprinkles because some taste like wax and ruin the whole experience. Look for ones made with real sugar and natural colors, or go for the classic red and green nonpareils that dissolve slightly into the frosting. The key is adding them right after frosting while it's still tacky, so they adhere properly without bleeding colors into the white frosting. Pro tip: mix different sizes and shapes for visual depth that looks professionally styled.
The Method — Step by Step
- Preheat your oven to 325°F (not 350°F — we're going low and slow here for maximum fudginess). Line a 9x13-inch baking pan with parchment paper, leaving overhang on the sides to create handles for easy removal. This isn't just for convenience — the parchment prevents the edges from overcooking and gives you perfect corners that look bakery-professional. While the oven heats, place your butter in a medium saucepan over low heat. We want it just melted, not bubbling or browned, so keep a close eye and remove from heat as soon as the last solid piece disappears. Let it cool for 5 minutes because adding it too hot to the sugar can scramble the eggs and create a texture disaster.
- In a large bowl, whisk together the granulated sugar, brown sugar, and vanilla extract until combined. The sugars should feel slightly moist from the brown sugar's molasses content — this is good! Add the slightly cooled melted butter and whisk vigorously for a full minute. You're not just mixing here; you're dissolving some of the sugar which creates that gorgeous crackly top we all dream about. The mixture should look like wet sand and smell like caramel. If you've got arm muscles, now's their time to shine — really put some elbow grease into this step because it affects the final texture more than you'd think.
- Crack in the eggs one at a time, whisking well after each addition. This isn't a race — add the first egg and whisk until it's fully incorporated and the batter looks smooth and glossy before adding the next. The batter should thicken and become more luxurious with each egg. When all four eggs are in, whisk for another 30 seconds to create some structure. The batter should ribbon off the whisk and sit on top of itself for a few seconds before disappearing back into the mixture. This is called the "ribbon stage" and it's your visual cue that you've got enough air incorporated for perfect texture.
- In a separate bowl, sift together the flour, cocoa powder, salt, and espresso powder. Yes, you need to sift — cocoa powder is notorious for clumping, and biting into a bitter cocoa pocket ruins the experience faster than coal in your stocking. The espresso powder should disappear into the cocoa, creating a dark, fragrant mixture that smells like a chocolate factory. Add the dry ingredients to the wet in three additions, folding gently with a spatula after each addition. Overmixing develops gluten and creates tough, cakey brownies — we're going for tender and fudgy, so mix just until you see no more dry streaks. The batter will be thick and glossy, like chocolate mousse that's been hitting the gym.
- Fold in the chocolate chips with your spatula, distributing them evenly throughout the batter. They should stay suspended rather than sinking to the bottom — if they sink, your batter is too thin and you need to add a tablespoon more flour. Pour the batter into your prepared pan and spread it evenly with an offset spatula. The batter will be thick and reluctant, so take your time getting it into the corners. Drop the pan from about 3 inches above the counter twice — this releases air bubbles that can create holes in your brownies. The top should look smooth and slightly shiny, like a chocolate lake at sunset.
- Bake for 28-32 minutes, but start checking at 25. The edges should look set and slightly pulled away from the pan, while the center should still jiggle slightly when you gently shake the pan. A toothpick inserted 2 inches from the edge should come out with a few moist crumbs — not wet batter, but not completely clean either. This is crucial: the brownies will continue cooking from residual heat, so pull them when they look slightly underdone. Overbaking is the enemy of fudgy brownies, and once you cross that line, there's no going back. Let them cool completely in the pan on a wire rack — this takes about 2 hours, so plan accordingly.
- While the brownies cool, make the frosting. Beat the cream cheese and butter together until completely smooth and fluffy — this takes about 3 minutes with a hand mixer on medium speed. Don't rush this step; properly creamed butter and cream cheese create the stable base for our frosting. Add the powdered sugar in three additions, beating on low speed after each addition to avoid a sugar snowstorm in your kitchen. Once all the sugar is incorporated, add the heavy cream, vanilla extract, and peppermint extract. Beat on high speed for 2 minutes until the frosting is light and airy, like chocolate clouds that taste like Christmas.
- Spread the frosting over the completely cooled brownies, creating swoops and swirls with an offset spatula for that professional bakery look. The frosting should be about 1/4-inch thick — enough to make an impact but not so much that it overwhelms the brownie base. Immediately sprinkle with Christmas sprinkles while the frosting is still tacky, pressing them in gently so they adhere properly. For extra flair, pipe some additional frosting in a contrasting pattern or add some edible gold stars. Chill for 30 minutes to set the frosting before cutting into squares. Use the parchment overhang to lift the entire slab onto a cutting board for the cleanest cuts.
- Cut into 24 squares for normal portions or 12 larger pieces for serious chocolate lovers. The brownies should cut cleanly without crumbling, revealing that perfect fudgy interior with glossy frosting on top. Store in an airtight container in the refrigerator for up to 5 days — if they last that long. Bring to room temperature for 30 minutes before serving for the best texture and flavor, though they're surprisingly good cold too. The flavors actually meld and improve after the first day, making these perfect for holiday prep. Serve on a festive platter and watch them disappear faster than cookies by the fireplace on Christmas Eve.
That's it — you did it. But hold on, I've got a few more tricks that'll take this to another level...
Insider Tricks for Flawless Results
The Temperature Rule Nobody Follows
Here's the thing that separates amateur bakers from the pros — temperature control throughout the entire process. Your eggs and cream cheese should be at room temperature before you start, but not warm. Cold cream cheese creates lumpy frosting that looks like cottage cheese had a bad day, while warm cream cheese makes frosting that's too loose and slides off your brownies like they're greased. Take them out of the fridge 2 hours before baking, not 30 minutes. I set a timer because I've made this mistake too many times, and there's no fixing lumpy cream cheese frosting without starting over. The same goes for eggs — cold eggs don't incorporate properly and can leave you with streaky batter that bakes unevenly.
Why Your Nose Knows Best
Trust your sense of smell more than the timer when baking these brownies. When they're about 3 minutes from perfect, your kitchen will fill with the most incredible chocolate aroma that's rich and slightly nutty. If you smell sharp or bitter notes, you've probably overbaked them. I learned this from a pastry chef who swore she could tell doneness by scent alone, and after years of testing, I can confirm it works. The smell should make you want to dive face-first into the oven — if it doesn't, check your brownies immediately. This is especially important if your oven runs hot or cold, because timing varies but aroma is consistent.
The 5-Minute Rest That Changes Everything
After you melt the butter, let it rest for exactly 5 minutes before adding it to the sugar. This prevents the hot butter from cooking the eggs when you add them later, but it's still warm enough to help dissolve the sugar for that perfect crackly top. I set a timer because I'm impatient and have jumped the gun too many times, ending up with scrambled egg bits in my brownie batter. The butter should feel warm to the touch but not hot — like a comfortable bath, not a scalding one. This simple pause makes the difference between amateur and professional results, and once you try it, you'll never skip it again.
The Pan-Prep Secret
Don't just grease your pan — create a parchment paper sling that overhangs on all sides. This isn't about being fancy; it's about getting your brownies out intact and achieving those perfect corners that make people think you bought them from a bakery. Spray the pan lightly with cooking spray first, then press in the parchment — the spray helps it stick and stay put while you spread the batter. Leave 2 inches of overhang on the long sides to create handles for lifting the entire slab out after cooling. This simple step prevents the heartbreak of brownies that stick or break when you try to remove them, and it makes cutting much easier since you can lift the whole thing onto a cutting board.
Storage That Actually Works
Here's what nobody tells you about storing frosted brownies — the frosting can dry out and form a crust that ruins the whole experience. The solution? Place a piece of plastic wrap directly on the surface of the frosting before covering with a lid. Yes, it ruins the pretty top, but it keeps the frosting soft and creamy for days. When you're ready to serve, just peel off the plastic and re-smooth the top with an offset spatula. If you need them to look perfect for serving, frost them the day you plan to serve them, but this storage trick means you can bake the brownies days ahead and still have that fresh-frosted texture when it's time to impress your guests.
Creative Twists and Variations
This recipe is a playground. Here are some of my favorite ways to switch things up:
Peppermint Bark Brownies
Replace the chocolate chips with white chocolate chips and crushed candy canes. The white chocolate adds creamy sweetness that plays beautifully against the dark chocolate base, while the candy canes melt slightly during baking to create pockets of peppermint throughout. Top with white chocolate ganache instead of cream cheese frosting, then sprinkle with more crushed candy canes for a peppermint bark effect that tastes like your favorite holiday candy but better. These disappear faster than snowflakes on a hot tongue at holiday parties.
Orange-Cranberry Christmas Edition
Add the zest of one orange to the brownie batter and fold in dried cranberries instead of chocolate chips. The orange oil adds a bright, citrusy note that makes the chocolate taste more complex, while the cranberries provide tart little bursts that keep things interesting. Replace the peppermint extract in the frosting with orange extract, and swap the Christmas sprinkles for candied orange peel. The result tastes like Christmas morning in a chocolate factory, with flavors that dance between rich and refreshing.
Hot Cocoa Brownies
Add a packet of instant hot cocoa mix to your dry ingredients and replace the espresso powder with it. This creates brownies that taste exactly like drinking a cup of hot chocolate, complete with that nostalgic flavor that takes you back to childhood. Top with marshmallow fluff instead of frosting, then torch it lightly with a kitchen torch for that campfire effect. The marshmallow gets all toasty and caramelized, creating a s'mores-meets-hot-cocoa experience that'll have everyone asking for your secret.
Salted Caramel Swirl
Drizzle homemade or store-bought caramel sauce over the brownie batter before baking, then use a toothpick to create swirls. Sprinkle with flaky sea salt right after they come out of the oven. The salt enhances the chocolate flavor and creates an addictive sweet-salty thing that makes it impossible to stop at one. Use the original cream cheese frosting but add a tablespoon of caramel sauce to it for a subtle caramel flavor that ties everything together. These are dangerously good — like, hide-them-from-yourself good.
Gingerbread Spice Brownies
Add 2 teaspoons of gingerbread spice mix to your dry ingredients and replace the vanilla with molasses for brownies that taste like gingerbread and chocolate had a beautiful baby. The molasses adds depth and creates that classic gingerbread flavor while keeping the brownies moist for days. Top with cream cheese frosting mixed with a touch of maple syrup, and sprinkle with crystallized ginger pieces. These taste like Christmas morning feels — warm, spicy, and utterly comforting.
White Christmas Brownies
Use white chocolate instead of dark in both the brownies and frosting, then add coconut extract instead of peppermint. The result is brownies that look like a winter wonderland with their pale, creamy appearance. Top with coconut flakes that you've toasted to golden perfection for texture and visual appeal. These are perfect for people who don't love dark chocolate but still want something indulgent for the holidays. They're like eating a cloud that tastes like Christmas at the beach — unexpected but absolutely magical.
Storing and Bringing It Back to Life
Fridge Storage
These frosted beauties will keep in the refrigerator for up to 5 days, but they need proper protection from the dry air that can turn your perfect frosting into a disappointing crust. Store them in an airtight container with a tight-fitting lid, placing wax paper between layers if you need to stack them. The cold temperature actually improves the flavor as the chocolate and peppermint meld together, creating a more complex taste profile. However, cold brownies are firmer, so let them sit at room temperature for 30 minutes before serving for the best texture. If you're storing them longer than 3 days, add a small piece of bread to the container — it will absorb excess moisture and keep your brownies fresh longer.
Freezer Friendly
Here's where this recipe really shines — these brownies freeze beautifully for up to 3 months, making them perfect for holiday prep. Cut them into squares first, then place them on a baking sheet and freeze until solid (about 2 hours). Once frozen, wrap each brownie individually in plastic wrap, then place them in a freezer bag with the air pressed out. This prevents freezer burn and lets you thaw exactly as many as you need. Thaw overnight in the refrigerator, then bring to room temperature for 30 minutes before serving. The frosting might weep slightly as it thaws, but a quick re-whip with a spatula will bring it back to life. I've served these to guests after freezing and they couldn't tell the difference from fresh.
Best Reheating Method
While these are delicious cold, sometimes you want that fresh-from-the-oven experience. The key is gentle reheating that warms them through without melting the frosting into a puddle. Place individual brownies on a microwave-safe plate and microwave for 8-10 seconds on 50% power — just enough to take the chill off without making them hot. Alternatively, place them in a 250°F oven for 5-7 minutes, watching carefully to prevent the frosting from sliding off. The goal is barely warm, not hot, because too much heat will separate the frosting and create an oily mess. For an extra special touch, place a warm brownie on a plate with a scoop of vanilla ice cream — the contrast between warm brownie and cold ice cream creates a dessert experience that rivals any restaurant.