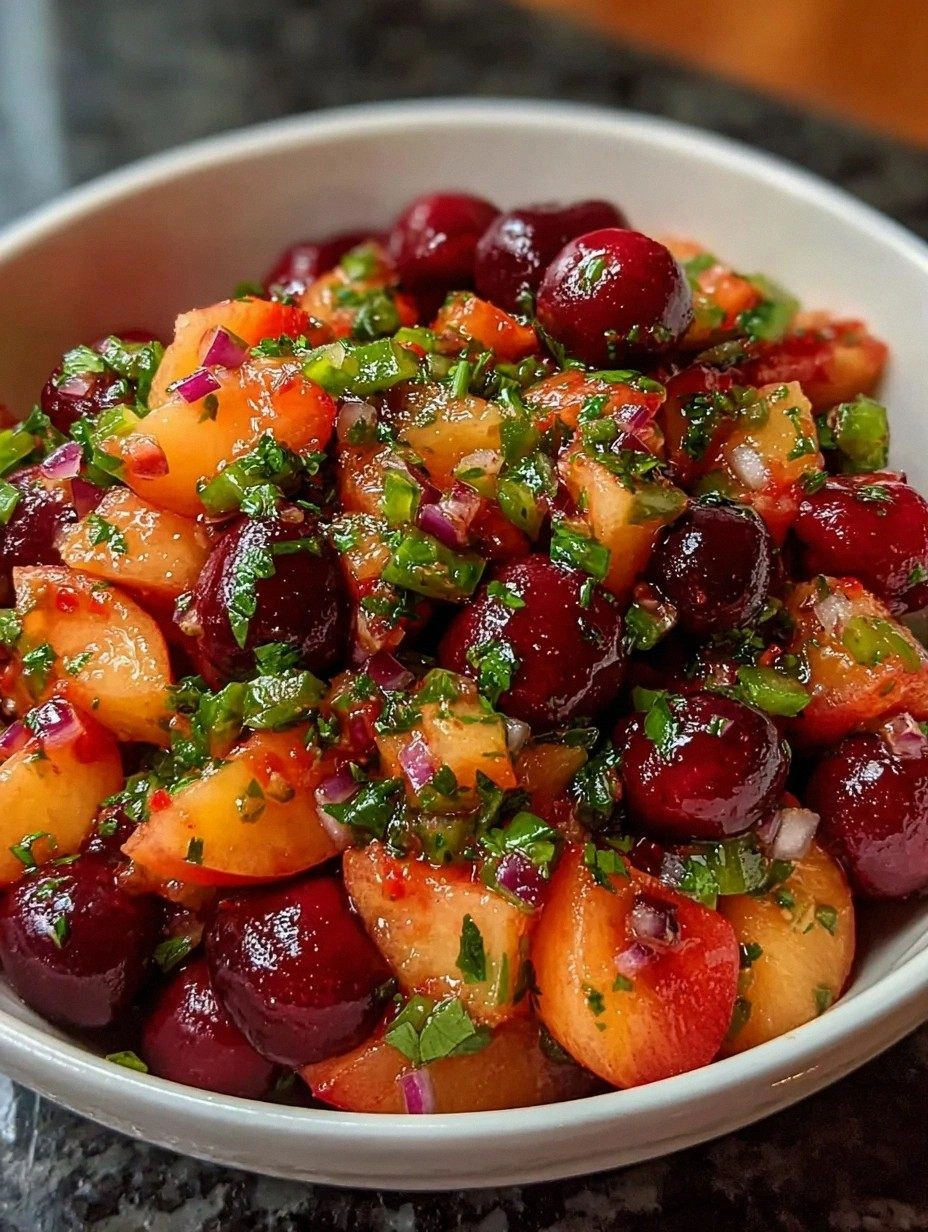
I was halfway through a marathon Netflix binge when my roommate shouted, “Hey, you ever try making garlic butter rolls that actually make you forget about pizza?” I laughed, but the idea stuck like a stubborn piece of dough on the counter. The next morning, armed with a half‑empty butter tub and a garlic clove that smelled like a promise, I set out to prove that a simple roll could out‑shine any fancy bakery croissant. The kitchen filled with a buttery perfume that reminded me of Sunday mornings at my grandma’s house, while the oven’s hum became the soundtrack to a culinary experiment that would soon become my go‑to party weapon. I’ll be honest — I ate half the batch before anyone else got a chance to try it, and that’s a confession I’m not ashamed to make.
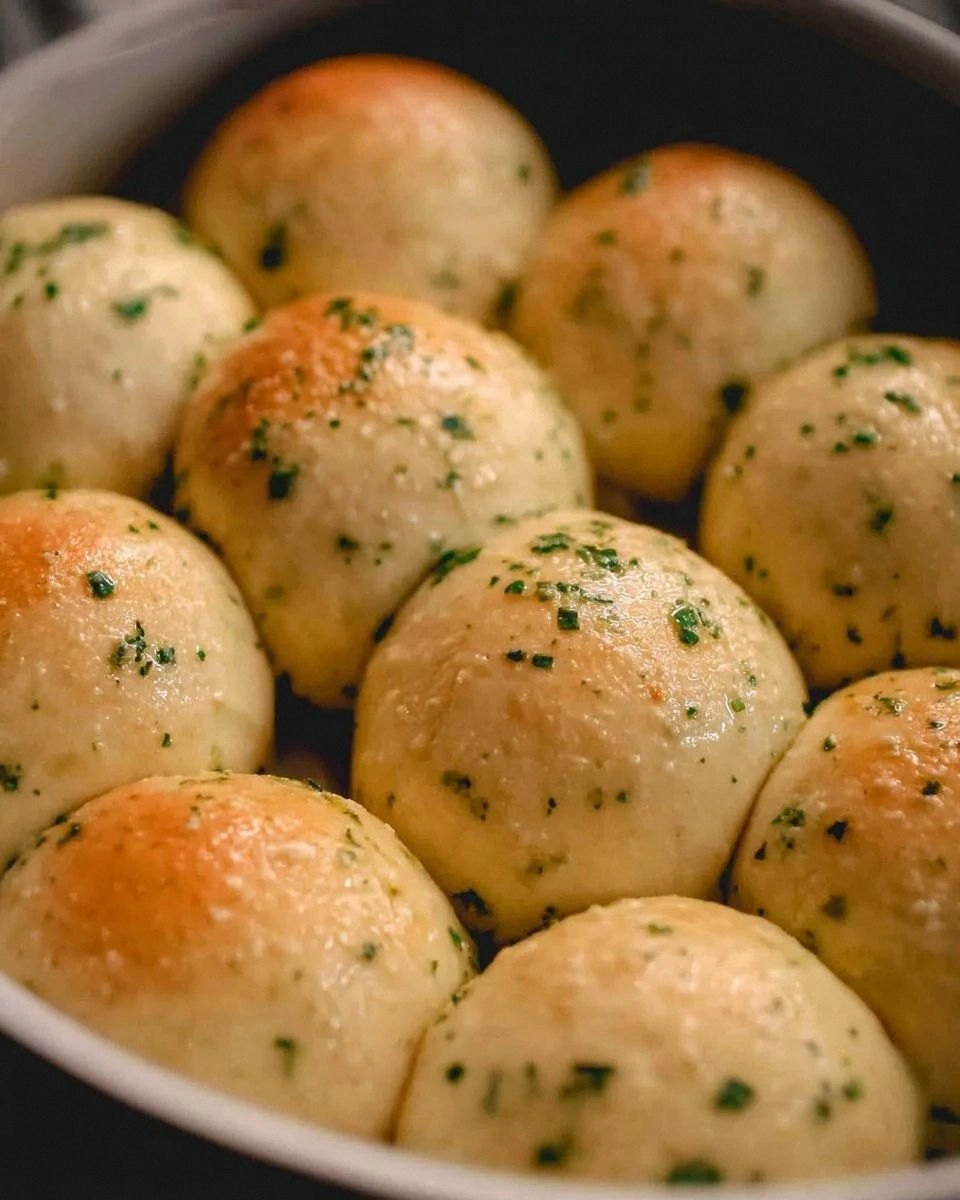
Picture this: a golden‑brown crown of crust that cracks open with a satisfying snap, revealing a pillowy interior that’s soft enough to melt in your mouth but sturdy enough to hold a generous swirl of garlic‑infused butter. The first bite delivers a buttery richness that hugs your palate like a warm blanket, while the garlic punches through with a gentle, aromatic kick that makes your taste buds do a happy dance. If you’ve ever struggled with soggy, flavorless rolls, you’re not alone — I’ve been there, battling dough that never rises and butter that never seeps in. This version flips the script by using a quick‑rise technique and a secret butter‑brush ritual that locks in moisture and flavor, ensuring every roll is a bite‑size masterpiece.
Most recipes get this completely wrong. They either drown the dough in butter, turning it greasy, or they skim on the garlic, leaving you with a bland bite that feels like a missed opportunity. Here’s what actually works: a balanced ratio of flour to liquid, a gentle fold‑in of melted butter that stays in the dough rather than pooling, and a final brush of garlic butter that creates a caramelized crust without sogginess. I dare you to taste this and not go back for seconds; the combination is so addictive you’ll wonder how you ever survived without it. The secret ingredient? A pinch of patience and a dash of confidence that the dough will rise like a champion.
Okay, ready for the game‑changer? The technique I’m about to share is pure magic. We’ll start with a classic yeasted dough, but I’ll introduce a “double‑rise” method that gives the rolls an airy crumb and a buttery crust that crackles like thin ice under a summer sun. I’ll also reveal a quick hack for garlic butter that ensures every nook and cranny of the roll is coated with flavor. Stay with me here — this is worth it. Let me walk you through every single step — by the end, you’ll wonder how you ever made it any other way.
What Makes This Version Stand Out
- Taste: The garlic butter glaze creates a flavor explosion that’s both aromatic and savory, turning a humble roll into a crowd‑pleasing star.
- Texture: A crisp, golden exterior gives way to a fluffy, cloud‑like interior that stretches like warm taffy.
- Simplicity: Only eight ingredients, no fancy equipment, and a straightforward two‑rise method that even beginners can master.
- Uniqueness: The final butter brush is infused with minced garlic and parsley, delivering a fresh herbaceous note that most recipes miss.
- Crowd Reaction: Guests often ask for the recipe before the first bite is even finished — a true testament to its addictive quality.
- Ingredient Quality: Using high‑quality unsalted butter and fresh garlic makes a world of difference in flavor depth.
- Cooking Method: The double‑rise technique ensures maximum lift without over‑proofing, giving you that perfect airy crumb.
- Make‑Ahead Potential: You can freeze the unbaked rolls and bake them straight from the freezer, making party prep a breeze.
Alright, let's break down exactly what goes into this masterpiece...
Inside the Ingredient List
The Flavor Base
All‑purpose flour is the backbone of any good roll, providing structure and the ability to trap gas bubbles from the yeast. I always reach for a brand that’s labeled “unbleached” because it has a slightly higher protein content, which translates to a better gluten network. If you skip the flour or substitute it with a low‑protein alternative, you’ll end up with a dense, rubbery roll that feels more like a chew toy than a treat. For a gluten‑free twist, try a blend of rice flour, tapioca starch, and xanthan gum, but expect a different texture.
The Sweet & Yeasty Boost
Sugar isn’t just for sweetness; it feeds the yeast, accelerating fermentation and giving the dough a tender crumb. A modest two tablespoons is enough to coax the yeast without making the rolls taste like dessert. Instant yeast, the kind that skips the proofing step, is my go‑to because it dissolves quickly and provides a reliable rise. If you only have active dry yeast, just double the proofing time and you’ll still get a beautiful puff.
The Texture Crew
Salt is the unsung hero that strengthens gluten and balances the flavor. A single teaspoon may seem trivial, but without it, the rolls would taste flat and the gluten would be weak, leading to a crumb that collapses. Warm water (110°F/45°C) is crucial; too hot and it kills the yeast, too cold and the yeast stays dormant. I love using a kitchen thermometer to nail the temperature, because consistency is the secret sauce of great baking.
The Unexpected Star
Melted unsalted butter is folded into the dough, creating a tender, rich crumb that’s impossible to achieve with oil alone. The butter also coats the flour particles, slowing gluten formation just enough to keep the interior soft. Garlic, minced finely, infuses the butter with a pungent aroma that becomes the signature flavor of these rolls. If you’re not a garlic fan, try roasted red pepper puree for a sweet, smoky twist. Fresh parsley adds a bright, herbaceous finish; it’s optional but highly recommended for that pop of color and freshness.
Everything's prepped? Good. Let's get into the real action...
The Method — Step by Step
In a small bowl, combine the warm water, sugar, and instant yeast. Stir gently, then let the mixture sit for 5‑7 minutes until it becomes frothy and smells like a sweet perfume. This is the moment of truth — if you don’t see bubbles, your water might be too hot or the yeast is dead, and you’ll need to start over.
Kitchen Hack: Use a microwave for 10‑15 seconds to warm the water if you’re in a rush; just be sure it’s not boiling.In a large mixing bowl, whisk together the flour and salt. Make a well in the center and pour in the melted butter followed by the foamy yeast mixture. Using a wooden spoon, stir until a shaggy dough forms, then turn it onto a lightly floured surface.
Knead the dough for about 8‑10 minutes, or until it becomes smooth, elastic, and slightly tacky. This is where the gluten network develops, giving you that coveted airy crumb. If the dough feels too sticky, dust with a little extra flour; if it feels dry, add a splash of water.
Watch Out: Over‑kneading can make the rolls tough; stop once the dough springs back when you press it lightly.Form the dough into a ball, place it in a lightly oiled bowl, cover with a damp towel, and let it rise in a warm spot for 45‑60 minutes, or until doubled in size. The kitchen should feel like a gentle sauna; if it’s too cold, pre‑heat your oven to 100°F, turn it off, and let the dough rise inside.
While the dough is rising, melt the remaining butter in a small saucepan over low heat. Add the minced garlic and sauté for 30 seconds until fragrant, then stir in the chopped parsley if you’re using it. This garlic butter will be brushed onto the rolls later, creating that glossy, caramelized finish.
Punch down the risen dough to release excess gas, then turn it out onto a floured surface. Divide the dough into 12 equal pieces (about the size of a golf ball) and shape each piece into a smooth roll by tucking the edges underneath.
Kitchen Hack: Use a bench scraper to portion the dough evenly; it saves time and ensures uniform size.Place the shaped rolls on a parchment‑lined baking sheet, leaving a little space between each. Cover loosely with plastic wrap and let them proof for a second rise of about 20‑30 minutes. They should puff up and look slightly domed; if they don’t, the dough may be over‑proofed, and you’ll need to bake them sooner.
Watch Out: Over‑proofing can cause the rolls to collapse in the oven, turning them flat and dense.Preheat your oven to 375°F (190°C). Just before sliding the tray in, brush each roll generously with the garlic‑butter mixture, making sure to coat the tops and sides. The butter will melt into the crust, creating that irresistible glossy sheen.
Bake for 15‑20 minutes, or until the rolls are a deep golden‑brown and sound hollow when tapped on the bottom. That sizzle when the butter hits the hot crust? Absolute perfection. Remove from the oven and, if you like extra garlic punch, brush them once more with any remaining butter.
That's it — you did it. But hold on, I've got a few more tricks that'll take this to another level. Trust me, these final touches will make your garlic butter rolls the talk of any gathering, and you’ll never settle for store‑bought again.
Insider Tricks for Flawless Results
The Temperature Rule Nobody Follows
Never underestimate the power of a consistent dough temperature. Aim for a dough temperature of around 78°F (26°C) after mixing; this is the sweet spot where yeast works efficiently without over‑producing gas. If your kitchen is chilly, give the dough a warm, humid environment by placing it in a turned‑off oven with a pan of hot water. I once tried to speed up the rise by cranking the oven to 200°F, and the rolls ended up with a gummy crumb — lesson learned.
Why Your Nose Knows Best
During the first rise, keep an eye (and a nose) on the dough. When it’s doubled, you’ll notice a faint, yeasty aroma that’s both sweet and slightly tangy. If the scent is weak, the dough needs more time; if it’s overly sour, you’re approaching over‑proofing. Trusting your senses beats any timer, and it’s the secret sauce that seasoned bakers swear by.
The 5‑Minute Rest That Changes Everything
After shaping the rolls, let them rest uncovered for five minutes before the final proof. This short pause lets the gluten relax, making it easier for the rolls to expand evenly in the oven. A friend once skipped this step and ended up with rolls that cracked on the top, looking like broken pottery — not pretty.
Butter‑Brush Timing
Brush the garlic butter onto the rolls just before they enter the oven, and then again five minutes into baking. The first brush creates a flavorful base, while the second adds a glossy, caramelized finish that makes the crust crackle delightfully. If you wait until after baking, the butter will slide off; if you brush too early, it can burn.
Steam Power for a Perfect Crust
Place a shallow pan of hot water on the lower rack of the oven during the first ten minutes of baking. The steam keeps the crust supple, allowing it to expand fully before setting, resulting in a glossy, crackly exterior. I tried baking without steam once and the rolls turned out flat and pale — a missed opportunity for crunch.
Creative Twists and Variations
This recipe is a playground. Here are some of my favorite ways to switch things up:
Cheesy Parmesan Pull‑Apart
Mix ½ cup grated Parmesan into the butter before brushing, and sprinkle a little extra on top before baking. The cheese melts into the crust, creating salty pockets that burst with flavor. Perfect for cheese lovers who want that extra umami kick.
Spicy Chili‑Garlic
Add a pinch of red pepper flakes to the garlic butter for a subtle heat that wakes up the palate. If you’re daring, stir in a teaspoon of sriracha for a bold, tangy twist that pairs beautifully with the buttery base.
Herb‑Infused Delight
Swap parsley for fresh rosemary or thyme, and add a drizzle of olive oil to the butter. The aromatic herbs give the rolls a Mediterranean flair that’s perfect for serving alongside grilled meats.
Sweet Cinnamon‑Sugar
For a breakfast‑friendly version, brush the rolls with melted butter mixed with 2 tablespoons of brown sugar and a teaspoon of cinnamon. The rolls become a sweet treat that pairs wonderfully with coffee or tea.
Whole‑Wheat Health Boost
Replace half of the all‑purpose flour with whole‑wheat flour for a nuttier flavor and added fiber. The texture becomes a bit denser, but the garlic butter still shines through, making it a wholesome snack.
Storing and Bringing It Back to Life
Fridge Storage
Place cooled rolls in an airtight container or zip‑top bag and store them in the refrigerator for up to three days. To revive, preheat the oven to 350°F and warm for 5‑7 minutes, letting the crust re‑crisp.
Freezer Friendly
Freeze unbaked rolls on a baking sheet, then transfer to a freezer‑safe bag. They’ll keep for up to two months. When you’re ready, bake directly from frozen at 375°F, adding an extra 5‑7 minutes to the bake time.
Best Reheating Method
Add a tiny splash of water to the rolls before reheating; the steam restores the interior’s softness while the butter revives the crisp crust. For a quick microwave fix, wrap a roll in a damp paper towel and heat for 20 seconds, then finish under a hot broiler for a few seconds to restore crunch.