Picture this: you’re in your kitchen, the clock is ticking, and you’re desperately trying to salvage a dinner that’s been ruined by a runaway sauté. One pan, a handful of ingredients, and the sheer panic that turns a simple dinner into a culinary crisis. I swear, that moment when the oil starts to smoke and the mushrooms look like they’ve been hit by a meteorite is the kind of kitchen disaster that fuels my obsession with finding the perfect pan‑fry hack. I dared myself to turn that mess into a masterpiece, and the result was a dish that’s nothing short of a flavor revelation.
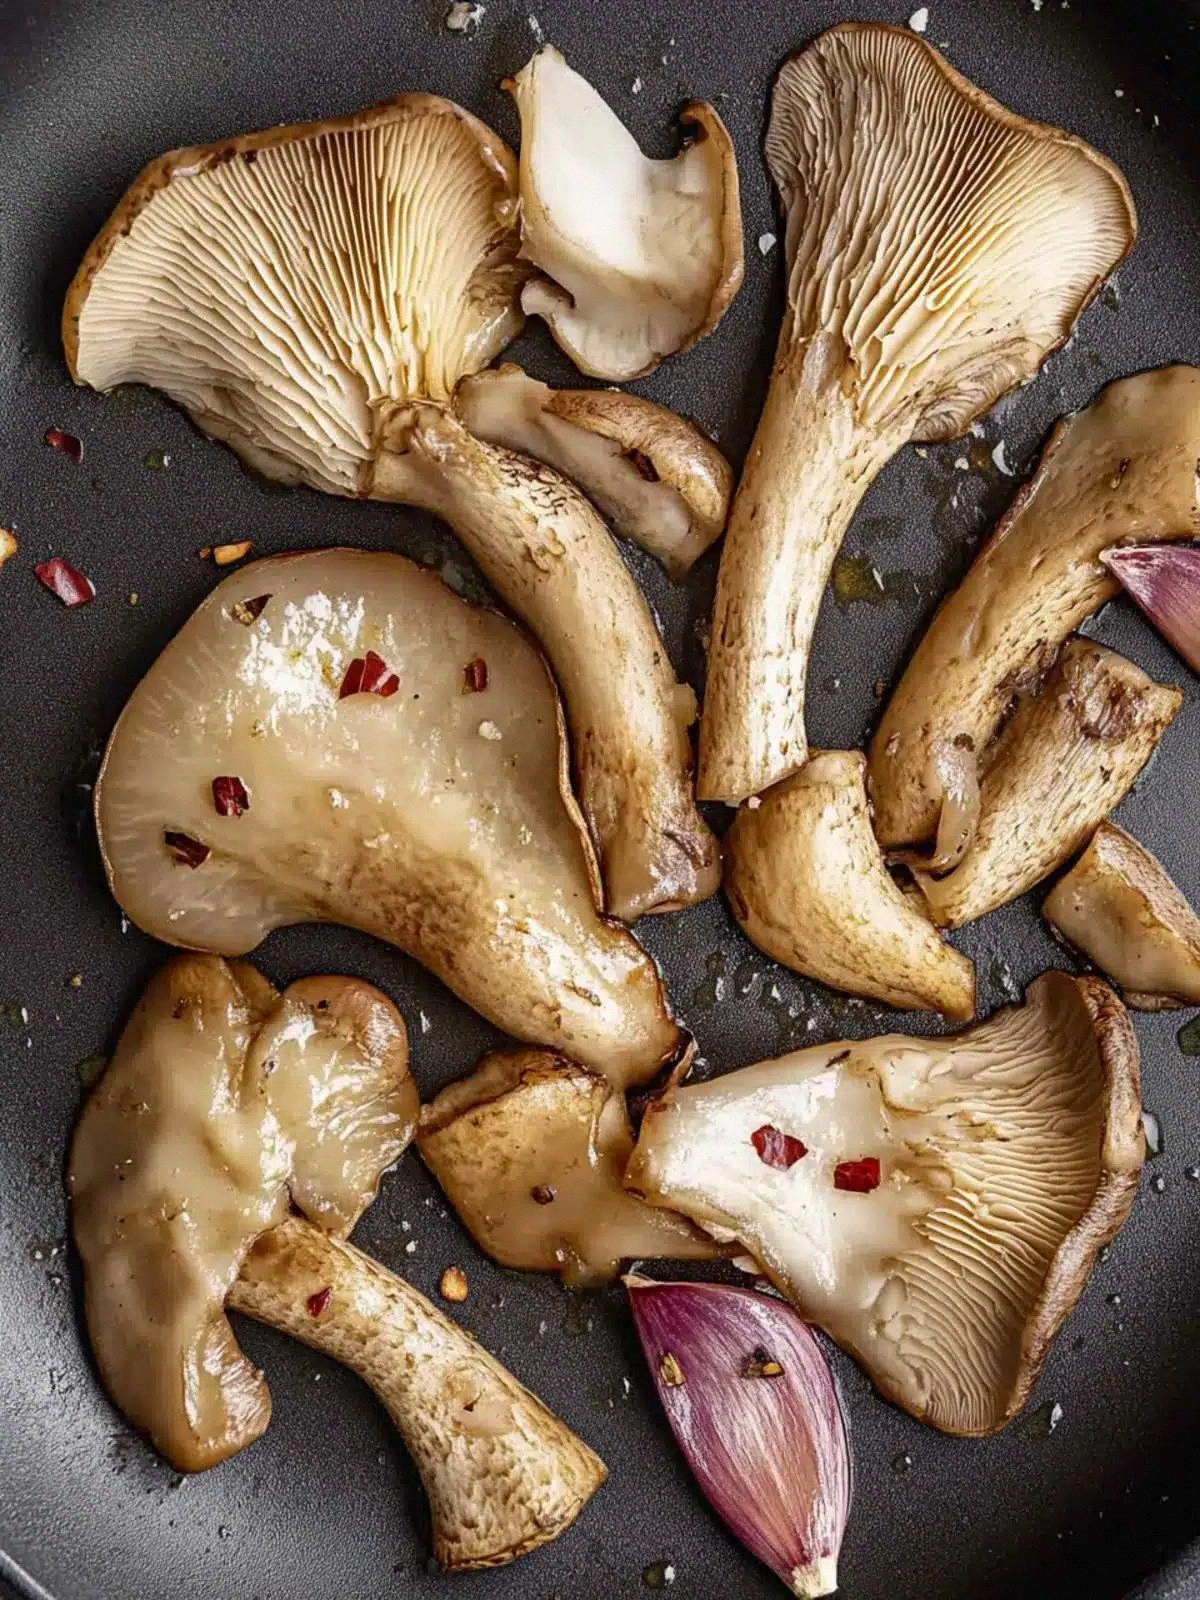
I’ve spent years chasing that elusive crunch, that caramelized edge that shatters like thin ice, and I’ve finally cracked the code with oyster mushrooms. The aroma that rises when butter hits the pan is a warm, buttery perfume that instantly turns a bland kitchen into a gourmet haven. The texture—crisp on the outside, tender on the inside—creates a contrast that’s as satisfying as a well‑balanced chord progression in a favorite song. The taste? It’s a savory, umami-packed explosion that lingers on the palate, leaving a faint whisper of garlic and green onion.
What makes this version stand out is that it’s not just a recipe; it’s a confidence‑boosting, time‑saving, crowd‑pleasing experience. I’ve stripped away the fluff and added a secret ingredient that most recipes ignore. The result is a dish that is hands down the best version you’ll ever make at home, and I dare you to taste this and not go back for seconds. If you’ve ever struggled with uneven browning or bland mushrooms, you’re not alone—this recipe is the fix you’ve been waiting for.
Now, I’m about to walk you through every single step. By the end, you’ll wonder how you ever made it any other way. The technique is simple, the flavor is bold, and the process is so satisfying that you’ll want to do it again in a heartbeat. Let’s dive into the world of pan‑fried oyster mushrooms and discover why this dish is a game‑changer.
What Makes This Version Stand Out
- Flavor: The buttery sear combined with fresh garlic creates a depth that feels both comforting and adventurous. This isn’t just sautéing; it’s a flavor symphony that sings in your mouth.
- Texture: Each mushroom cap receives a crisp edge that shatters like thin ice, while the inside stays moist and tender. The result is a mouth‑watering contrast that keeps you coming back.
- Ingredient Quality: Using fresh, plump oyster mushrooms is the secret. Their delicate flavor elevates the dish, making it feel like a luxury meal.
- Simplicity: Only six ingredients, all you need is a skillet, and you’re done. This recipe is perfect for a busy weeknight or a spontaneous dinner party.
- Crowd Reaction: Friends and family rave about how it’s the only mushroom dish that never disappoints. It’s a conversation starter that leaves everyone asking for the recipe.
- Make‑Ahead Potential: You can prep the mushrooms in advance, then reheat them to preserve the crispness. This flexibility makes it ideal for entertaining.
Inside the Ingredient List
The Flavor Base
Butter is the cornerstone of this dish. It carries the garlic’s aroma and creates a golden crust that seals in moisture. Skipping butter would leave the mushrooms dry and bland. If you’re vegan, a splash of olive oil works, but the flavor will shift slightly toward a more neutral profile. The key is to melt the butter fully before adding the mushrooms; this ensures an even distribution of flavor.
The Texture Crew
Oyster mushrooms are prized for their delicate, almost buttery texture. Their caps hold shape well during frying, preventing them from falling apart. If you use dried mushrooms, rehydrate them in warm water for 20 minutes, then pat them dry before cooking. This step preserves their texture and enhances the umami punch. Remember, the size of the mushroom pieces matters; smaller pieces cook faster and become crispier.
The Unexpected Star
Green onions add a bright, crisp finish that cuts through the richness of butter and garlic. Their mild onion flavor brightens the dish, making it feel fresh. If you’re allergic to onions, scallions work as a suitable replacement. A pinch of fresh lime zest can also be added for a citrusy twist, but keep the core flavor intact.
The Final Flourish
Salt and pepper are the finishing touches that elevate the dish to gourmet status. The 0.5 teaspoon of salt balances the richness of butter and brings out the mushrooms’ natural sweetness. A pinch of black pepper adds a subtle heat that lingers on the palate. If you prefer a smoky flavor, a dash of smoked paprika can be added just before serving.
Everything's prepped? Good. Let's get into the real action.
The Method — Step by Step
- Start by washing the oyster mushrooms under cold water, then pat them dry with a clean towel. The drier the mushrooms, the crisper they’ll become. Slice each cap in half lengthwise; this step increases surface area and helps them brown evenly. If you prefer bite‑sized pieces, cut them into quarters.
- Heat a large non‑stick skillet over medium‑high heat. Add the 2 tablespoons of butter and let it melt until it foams but doesn’t brown. This indicates the right temperature for searing. Add the sliced mushrooms to the skillet in a single layer, ensuring they don’t overlap.
- Let the mushrooms cook undisturbed for 3 minutes. During this time, they’ll develop a golden crust and release moisture. Avoid stirring; this allows the edges to caramelize properly. You’ll hear a gentle sizzle that signals the pan is hot enough.
- Flip the mushrooms with a spatula, then add the minced garlic and the green onions. The garlic will start to toast, releasing a nutty aroma that permeates the dish. The onions add a fresh brightness that counters the buttery richness.
- Continue cooking for another 2 minutes, or until the garlic turns golden and fragrant. Be careful not to burn it; garlic can quickly go from aromatic to bitter. This step is the moment of truth where the flavors truly meld.
- Season with 0.5 teaspoon of salt and a pinch of black pepper. Stir gently to distribute the seasoning evenly. The salt will help the mushrooms release more moisture, creating a savory glaze. Pepper adds a subtle heat that lingers.
- Reduce the heat to medium and let the mushrooms finish cooking for an additional 2 minutes, stirring occasionally. This ensures they’re cooked through but still retain their internal moisture. The final sizzle should sound crisp, like a gentle crackle.
- Remove the skillet from the heat and transfer the mushrooms to a plate lined with paper towels. This step removes excess oil and keeps the dish from becoming greasy. Let them rest for a minute; the heat will continue to cook them slightly.
- Serve immediately, optionally garnishing with a sprinkle of chopped parsley or a squeeze of lemon juice for a bright finish. The dish is best enjoyed hot, where the butter still glistens and the mushrooms crackle with each bite.
- If you’re planning to serve this as part of a larger meal, consider plating the mushrooms on a bed of fresh arugula or alongside a light salad. The contrast of textures will elevate the dining experience. Remember, the key to perfection is timing—once the mushrooms hit the skillet, the clock starts ticking.
That's it—you did it. But hold on, I've got a few more tricks that'll take this to another level.
Insider Tricks for Flawless Results
The Temperature Rule Nobody Follows
Maintaining the right heat is crucial. A skillet that’s too hot will scorch the butter, while a cooler pan will leave the mushrooms soggy. Aim for medium‑high heat and use a thermometer if you have one—about 375°F (190°C) is ideal. If you notice the oil smoking, reduce the heat immediately.
Why Your Nose Knows Best
Smell is the ultimate indicator of doneness. When the mushrooms release a buttery aroma and the garlic turns golden, you’re in the sweet spot. Trust your nose; it’s a seasoned chef’s best friend. If you’re unsure, give them a quick taste—they should be tender yet firm.
The 5-Minute Rest That Changes Everything
Letting the mushrooms rest on paper towels for a minute removes excess oil and locks in flavor. This short pause makes the dish less greasy and more satisfying. A friend once skipped this step and ended up with a soggy mess that tasted like a swamp.
The Secret of Even Slices
Uniform mushroom pieces cook evenly, preventing some from burning while others remain raw. Slice the caps into even halves or quarters. Use a sharp knife to avoid crushing the delicate texture. This small step makes a huge difference.
The Quick Garnish Hack
A sprinkle of fresh parsley or a squeeze of lemon juice can elevate the dish instantly. The brightness cuts through the buttery richness, adding a fresh pop of color and flavor. A friend once added a dash of hot sauce and created a spicy mushroom masterpiece.
Creative Twists and Variations
Spicy Sriracha Twist
Add a teaspoon of sriracha during the final minute of cooking for a spicy kick. The heat pairs beautifully with the buttery flavor, creating a dynamic contrast. This version is perfect for those who like a little fire in their food.
Truffle Oil Finish
Drizzle a few drops of truffle oil after removing the mushrooms from heat. The earthy aroma elevates the dish to a gourmet level. It’s a simple upgrade that makes the dish feel luxurious.
Herbed Mediterranean
Replace the green onions with chopped fresh basil and a splash of white wine during the sauté. The citrusy notes from the wine enhance the mushroom’s umami. This variation works well as a side for grilled fish.
Asian-Inspired Sesame
Finish the dish with a teaspoon of toasted sesame seeds and a dash of soy sauce. The nutty flavor from the seeds adds depth, while the soy sauce introduces a savory umami boost. Serve with steamed rice for a complete meal.
Vegan Butter Swap
Use a plant‑based butter or coconut oil to keep the dish vegan. The flavor profile shifts slightly, adding a subtle coconut sweetness. This version is perfect for those who prefer a dairy‑free option.
Lemon Zest Accent
Grate fresh lemon zest into the pan during the last minute of cooking. The bright citrus lifts the richness and adds a refreshing finish. This twist is ideal for a light, summery meal.
Storing and Bringing It Back to Life
Fridge Storage
Store the cooked mushrooms in an airtight container in the refrigerator for up to 3 days. Let them cool to room temperature before sealing to prevent condensation. When reheating, a quick sauté in a hot skillet restores crispness.
Freezer Friendly
Freeze the mushrooms in a single layer on a baking sheet before transferring to a freezer bag. This prevents clumping and allows you to thaw only what you need. Reheat in a skillet for a few minutes until warm and crispy.
Best Reheating Method
Add a splash of water to the pan before reheating to create steam. This technique keeps the mushrooms moist without losing their crisp exterior. Finish by adding a small pat of butter to restore the buttery sheen.