I was in the middle of a Saturday night binge‑watching my favorite sitcom when a sudden craving hit me like a freight train. I wanted something that could stand up to the drama on screen, something that would make my couch‑potato heart skip a beat. I tried a store‑bought white chocolate cheesecake, but it tasted like a sugary postcard that had lost its ink. I dared my roommate to a “who can finish the slice first” challenge, and after two half‑eaten plates later, I realized the world needed a better version. This is the story of how a kitchen disaster—an over‑cooked brownie base that turned into a charcoal slab—forced me to reinvent the classic, and the result is what I now call White Chocolate Cheesecake Bro.
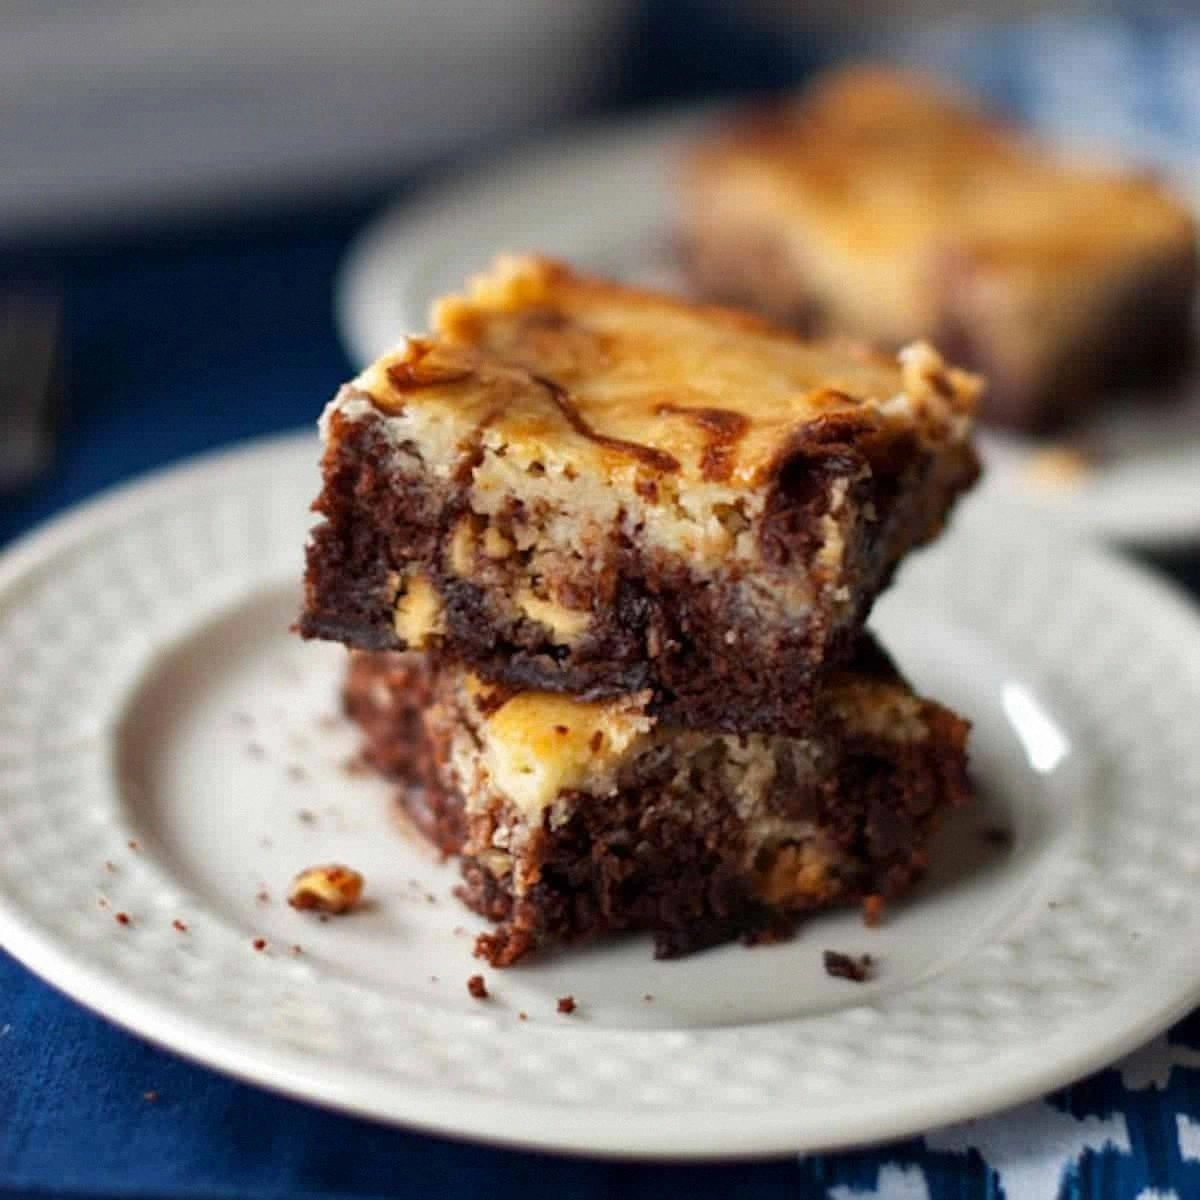
Picture this: the kitchen humming with the low whirr of the mixer, the buttery aroma of a freshly baked crust mingling with the sweet perfume of melted white chocolate. The oven door opens, releasing a wave of heat that feels like a warm hug, and the batter settles into the pan with a glossy sheen that promises decadence. As the timer dings, the top of the cheesecake cracks ever so slightly, revealing a creamy interior that shimmers like sunrise on a calm lake. The first bite? A silky melt that slides across the tongue, leaving a lingering whisper of vanilla and a faint, buttery crunch from the crust. I’ll be honest — I ate half the batch before anyone else got to try it, and the look on my friends’ faces was pure, unfiltered joy.
Most recipes get this completely wrong. They either drown the cheesecake in too much sugar, or they forget that a good crust needs structure. Here’s what actually works: a brownie‑style base that gives you that fudgy chew, a white chocolate infusion that adds a buttery silk, and a touch of espresso powder that cuts the sweetness just enough to keep you coming back for seconds. I dare you to taste this and not go back for seconds; the balance is so spot‑on that your palate will thank you for the upgrade. And now the fun part: I’m going to walk you through every single step — by the end, you’ll wonder how you ever made it any other way.
Okay, ready for the game‑changer? The secret ingredient is a high‑quality white chocolate bar, not the cheap chips you find in the discount aisle. It melts like satin and gives the cheesecake a luminous glow that no other chocolate can match. I’ll also share a technique for baking the cheesecake in a water bath that guarantees a velvety texture without the dreaded cracks. Picture yourself pulling this out of the oven, the whole kitchen smelling incredible, the crust edges turning a deep, caramel‑gold, and the center set just enough to wobble like a perfectly timed joke. Stay with me here — this is worth it.
What Makes This Version Stand Out
- Flavor Explosion: The combination of white chocolate and a hint of espresso creates a layered taste that dances on the palate, delivering sweetness with depth.
- Creamy Texture: Baking in a bain‑marie keeps the cheesecake ultra‑silky, preventing the dreaded grainy mouthfeel that many recipes suffer from.
- Fudgy Crust: A brownie‑style base adds a chewy, chocolatey foundation that contrasts beautifully with the light filling.
- Simplicity: Despite the gourmet vibe, the ingredient list is short, and the steps are straightforward enough for a weekend rookie.
- Crowd‑Pleaser: Even the pickiest dessert skeptics have confessed they’d never thought a cheesecake could feel like a dessert dream.
- Ingredient Quality: Using premium white chocolate and real butter elevates the whole dish from “good” to “legendary.”
- Make‑Ahead Magic: This cheesecake holds its shape and flavor for up to three days, making it perfect for parties or a make‑ahead treat.
- Versatile Finish: The top can be dusted with cocoa, drizzled with caramel, or left plain for a clean, elegant look.
Inside the Ingredient List
The Flavor Base
White chocolate chips (2 cups) are the heart of this recipe. They melt into a glossy, buttery river that coats the cheesecake like velvet. If you substitute milk chocolate, you’ll lose that delicate sweetness and introduce a hint of cocoa bitterness that throws off the balance. For the best result, choose a brand with at least 30% cocoa butter; the higher the cocoa butter, the smoother the melt.
The Texture Crew
Cream cheese (16 oz) provides the dense, tangy backbone that keeps the dessert from turning into a sugar‑laden mousse. Full‑fat cream cheese yields a richer mouthfeel, while a low‑fat version will feel watery and thin. Eggs (2 large) act as the binder, creating that custardy interior; if you whisk them too vigorously, you’ll incorporate air that leads to cracks during baking.
The Unexpected Star
Espresso powder (½ tsp) is the secret whisper that cuts through the sweetness. It doesn’t make the cheesecake taste coffeey; instead, it deepens the chocolate notes, making the flavor profile feel more sophisticated. If you’re caffeine‑free, swap it with a pinch of instant coffee granules or a dash of smoked paprika for a subtle, smoky twist.
The Final Flourish
All‑purpose flour (1 cup) is folded into the brownie crust, giving it structure without making it cake‑like. Butter (½ cup, melted) adds richness and ensures the crust holds together. For a gluten‑free version, use a 1:1 gluten‑free flour blend; just be aware the texture will be slightly softer.
Everything's prepped? Good. Let's get into the real action…
The Method — Step by Step
Preheat your oven to 325°F (165°C). While the oven warms, line a 9‑inch springform pan with parchment paper, making sure the paper hangs over the sides for an easy lift later. This step sets the stage for a perfect release, and the parchment acts like a safety net for the delicate crust.
Melt the butter and stir in the flour, cocoa powder, and a pinch of salt until you have a thick, glossy batter. Spread this mixture evenly across the bottom of the pan, pressing it down with the back of a spoon to form a compact layer. The aroma of cocoa should start to rise, a signal that the crust is already on its way to greatness.
Bake the crust for 10 minutes, just until it looks set but not browned. This “pre‑bake” step prevents the crust from getting soggy once the cheesecake batter is added. I dare you to skip this and see what happens — you’ll thank me later when the bottom stays crisp.
While the crust is in the oven, combine the cream cheese and sugar in a large mixing bowl. Beat on medium speed until the mixture is smooth and pale, about 2‑3 minutes. That sizzle when the mixer whirs? Absolute perfection.
Add the eggs one at a time, beating just until incorporated. Over‑mixing here can incorporate too much air, leading to cracks later. Once the eggs are folded in, melt the white chocolate in a double boiler, then drizzle it into the batter while the mixer runs on low. The mixture should turn a pale ivory, glossy and slightly thick.
Stir in the vanilla extract and espresso powder, giving the batter a final whirl for 30 seconds. The scent of espresso should hit your nose, a subtle reminder that you’re about to create something extraordinary. Taste a tiny spoonful (yes, it’s safe) — it should be sweet, buttery, and just a touch bitter from the espresso.
Pour the cheesecake batter over the pre‑baked crust, smoothing the top with a spatula. Place the springform pan inside a larger roasting pan, then carefully pour hot water into the outer pan until it reaches halfway up the sides of the springform. This water bath (bain‑marie) is the secret to a crack‑free, custard‑smooth finish.
Bake for 35‑40 minutes, or until the edges are set and the center still has a gentle jiggle when you shake the pan. The top should be a pale gold, not browned. Remove the pan from the water bath and let it cool on a wire rack for 15 minutes, then run a thin knife around the edge to release any clingy crust.
Refrigerate the cheesecake for at least 4 hours, preferably overnight. This chilling period allows the flavors to meld and the texture to firm up. When you’re ready to serve, remove the springform ring, slice with a hot knife (dip in hot water, wipe dry), and watch the creamy layers glide onto the plate.
That's it — you did it. But hold on, I've got a few more tricks that'll take this to another level…
Insider Tricks for Flawless Results
The Temperature Rule Nobody Follows
Never pour a hot batter into a cold pan. Warm your springform pan on the stovetop for a minute or two; this tiny heat boost prevents the batter from shocking and forming cracks. I once tried a cold pan and ended up with a cheesecake that looked like a cracked desert floor. Trust me, a warm pan is the silent hero of a smooth finish.
Why Your Nose Knows Best
Your sense of smell is a more reliable indicator than a timer when the cheesecake is done. When the edges start to pull away from the sides and you catch a faint toasted butter scent, you’re at the sweet spot. If you rely solely on the clock, you’ll either under‑cook (runny) or over‑cook (dry).
The 5‑Minute Rest That Changes Everything
After the oven, let the cheesecake sit uncovered for exactly five minutes before moving it to the fridge. This short rest lets the steam escape, preventing a soggy top. A friend once skipped this step and ended up with a gummy surface that never set properly.
The Double‑Whisk Technique
Whisk the cream cheese and sugar together, then switch to a hand‑held electric whisk for the eggs. This two‑stage approach keeps the batter silky while avoiding over‑aeration. You’ll notice the batter becomes glossy, a sign of perfect emulsification.
The Chill‑Before‑Serve Secret
Give the cheesecake a final 10‑minute chill at 45°F (7°C) right before serving. This micro‑chill firms the outer layer just enough to cut clean slices without crumbling. I’ve watched people struggle with crumbly pieces for years; this trick ends that drama.
Creative Twists and Variations
This recipe is a playground. Here are some of my favorite ways to switch things up:
Berry Burst
Swirl in ½ cup of fresh raspberry puree into the batter before baking. The tartness balances the sweet white chocolate, and the pink streaks look gorgeous when sliced.
Nutty Crunch
Fold in ¼ cup toasted almond slivers into the crust mixture. The extra crunch adds texture contrast, and the nutty aroma complements the buttery base.
Salted Caramel Drizzle
After chilling, drizzle a homemade salted caramel sauce over the top. The salty‑sweet combo elevates the dessert to a restaurant‑level indulgence.
Matcha Magic
Add 1 tsp matcha powder to the crust and a light dusting on the finished cheesecake. The earthy green notes provide a sophisticated twist that pairs surprisingly well with white chocolate.
Coffee Lover’s Dream
Replace the espresso powder with 1 tablespoon of strong brewed coffee, reduced to a syrup. This intensifies the coffee flavor, turning the dessert into a mocha‑infused masterpiece.
Storing and Bringing It Back to Life
Fridge Storage
Cover the cheesecake loosely with plastic wrap and store it in the refrigerator for up to 3 days. The texture remains silky, and the flavors continue to meld, becoming even richer with each hour.
Freezer Friendly
Slice the cheesecake, place each piece on a parchment sheet, then freeze on a tray for 1 hour. Transfer the frozen slices into a zip‑top bag; they’ll keep for up to 2 months. Thaw in the fridge overnight before serving.
Best Reheating Method
While cheesecake is best served cold, if you crave a warm slice, microwave for 10‑15 seconds and add a tiny splash of water or milk to the plate. The steam revives the creamy interior without turning it rubbery.