The first time I tried this recipe, my kitchen smelled like a tropical rainforest—coconut oil, peanut butter, and chocolate mingled in a fragrant haze that could convince a skeptic of the existence of heaven. The sound of the chocolate melting was a soft hiss, a whisper of promise that the final product would be silky smooth. My taste buds tingled even before the first bite, and I swear the texture was like a velvety cloud with a nutty crunch. If you’re looking for a dessert that feels indulgent yet stays plant‑powered, you’re in the right place.
I dare you to taste this and not go back for seconds. The first lick of the chocolate‑peanut butter swirl will make you question why you ever settled for ordinary. The combination of sweet maple, earthy cacao nibs, and the subtle salt lift creates a flavor profile that is both complex and comforting. The moment the cup hits your tongue, you’ll feel the richness of the peanut butter coating the chocolate like velvet, and the crunch of roasted peanuts will shatter like thin ice.
Most recipes get this completely wrong by overmixing or using the wrong type of chocolate. The secret is in the quality of the dark vegan chocolate chips, which give depth without bitterness. The coconut oil keeps the mixture silky and helps the peanut butter spread evenly. The maple syrup adds a natural sweetness that balances the salt and chocolate, while the vanilla extract pulls everything together with aromatic warmth.
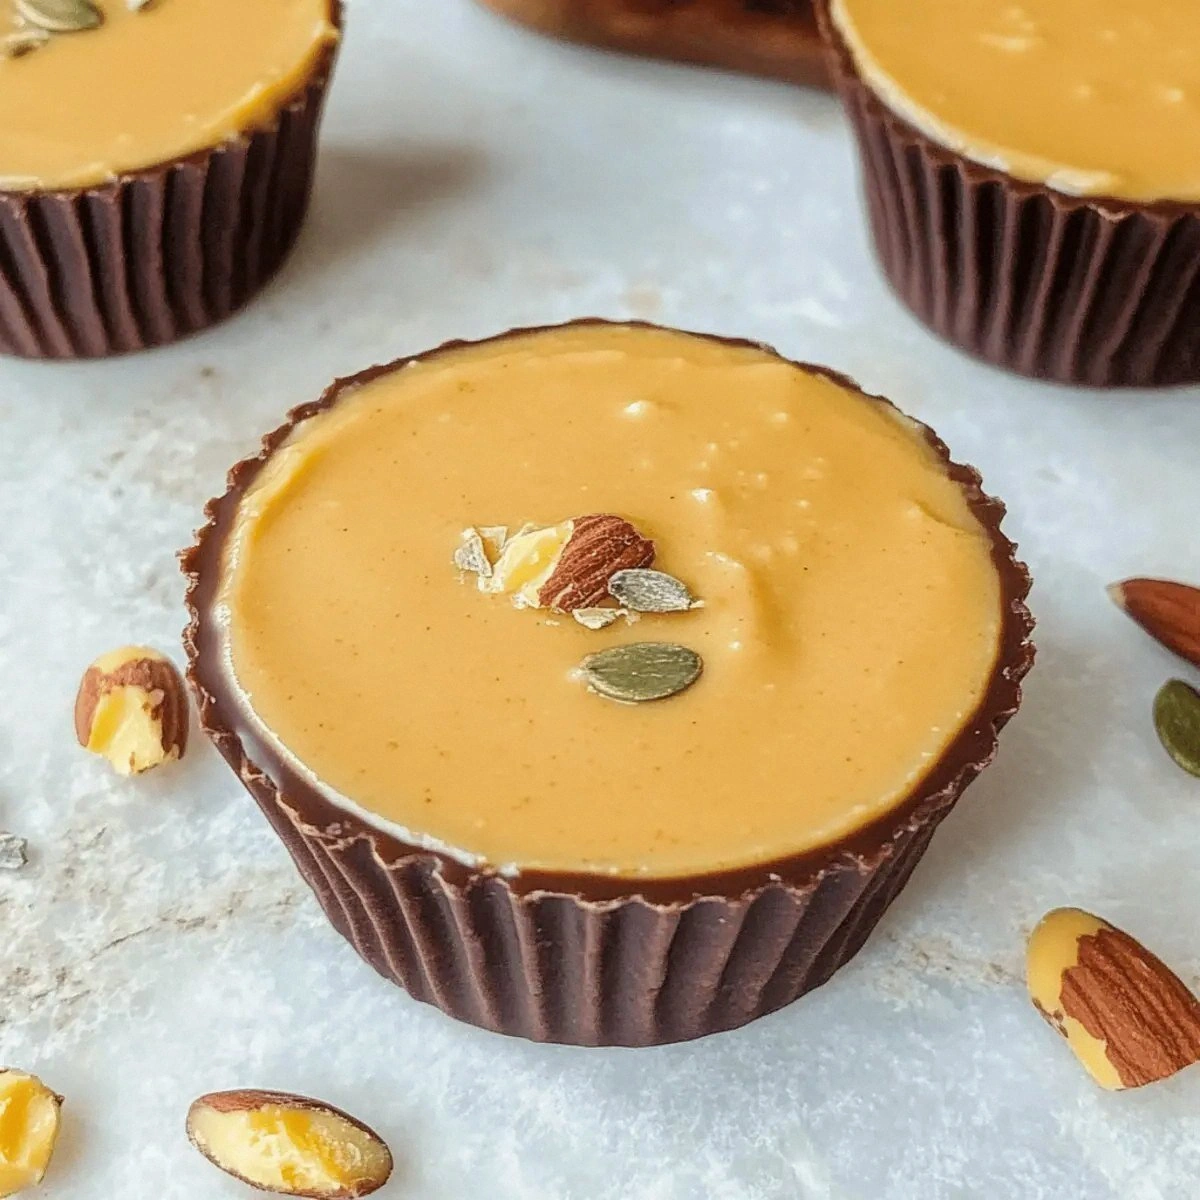
This is hands down the best version you'll ever make at home. The final result is a chocolate cup that feels luxurious, yet is 100% plant‑based. The glossy finish on top is a visual cue that you’re about to indulge in something extraordinary. Picture yourself pulling this out of the refrigerator, the whole kitchen smelling incredible, and watching the chocolate glimmer like liquid gold.
What Makes This Version Stand Out
Texture: The chocolate melts into a silky base that coats the peanut butter like a smooth coat of paint, creating a melt‑in‑your‑mouth sensation that’s hard to resist.
Flavor Depth: Dark chocolate chips provide a robust, slightly bitter foundation that is counterbalanced by sweet maple syrup and subtle vanilla notes.
Crunch Factor: Chopped roasted peanuts add a satisfying crunch that contrasts beautifully with the creamy interior.
Ingredient Quality: Using high‑quality vegan chocolate and natural peanut butter ensures a richer taste and better mouthfeel.
Ease of Preparation: The recipe requires no baking or advanced techniques—just a few simple steps that anyone can follow.
Make‑Ahead Potential: These cups can be prepared in advance and stored in the fridge, making them perfect for parties or a quick snack.
Alright, let's break down exactly what goes into this masterpiece...
Inside the Ingredient List
The Flavor Base
Dark vegan chocolate chips: These are the heart of the recipe, providing a deep, bittersweet undertone that anchors the sweetness of maple syrup and the richness of peanut butter. If you skip this step, the cups lose their chocolatey depth and feel flat. For a different flavor, try using semi‑sweet chocolate chips for a slightly sweeter profile.
Maple syrup: A natural sweetener that brings a subtle, caramel-like warmth without overpowering the chocolate. If you prefer a less sweet version, reduce the amount to one tablespoon. The syrup also helps bind the mixture, creating a smoother texture.
The Texture Crew
Coconut oil: This oil keeps the mixture silky and helps the chocolate melt evenly, preventing clumps. Using coconut oil also adds a faint tropical aroma that enhances the overall sensory experience. If you’re allergic to coconut, a neutral oil like grapeseed works well.
Natural peanut butter: The star of the show, it adds a creamy, nutty base that balances the chocolate’s bitterness. A creamy, unsweetened variety works best; chunky peanut butter can give a more rustic feel but may alter the smoothness. If you’re looking for a lower‑fat option, try a light peanut butter, but the texture will change.
The Unexpected Star
Sea salt: Just a pinch lifts the flavors and adds a subtle brine that cuts through the sweetness. Too much salt will overpower the chocolate; too little will leave the cups bland. You can also try smoked sea salt for a smoky undertone.
Cacao nibs: They provide a crunchy texture and an extra burst of chocolate flavor. If you’re a chocolate aficionado, adding a handful of cacao nibs will elevate the cups. For a smoother finish, simply omit them.
The Final Flourish
Chopped roasted peanuts: These add crunch and a nutty aroma that complements the peanut butter. Roasting them yourself can bring out a deeper flavor, but pre‑roasted peanuts are convenient. If you’re allergic to peanuts, substitute with sunflower seeds for a similar crunch.
Everything's prepped? Good. Let's get into the real action...
The Method — Step by Step
- Start by placing the dark chocolate chips in a heat‑proof bowl and melt them over a pot of simmering water, stirring until the mixture is glossy and free of lumps. Keep the heat low; you don’t want the chocolate to scorch. This step ensures a smooth base that will carry the peanut butter without clumping.
- Add the coconut oil to the melted chocolate and stir until fully incorporated. The oil should melt into the chocolate, creating a silky consistency. This is the moment of truth—if the mixture is too thick, a splash of non‑dairy milk can help.
- Stir in the natural peanut butter, maple syrup, and vanilla extract, mixing until the mixture is even and glossy. The peanut butter should be fully blended, not streaked. If you’re watching your sugar intake, you can reduce the maple syrup to one tablespoon.
- Add a pinch of sea salt, mixing until the salt is evenly distributed. The salt lifts the flavors and balances the sweetness. Too much salt will overpower the chocolate; too little will leave the cups bland.
- Fold in the cacao nibs, ensuring they’re evenly distributed throughout the mixture. The nibs add a crunchy texture and a burst of chocolate flavor. If you prefer a smoother finish, simply omit them.
- Pour the mixture into a silicone muffin tin, filling each cup about three‑quarters full. The cups should be level and smooth. This step is crucial for an even finish when you chill the cups.
- Place the muffin tin in the refrigerator for 20 minutes, or until the cups are firm but still slightly pliable. The chill helps the flavors meld and the texture firm up for a satisfying bite.
- Sprinkle chopped roasted peanuts on top of each cup, pressing lightly to secure them. The peanuts add a delightful crunch and a nutty aroma that complements the peanut butter. Let the cups rest in the fridge for another 10 minutes to set fully.
- Remove the cups from the refrigerator and let them sit at room temperature for 5 minutes before serving. This brief rest allows the chocolate to soften just enough for a smooth bite. If you’re serving them immediately, the cups will be firm and ready to devour.
- Serve chilled or at room temperature, depending on your preference. For a dramatic presentation, arrange them on a platter with a drizzle of melted dark chocolate on top. Enjoy the burst of flavor and texture in every bite.
That's it — you did it. But hold on, I've got a few more tricks that'll take this to another level. The next section will reveal insider tips that will help you perfect the texture and flavor profile even further.
Insider Tricks for Flawless Results
The Temperature Rule Nobody Follows
Chocolate melts best at a steady 86°F (30°C). If your kitchen is cooler, let the chocolate sit at room temperature for a few minutes before melting. This small adjustment ensures a silky texture that won’t separate when you add the peanut butter. I once tried melting it over a hot stove and ended up with a grainy mess.
Why Your Nose Knows Best
Before you pour the mixture into the molds, pause and inhale the aroma. A rich chocolate scent with a hint of coconut and vanilla indicates that the mixture is ready. If it smells flat, give it a minute to settle or add a splash of vanilla extract. Trust your nose; it’s your best flavor sensor.
The 5‑Minute Rest That Changes Everything
After chilling the cups for 20 minutes, let them rest at room temperature for five minutes before serving. This short rest softens the chocolate just enough for a silky bite, preventing a hard bite that feels like chewing on a rock. I swear it’s the difference between “good” and “gorgeous.”
The Quick Chill Trick
If you’re short on time, place the filled molds in a shallow tray of cold water for 10 minutes. This method rapidly cools the cups, preserving their shape and preventing condensation. It’s a lifesaver when you’re hosting a last‑minute gathering.
The Final Coat
For a glossy finish, drizzle melted dark chocolate over the top of each cup after they’ve set. Let it harden for a minute before serving. This adds a layer of decadence and visual appeal that elevates the presentation.
The Peanut Butter Trick
If your peanut butter is too thick, warm it slightly in the microwave before adding it to the chocolate. This ensures a smooth blend and prevents the mixture from becoming lumpy. A quick 10‑second burst does the trick.
These tricks are the secret sauce that turns a good recipe into a masterpiece. Try them out, and you’ll see why I’ve been bragging about this recipe for months.
Creative Twists and Variations
This recipe is a playground. Here are some of my favorite ways to switch things up:
Citrus Burst
Add a tablespoon of orange zest to the mixture for a bright, zesty kick. The citrus pairs wonderfully with the chocolate and peanut butter. It’s a refreshing twist for summer gatherings. The zest adds a subtle aroma that lifts the whole flavor profile.
Spiced Delight
Stir in a pinch of smoked paprika or a dash of cayenne pepper for a subtle heat. The spice balances the sweetness and adds a smoky undertone. It’s perfect for those who love a little kick in their dessert. Just a tiny amount keeps the flavor from overpowering.
Almond Crunch
Swap out the roasted peanuts for toasted almond slivers. The almonds provide a different crunch and a slightly sweet, buttery flavor. They’re also a great alternative for peanut allergy sufferers. The texture remains satisfying while adding a new dimension.
Matcha Magic
Incorporate a tablespoon of matcha powder into the chocolate base. The green tea flavor adds earthiness and a vibrant color. It’s a stylish way to elevate the cups for a special occasion. The matcha also boosts antioxidant content.
Sea Salt Caramel
Add a spoonful of vegan caramel sauce to the mixture for a sweet, buttery layer. The caramel complements the peanut butter and chocolate beautifully. It also adds a glossy sheen to the finished cups. The sea salt will enhance the caramel’s sweetness.
Nut-Free Alternative
Replace peanut butter with sunflower seed butter and use sunflower seeds for the crunch. The nut-free version keeps the same flavor profile while being allergy‑friendly. It’s also a great way to experiment with new textures. The seeds add a subtle nuttiness that’s surprisingly similar.
Experimenting with these variations will keep your taste buds excited and your guests coming back for more. The base recipe is versatile enough to accommodate a wide range of flavors.
Storing and Bringing It Back to Life
Fridge Storage
Store the cups in an airtight container in the refrigerator for up to a week. The cool temperature keeps the chocolate firm and the peanut butter creamy. Make sure the container is sealed to prevent the cups from absorbing other odors. This method ensures freshness and flavor consistency.
Freezer Friendly
For longer storage, place the cups in a freezer‑safe container and freeze for up to two months. Thaw them in the fridge overnight before serving. The texture remains intact, and the chocolate retains its glossy finish. This is perfect for meal prepping or hosting a large event.
Best Reheating Method
When you’re ready to serve, let the cups sit at room temperature for 10 minutes. If they’re still too firm, microwave them on low power for 10 seconds. Add a tiny splash of water before reheating to create steam, which helps the chocolate melt back to perfection. This small trick ensures a silky, indulgent bite.