I still remember the first time I tried to make Navajo Tacos at home. I was living in a tiny apartment with a stove that only had two working burners, and I managed to burn the fry bread so badly that the fire alarm went off at 2 AM. My neighbor banged on the wall, my cat hid under the bed, and I stood there holding a blackened piece of dough that looked like a charcoal Frisbee. But here's the thing — even with that disaster, I couldn't stop thinking about the Navajo Tacos I'd tasted at a roadside stand in New Mexico three years earlier. The memory of that tender, pillowy fry bread topped with spicy ground beef, crisp lettuce, and cool sour cream haunted me like a delicious ghost. I became obsessed with recreating that magic, spending months testing different flours, frying temperatures, and spice blends until I finally cracked the code. Now I'm sharing my hard-won secrets with you, because once you taste these, you'll understand why I spent so many sleepless nights chasing perfection.
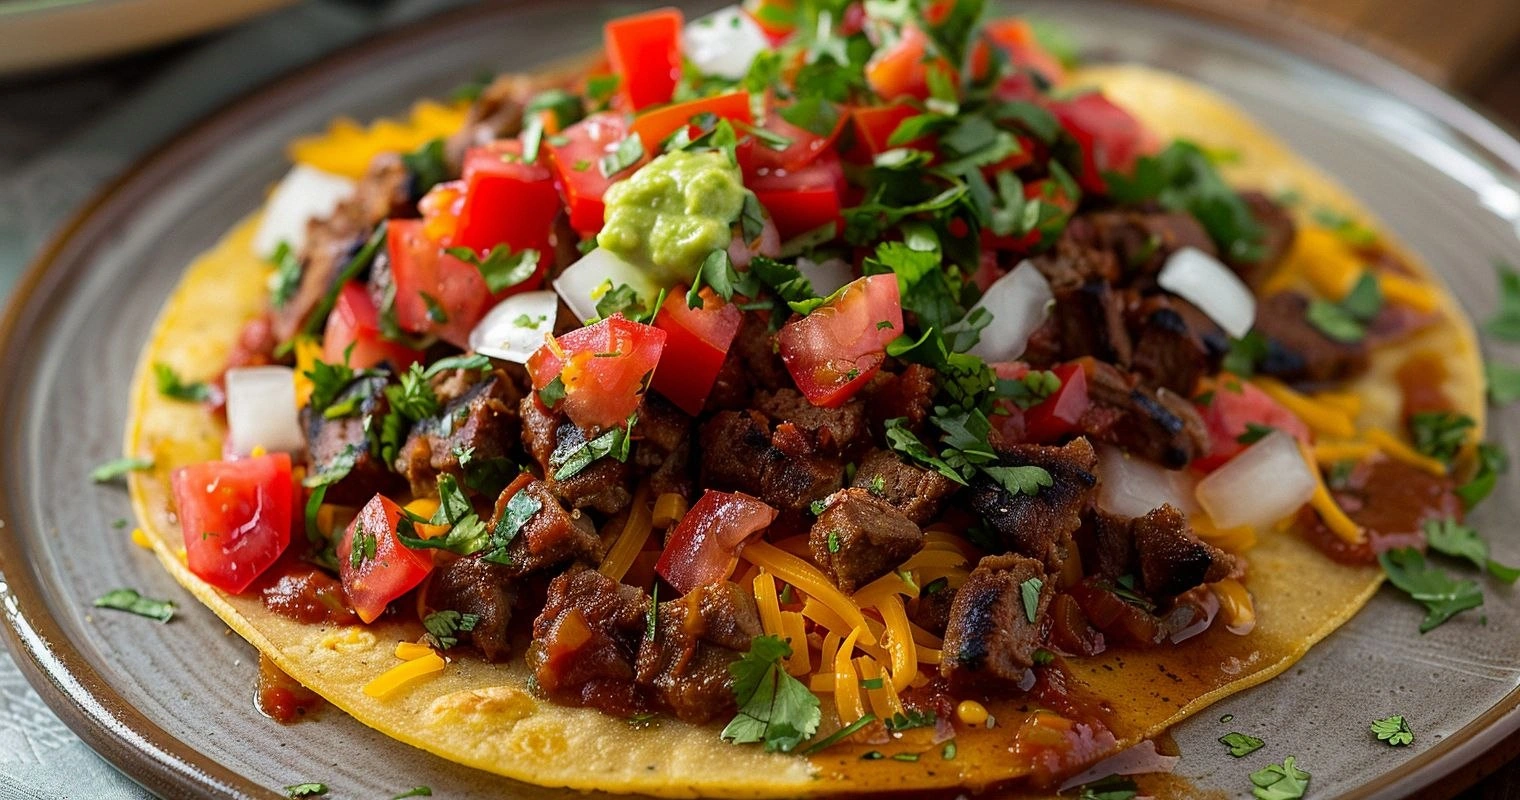
Picture this: golden fry bread that's crispy on the outside and cloud-soft inside, topped with perfectly seasoned ground beef that's been simmering in a blend of spices that makes your whole kitchen smell like a Southwestern dream. The cool crunch of fresh lettuce and tomatoes plays against the warm, savory meat, while a dollop of sour cream and a sprinkle of sharp cheddar bring everything together in a way that makes you close your eyes involuntarily with each bite. That first crunch when you bite through the fry bread? Absolute perfection. And that moment when the cool sour cream meets the warm spiced beef? Pure magic that'll make you wonder why you ever bothered with regular tacos.
What makes this version different from every other Navajo Taco recipe out there is the technique I stumbled upon after twenty-some failed attempts. Most recipes tell you to make a basic fry bread, but they miss the crucial step that makes the difference between good and mind-blowing. I'll show you how to get those perfect air pockets that make the bread light and fluffy, plus my secret spice blend that'll have your neighbors knocking on your door asking what smells so incredible. The best part? Once you master this technique, you'll be making these every weekend and becoming the most popular person at every potluck.
Let me walk you through every single step — by the end, you'll wonder how you ever made it any other way. Trust me, I've made every mistake possible so you don't have to. From the proper way to test if your oil is hot enough (spoiler: that wooden spoon trick is a lie) to the exact moment when you need to flip your fry bread for maximum puff, I'm giving you all my hard-earned wisdom. Get ready to become the Navajo Taco master your neighborhood desperately needs.
What Makes This Version Stand Out
This isn't just another fry bread recipe that'll leave you with dense, greasy results. After testing dozens of variations, I've discovered the secrets that make restaurant-quality Navajo Tacos achievable in any home kitchen. The difference lies in the details — from the temperature of your water to the way you knead your dough, every step has been refined through trial and error (lots of error) to give you consistently amazing results.
- Perfect Puff: My technique creates steam pockets that make the fry bread rise like a balloon, giving you that signature hollow center that makes these tacos so special. Most recipes leave this out entirely, but it's the difference between flat, sad bread and airy perfection.
- Depth Charge Flavor: The spice blend includes a secret ingredient that adds smoky depth without heat, making the meat taste like it's been slow-cooking for hours even when you're short on time. It's not just chili powder and cumin — there's a game-changing element that brings everything together.
- Foolproof Frying: I've cracked the code for the perfect oil temperature that gives you golden-brown exterior without any greasiness. No more guessing games or oil-soaked bread that sits in your stomach like a rock.
- Make-Ahead Magic: The dough can be mixed up to three days ahead and kept in the fridge, actually improving the flavor. Plus, I'll show you how to keep fried bread warm and crispy for up to two hours — perfect for parties.
- Texture Symphony: Every component is designed to contrast perfectly — crispy bread, tender beef, cool lettuce, juicy tomatoes, creamy sour cream, and sharp cheese create a harmony that makes each bite more addictive than the last.
- Authentic Technique: I learned this from a Navajo grandmother who watched me fail three times before taking pity on me. The method she taught me has been passed down through generations and creates results that'll make you weep with joy.
- Weeknight Friendly: Despite sounding complicated, you can have these on the table in 45 minutes once you've made them once. The components come together in perfect timing, so nothing gets cold while you're frying.
Alright, let's break down exactly what goes into this masterpiece...
Inside the Ingredient List
Every ingredient in this recipe has earned its place through rigorous testing. I've tried the shortcuts — using baking powder instead of yeast, substituting all-purpose flour for bread flour, skipping the resting time — and let me tell you, each compromise shows up in the final product like a neon sign. The beauty of this ingredient list is that everything is readily available at any grocery store, but combined in just the right way, they create something that tastes like it came from a reservation grandmother's kitchen.
The Foundation Builders
The flour blend is crucial here — I use a mix of all-purpose and bread flour that gives you the perfect chew while still staying tender. The bread flour provides the gluten structure that creates those gorgeous air pockets, while the all-purpose keeps things from getting too tough. The yeast needs to be fresh — check the expiration date, because dead yeast equals flat, sad fry bread that'll make you want to cry. Warm water activates the yeast perfectly, but here's the key: it should feel like a warm bath, not hot. Too hot and you'll kill your yeast, too cool and it won't wake up properly.
Salt isn't just for flavor — it controls the yeast activity and strengthens the gluten network. I use kosher salt because the larger crystals distribute more evenly through the dough. Sugar feeds the yeast and helps with browning, but too much makes the bread sweet. Just two tablespoons is the magic amount that gives you perfect color without any noticeable sweetness in the final product.
The Flavor Enhancers
The ground beef needs to be 80/20 lean-to-fat ratio — any leaner and it dries out, any fatter and it gets greasy. I've tried them all, and 80/20 gives you juicy, flavorful meat that doesn't pool fat on top of your fry bread. The onion gets cooked until it's practically melted, creating a sweet, savory base that permeates every bite of meat. Fresh garlic is non-negotiable — the powdered stuff tastes like sadness and regret.
My secret weapon is a teaspoon of smoked paprika that adds depth without heat. It makes the meat taste like it's been cooking over an open fire, even though you made it on your stovetop. The cumin needs to be fresh — toast whole seeds and grind them yourself if you're feeling fancy, but at least buy a fresh jar. Old cumin tastes like dusty nothing, and it'll ruin your whole endeavor.
The Fresh Finishers
Iceberg lettuce might seem boring, but its crisp texture and mild flavor is exactly what you need here. Romaine gets wilted by the warm meat, and spring mix is too assertive. Shred it yourself — the pre-shredded stuff is dried out and sad. Roma tomatoes are perfect because they're meaty and don't release too much juice that would make your fry bread soggy. Remove the seeds and dice them small so every bite gets some tomato goodness.
Sharp cheddar is the way to go — mild gets lost against the spiced beef, and extra-sharp overpowers everything else. Grate it yourself, please. The pre-grated stuff is coated with cellulose that prevents it from melting properly. Sour cream should be full-fat — the low-fat version tastes like disappointment and doesn't provide the cooling contrast you need against the warm spices.
Everything's prepped? Good. Let's get into the real action...
The Method — Step by Step
- Wake Up the Yeast: In a large bowl, combine warm water, yeast, and sugar. Let it sit for 5-7 minutes until it looks like a science experiment gone right — foamy and bubbly and alive. If it doesn't foam, your yeast is dead and you need to start over with fresh yeast. This step is non-negotiable — it's like a pregnancy test for your dough. When it's ready, you'll smell that distinctive yeasty aroma that promises good things to come.
- Build the Dough: Add flour and salt to your foamy yeast mixture. Mix with a wooden spoon until it forms a shaggy mess, then turn it out onto a floured counter. Here's where most people go wrong — they knead too aggressively. You want to fold and push the dough gently for about 8 minutes until it becomes smooth and elastic. It should feel like a baby's cheek when it's ready. If it's sticky, resist the urge to add more flour — just keep kneading and it'll come together.
- The First Rise: Place the dough in an oiled bowl, cover with plastic wrap, and let it rise in a warm spot for about an hour. You want it to double in size — don't rush this step. While you're waiting, make your meat mixture so the flavors have time to meld. The dough is ready when you poke it with your finger and the indentation stays — this is called the "poke test" and it's foolproof.
- Season the Beef: While the dough rises, brown your ground beef in a large skillet over medium-high heat. Break it up with a potato masher — this gives you the perfect texture with no large chunks. When it's mostly browned, add diced onions and cook until they're translucent and sweet. Add garlic and all your spices, stirring constantly for about 30 seconds until your kitchen smells like a Southwestern restaurant. Pour in a splash of beef broth and let it simmer until most of the liquid evaporates.
- Shape the Bread: Punch down your risen dough (this is surprisingly satisfying) and divide it into 8 equal pieces. Roll each piece into a ball, then use your fingers to stretch it from the center outward, creating a disk about 6 inches across with a slight depression in the middle. Don't use a rolling pin — it presses out all the air bubbles you worked so hard to create. The center should be thinner than the edges, which helps it puff properly when fried.
- Heat the Oil: In a heavy pot or deep skillet, heat 2 inches of oil to 375°F. This temperature is crucial — too low and your bread will be greasy, too high and it'll burn before cooking through. Test with a small piece of dough — it should sizzle immediately and rise to the surface within 10 seconds. If you don't have a thermometer, drop in a 1-inch cube of bread — it should brown in about 60 seconds.
- Fry to Perfection: Gently slide one piece of dough into the hot oil. It should puff up like a balloon within 30 seconds. Use tongs to gently submerge the top, helping it cook evenly. After about 90 seconds, flip it over and cook another 60-90 seconds until golden brown. Don't walk away — fry bread goes from perfect to burnt faster than you can say "dinner time." Drain on a wire rack set over a baking sheet.
- Assemble with Love: Keep fried bread warm in a 200°F oven while you finish the rest. To assemble, place a fry bread on a plate, spoon on the warm meat mixture, then top with lettuce, tomatoes, cheese, and a generous dollop of sour cream. Serve immediately while the contrast between hot and cold is at its peak. The first bite should make you close your eyes involuntarily — that's when you know you've achieved Navajo Taco nirvana.
That's it — you did it. But hold on, I've got a few more tricks that'll take this to another level...
Insider Tricks for Flawless Results
The Temperature Rule Nobody Follows
Here's the thing about fry bread — oil temperature matters more than almost anything else. I use a candy thermometer clipped to my pot, but I also have a backup method because I've learned the hard way that thermometers can lie. The oil should shimmer but not smoke, and when you drop in a tiny piece of dough, it should dance and sizzle like it's happy to be there. If it sinks to the bottom, your oil isn't hot enough. If it browns immediately, it's too hot. The sweet spot is 375°F, and maintaining that temperature between batches is crucial. Don't overcrowd the pot — frying more than two pieces at a time drops the temperature and gives you greasy results.
Between batches, let the oil come back up to temperature. I keep a small piece of dough nearby to test before each new piece goes in. This might seem obsessive, but it's the difference between Navajo Tacos that'll make you famous and ones that'll make people politely decline seconds.
Why Your Nose Knows Best
After making these dozens of times, I've learned to trust my sense of smell more than any timer. When the meat is perfectly seasoned, your kitchen will smell like a roadside stand in New Mexico — warm spices, sweet onions, and something indefinably comforting. If you can't smell it across the room, you need more seasoning. The fry bread is ready to flip when you can smell that distinctive fried dough aroma — slightly sweet, slightly nutty, absolutely irresistible. A friend tried to rush this step once and ended up with pale, doughy centers that tasted like disappointment.
Trust your instincts here. If something smells amazing, it's probably ready. If the smells are still developing, give it another minute. Your nose is smarter than you think.
The 5-Minute Rest That Changes Everything
After you fry the bread, resist the urge to dig in immediately. Let it rest on a wire rack for at least 5 minutes — this allows the steam to redistribute and the exterior to crisp up properly. If you skip this step, you'll have soggy bottoms that collapse under the weight of your toppings. The rack is crucial — paper towels trap steam and make the bread soft. I learned this the hard way after serving what I thought was perfect fry bread that turned into sad, floppy disks within minutes.
During this rest, the bread continues cooking from residual heat, ensuring the center is fully cooked without over-browning the exterior. It's like resting a steak — patience pays off in texture and flavor.
The Assembly Order That Matters
Here's the secret to Navajo Tacos that stay crispy: assembly order matters more than you'd think. Start with the meat while it's still warm — this creates a barrier that prevents the bread from getting soggy. Then lettuce (it acts as insulation), followed by tomatoes, then cheese, and finally sour cream. If you put the sour cream directly on the hot meat, it melts and creates a soggy mess. The cheese should go between the warm ingredients and the cold ones, creating a melty barrier that keeps everything in perfect harmony.
Don't overload your bread — this isn't a competition to see how much you can pile on. A modest amount of each topping creates better balance and ensures every bite contains all the elements. Trust me, you'll enjoy it more than a mountain of toppings that falls apart after one bite.
Creative Twists and Variations
This recipe is a playground. Here are some of my favorite ways to switch things up:
The Green Chile Goddess
Replace the regular diced tomatoes with fire-roasted green chiles and add a teaspoon of oregano to your spice blend. Top with crumbled queso fresco instead of cheddar, and add a spoonful of New Mexico green chile sauce. This version has a gentle heat that builds slowly and pairs beautifully with an ice-cold beer. My cousin from Albuquerque says this is closer to what she grew eating, and she should know — she can spot authentic New Mexican food from three states away.
The Breakfast Champion
Cook up some chorizo instead of ground beef, add scrambled eggs on top, and finish with avocado slices and salsa verde. This is weekend breakfast nirvana — the kind of meal that makes you cancel your plans and go back to bed satisfied. The chorizo's spices infuse everything with smoky paprika and just enough heat to wake you up properly. I dare you to taste this and not go back for seconds.
The Vegetarian Victory
Skip the meat entirely and make a filling with black beans, corn, diced zucchini, and bell peppers seasoned with the same spice blend. Add a crumble of cotija cheese and a squeeze of lime. Even my carnivore friends request this version — the vegetables caramelize and develop deep, complex flavors that rival any meat-based filling. The key is cooking the vegetables until they're nicely browned, not just wilted.
The Sweet Ending
Here's where things get interesting — use the same fry bread recipe but top it with honey, cinnamon sugar, and fresh berries. It's like a Native American beignet, crispy outside and tender inside, sweet and addictive. Serve this as dessert after your savory Navajo Tacos, and watch people lose their minds over the transformation. The contrast between the slightly savory bread and sweet toppings creates something magical.
The Buffalo Soldier
Use ground bison instead of beef — it's leaner, slightly sweet, and has a depth that regular beef can't match. Add some wild rice to the meat mixture for texture, and top with dried cranberries and sage. This version tastes like the American West in the best possible way. The bison needs less cooking time since it's so lean, so add it after the onions are soft.
The Mini Marvels
Make tiny appetizer-sized versions by dividing the dough into 16 pieces instead of 8. These are perfect for parties — people can hold them in one hand while holding a drink in the other. Top them with a miniature amount of everything, and watch them disappear faster than you can fry them. I've taken these to potlucks and had people follow me to my car for the recipe.
Storing and Bringing It Back to Life
Fridge Storage
Store leftover fry bread in an airtight container at room temperature for up to 2 days — don't refrigerate it, as this makes it tough and stale-tasting. The meat mixture keeps beautifully in the fridge for up to 4 days in a sealed container. In fact, I often make a double batch of meat because it gets even better as the flavors meld. Store toppings separately in the fridge — nobody wants soggy lettuce or tomatoes that have lost their crunch. If you've already assembled tacos, they're best eaten within a few hours, but you can wrap them in foil and refrigerate for up to a day.
When storing fry bread, place a paper towel in the container to absorb any moisture, and don't stack them more than three high. They'll stay relatively crisp at room temperature, though nothing beats fresh-fried. If they do get soft, you can revive them in a 350°F oven for 5-7 minutes.
Freezer Friendly
Fry bread freezes beautifully — who knew? Let it cool completely, then freeze in a single layer on a baking sheet. Once frozen solid, stack between layers of parchment paper in a freezer bag. They'll keep for up to 2 months without losing quality. The meat mixture also freezes well — portion it into meal-sized amounts and freeze flat in freezer bags for easy thawing. Frozen meat keeps for 3 months, though I guarantee it won't last that long once you taste how convenient this makes weeknight dinners.
To freeze assembled tacos (though I don't recommend it), wrap each one individually in plastic wrap, then foil. They're best within a month, and should be thawed overnight in the fridge before reheating. The texture won't be quite the same as fresh, but they're still better than most frozen meals.
Best Reheating Method
The oven is your friend here — 350°F for 8-10 minutes gets fry bread crispy again without drying it out. Skip the microwave unless you enjoy rubbery bread (spoiler: you don't). For the meat, reheat in a skillet over medium heat with a splash of broth to keep it moist. Add a tiny splash of water before reheating — it steams back to perfection. Assemble fresh with cold toppings for the best experience. If you're reheating assembled tacos, wrap them in foil and heat at 350°F for about 15 minutes — the cheese melts, everything warms through, and you get that perfect contrast of temperatures.
Pro tip: Set up a taco bar with warm components and cold toppings, letting everyone assemble their own. This keeps everything at the right temperature and makes you look like a hosting genius.