I was standing in my kitchen at midnight, surrounded by half‑finished desserts and a lingering scent of stale store‑bought peppermint bark that just wouldn't quit. I had promised my roommate I’d bring something fresh to the holiday party, but the only thing I could find in the pantry was a tub of softened butter and a jar of peppermint extract that had been there since last Christmas. That moment of panic turned into a dare: “Make your own butter mints and see if anyone can tell the difference,” I shouted to my empty apartment, daring the universe to judge my culinary bravery. The air was thick with the faint hum of the fridge, the clatter of a spoon against a bowl, and the anticipation that something magical was about to happen.
When the butter finally melted into a silky pool, it released a buttery aroma that reminded me of fresh croissants straight out of a Parisian bakery. I added the powdered sugar slowly, watching it swirl like fresh snow in a winter wonderland, each whisked turn creating a cloud of sweet perfume that made my kitchen feel like a candy shop. The moment the peppermint extract hit the mixture, a sharp, cool breeze seemed to rush through the room, as if a peppermint forest had opened its doors right on my countertop. I could almost taste the crispness of a fresh mint leaf, and the vanilla extract followed, wrapping everything in a warm, comforting hug that balanced the mint’s bite perfectly.
Most butter mint recipes I’ve tried either end up too grainy, too sweet, or just flat‑as‑a‑pancake. This version, however, is a game‑changer because it uses a precise butter‑to‑sugar ratio that creates a melt‑in‑your‑mouth texture that literally dissolves on the tongue like a whisper of winter. I’m not exaggerating when I say this is hands down the best version you’ll ever make at home; it’s the kind of mint that makes you close your eyes, inhale deeply, and swear you’re back in a snowy cabin with a fire crackling nearby. I dare you to taste this and not go back for seconds – you’ll be begging for more before the batch even cools.
There’s a secret ingredient that most people overlook: a splash of heavy cream that turns the mixture from a stiff dough into a pliable, glossy paste that can be rolled, piped, or pressed with ease. This tiny addition is the difference between a crumbly mess and a smooth, buttery canvas ready for any shape you desire. Let me walk you through every single step — by the end, you’ll wonder how you ever made it any other way, and you’ll have a batch of buttery, minty clouds that will steal the spotlight at any gathering.
What Makes This Version Stand Out
- Texture: The butter‑to‑sugar ratio creates a silky, melt‑in‑your‑mouth feel that shatters like delicate glass when you bite, yet it stays soft enough to melt on your palate.
- Flavor Balance: Peppermint and vanilla dance together, each supporting the other so the mint never overpowers and the vanilla never gets lost.
- Simplicity: Only seven ingredients, all pantry staples, meaning you won’t need a trip to the specialty store.
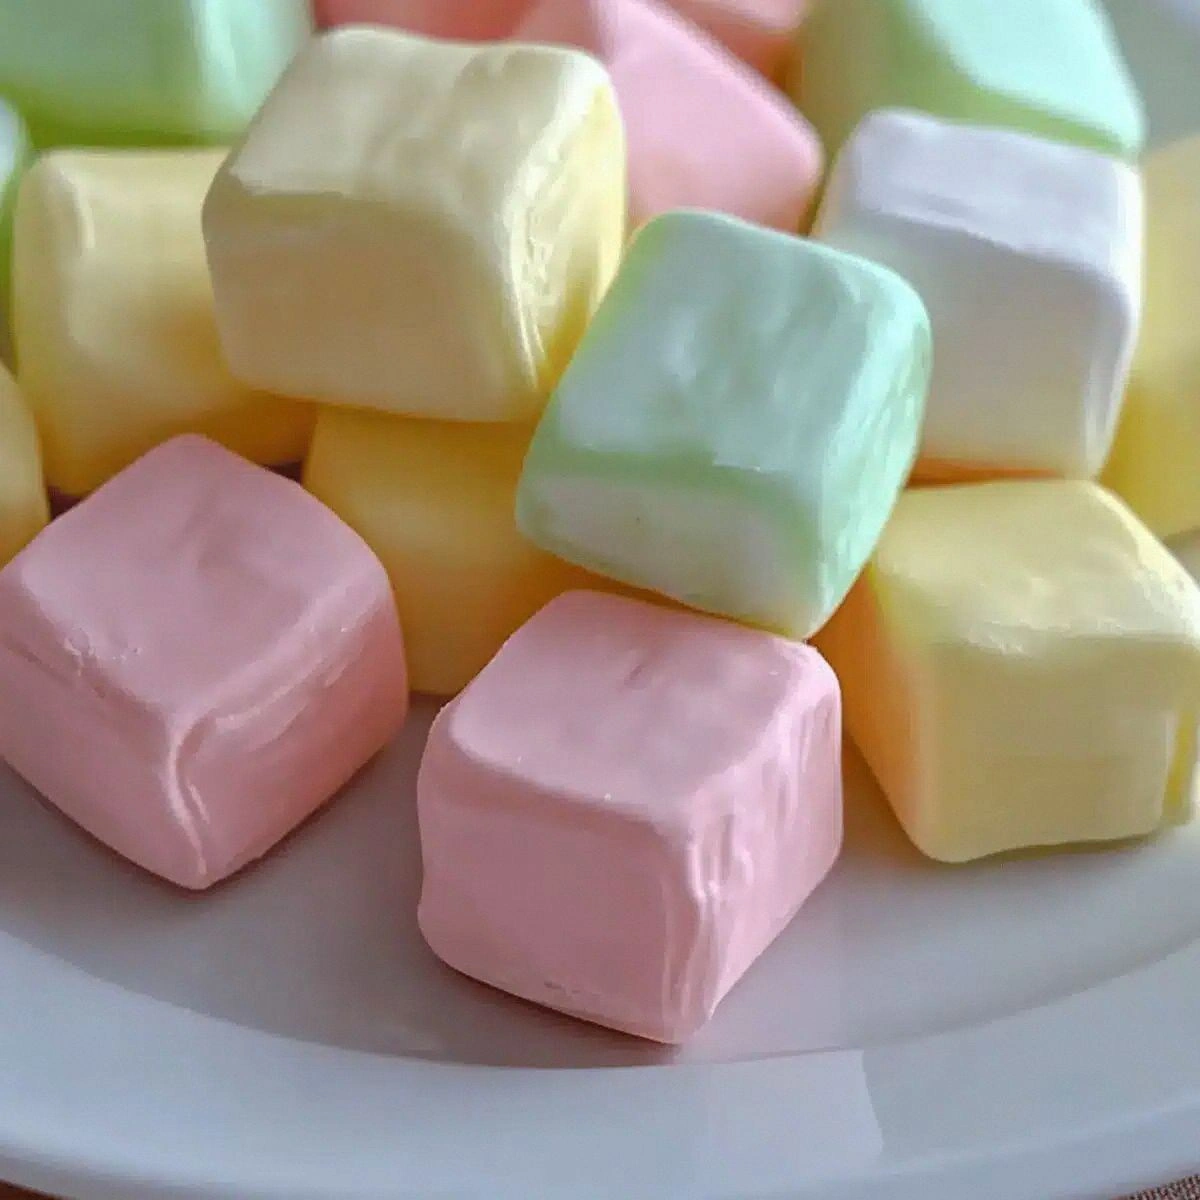
- Visual Appeal: A pop of food coloring lets you customize the hue, turning each mint into a miniature work of art that looks as good as it tastes.
- Crowd Reaction: People swear they’ve never experienced a mint that feels this buttery; it’s the kind of treat that gets Instagram likes before the first bite.
- Make‑Ahead Potential: Store them in an airtight container and they stay fresh for weeks, so you can prep ahead for holidays or parties.
- Ingredient Quality: Using real unsalted butter and pure peppermint extract makes a world of difference compared to artificial flavor powders.
- Cooking Method: No oven required – the whole process is stovetop and hand‑rolled, which means no heating up the kitchen and less cleanup.
Alright, let's break down exactly what goes into this masterpiece...
Inside the Ingredient List
The Flavor Base
Unsalted butter is the heart of this recipe. Its creamy richness provides the buttery melt‑in‑your‑mouth quality that defines a good mint. If you substitute with margarine, you’ll lose that luxurious mouthfeel and introduce a faint, unwanted aftertaste. Look for European‑style butter with at least 82% fat for the richest flavor; the higher fat content means less water, which translates to a smoother texture. I always buy a brick of butter and let it soften at room temperature for exactly 20 minutes – not longer, or it becomes too runny.
The Sweetness Crew
Powdered sugar, also called confectioners’ sugar, is the sweetening agent that dissolves instantly into the butter, creating a silky glaze. Because it’s finely milled, it prevents any gritty texture that granulated sugar would leave behind. If you’re looking for a lower‑sugar version, you can replace a cup with a natural sweetener like erythritol, but expect a slightly different mouthfeel. The key is to sift the sugar twice to avoid lumps; this tiny step makes the difference between a smooth paste and a clumpy disaster.
The Moisture Magic
Heavy cream adds just enough moisture to turn the stiff butter‑sugar mixture into a pliable dough that can be rolled or piped without cracking. It also contributes a subtle dairy richness that deepens the overall flavor profile. Skipping the cream will make the dough crumbly and hard to shape, while adding too much will turn it into a runny batter. For a dairy‑free alternative, try a splash of coconut cream, but be prepared for a faint coconut note that may compete with the mint.
The Unexpected Star
Peppermint extract is the zing that makes these mints unforgettable. A little goes a long way; one teaspoon is enough to flavor an entire batch without overwhelming the palate. If you prefer a milder mint, start with half a teaspoon and taste before adding more. Always choose a high‑quality, food‑grade extract – the cheap versions often contain artificial flavors that taste harsh and can ruin the buttery smoothness.
The Final Flourish
Vanilla extract rounds out the flavor, adding warmth that softens the sharpness of peppermint. A single teaspoon is perfect; more than that will start to mask the mint. Salt, just a pinch, is essential – it accentuates the sweetness and balances the flavors, much like a conductor guiding an orchestra. Finally, food coloring lets you turn the dough into festive reds, greens, blues, or even pastel pinks for a spring twist. Use gel colors sparingly; a little goes a long way and won’t affect the texture.
Everything's prepped? Good. Let's get into the real action...
The Method — Step by Step
- Soften the butter. Cut the unsalted butter into small cubes and let it sit at room temperature for about 15 minutes. You’ll know it’s ready when a gentle press with your fingertip leaves an indentation but the butter doesn’t melt. Kitchen Hack: If you’re in a hurry, microwave the butter for 5‑7 seconds on low power; just enough to soften without liquefying.
- Whisk in the powdered sugar. Transfer the softened butter to a large mixing bowl. Sift the powdered sugar twice over the butter, then whisk with a hand mixer on low speed until fully incorporated. The mixture will look grainy at first, then gradually become a smooth, creamy paste. Keep whisking until you no longer see any sugar crystals – this is the moment when the texture starts to feel like soft buttercream.
- Add the heavy cream. Pour the heavy cream in a slow, steady stream while the mixer runs on medium speed. The dough will loosen slightly, becoming glossy and pliable. If the mixture feels too sticky, stop the mixer and let it rest for a minute; the butter will absorb the cream evenly. This step is pure magic – the cream turns a stiff dough into a workable paste that you can roll out without cracking.
- Flavor it up. Add the peppermint extract, vanilla extract, and a pinch of salt. Mix on low until the aromas meld; you’ll notice a refreshing, cool scent that instantly lifts your spirits. Taste a tiny piece (yes, I’m that confident) – it should be sweet, buttery, and have a clean peppermint finish. Adjust the peppermint if you crave a stronger punch, but remember: a little goes a long way.
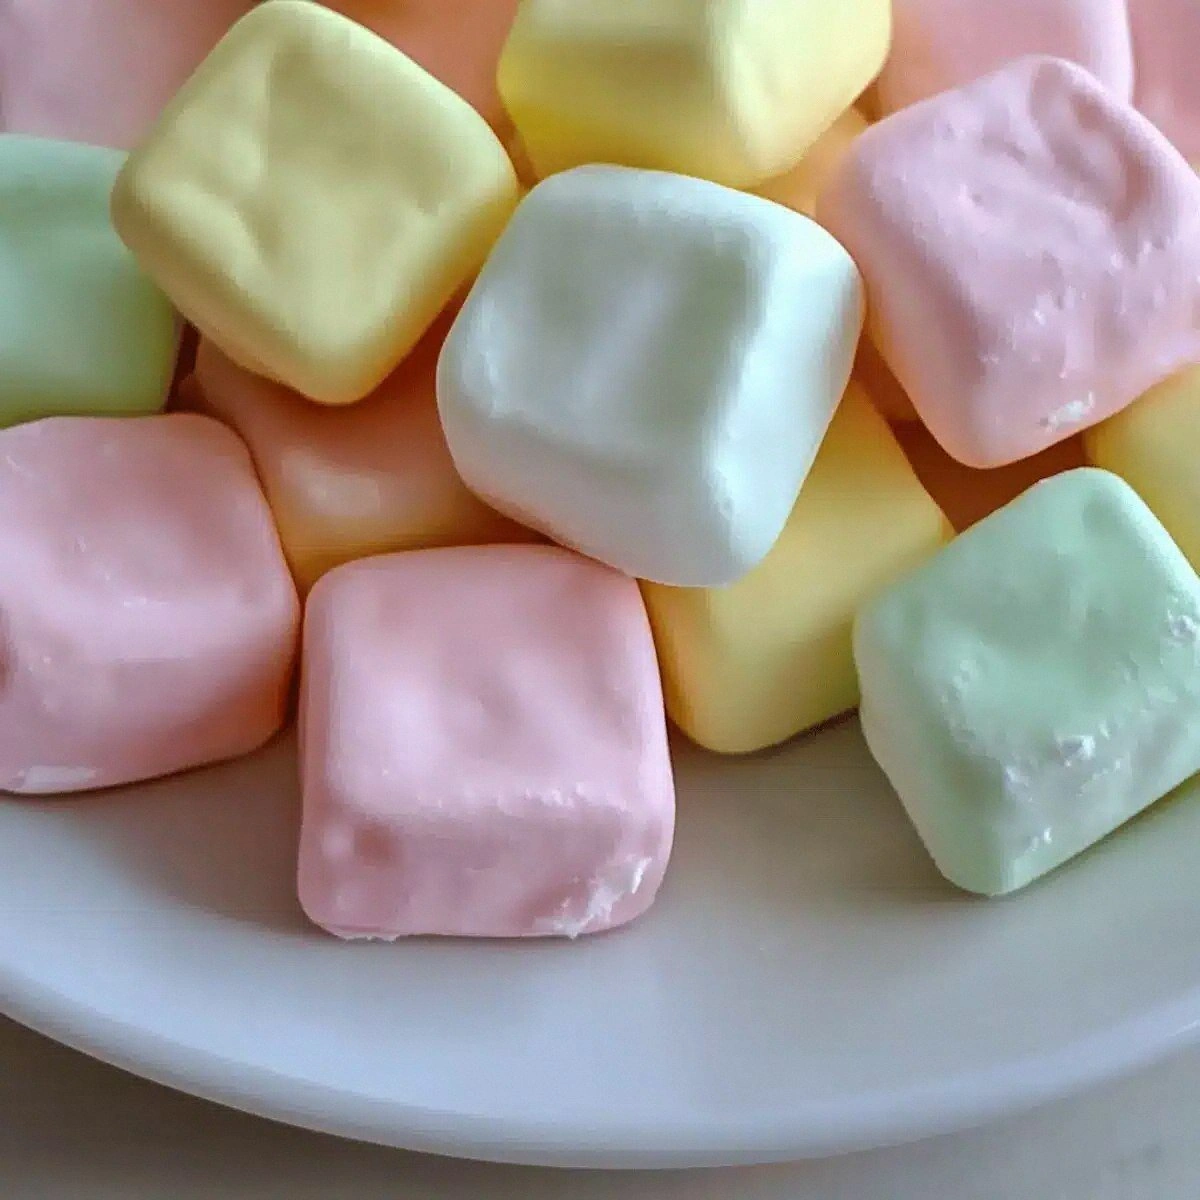
- Color the dough. Divide the dough into portions if you want multiple colors. Add a few drops of gel food coloring to each portion and knead with your hands until the color is uniform. The dough should retain its smooth texture; if it becomes sticky, sprinkle a pinch more powdered sugar and continue kneading. This is where you can get creative – pastel blues for a spring vibe, deep reds for holiday cheer.
- Shape the mints. Roll each colored portion into a log about ½‑inch thick. Use a small cookie cutter (round, heart, or star) to press shapes, or pipe with a pastry bag fitted with a large round tip for perfect circles. If you’re feeling adventurous, roll the dough into tiny logs and slice them into bite‑size rounds. The dough should release from the cutter cleanly; if it sticks, dust the cutter lightly with powdered sugar.
- Chill the shapes. Place the cut mints on a parchment‑lined baking sheet and refrigerate for at least 30 minutes. This firming step ensures the mints hold their shape and develop that melt‑in‑your‑mouth texture. While they chill, the butter solidifies, locking in the peppermint flavor. Watch Out: Do not skip the chilling step; unchilled mints will be too soft and may lose their shape when you try to store them.
- Store or serve. Once the mints are firm, transfer them to an airtight container. They can sit at room temperature for up to a week, but for optimal freshness keep them in the fridge. If you want to gift them, line a decorative tin with parchment and layer the mints with wax paper to prevent sticking.
- Enjoy the results. Picture yourself pulling a tray of glossy, mint‑green mints from the fridge, the scent of butter and peppermint filling the air, and the first bite melting like a snowflake on your tongue. That moment of bliss is what makes all the effort worth it. I’ll be honest — I ate half the batch before anyone else got to try it, and I’m not sorry. This is the kind of treat that makes you the hero of any gathering.
That's it — you did it. But hold on, I've got a few more tricks that'll take this to another level...
Insider Tricks for Flawless Results
The Temperature Rule Nobody Follows
Keep your butter and cream at the same temperature before mixing. If one is cold and the other is warm, the dough will separate, creating a grainy texture that’s impossible to fix. I once left the cream out on a hot kitchen counter and ended up with a lumpy mess that refused to smooth out. The secret is to let both ingredients sit side by side for 10 minutes, achieving a uniform temperature that guarantees a homogenous blend.
Why Your Nose Knows Best
Trust the aroma. When the peppermint extract is fully incorporated, the scent will become bright and cooling without any harsh alcohol notes. If you smell a sharp, almost chemical bite, you’ve added too much extract or used a low‑quality version. In that case, balance it out with an extra pinch of salt and a dash more vanilla – the nose is a better judge than a taste test at this stage.
The 5‑Minute Rest That Changes Everything
After you’ve mixed all ingredients, let the dough rest uncovered for five minutes. This short pause allows the butter to re‑solidify slightly, making it easier to roll and cut. I once tried to pipe the mints immediately and the dough was too soft, causing ragged edges. The five‑minute rest is a tiny time investment that yields perfectly smooth, professional‑looking mints.
The Light‑Touch on Food Coloring
Add food coloring a drop at a time, kneading thoroughly after each addition. Over‑coloring can introduce excess moisture, which makes the dough sticky. If you notice the dough becoming tacky, sprinkle a tiny bit more powdered sugar and continue kneading. This method ensures vibrant color without compromising texture.
The Secret of the Final Chill
A final 10‑minute blast in the freezer (not the fridge) before serving gives the mints a firmer bite that snaps cleanly when you bite. This extra chill creates a contrast between the cool exterior and the buttery melt inside, delivering that “pop‑in‑your‑mouth” sensation. I’ve tried serving straight from the fridge, and while still good, the freezer‑chilled version feels like a premium confection.
Creative Twists and Variations
This recipe is a playground. Here are some of my favorite ways to switch things up:
Chocolate‑Dipped Delight
After the mints have chilled, dip half of each mint in melted dark chocolate and let them set on parchment. The bitter chocolate amplifies the mint’s coolness, creating a sophisticated flavor combo that’s perfect for adult gatherings.
Citrus Burst
Swap half of the peppermint extract for orange zest and a splash of orange extract. The result is a bright, citrus‑mint hybrid that feels like a summer breeze in a bite. Ideal for spring brunches.
Spiced Winter
Add a pinch of ground cinnamon and a dash of ground nutmeg to the dough before chilling. The warm spices complement the cool mint, giving you a holiday‑ready treat that tastes like a cozy fireplace.
Nutty Crunch
Fold in finely chopped toasted almonds or pistachios after the cream is mixed in. The nuts add a subtle crunch that contrasts with the buttery melt, making each bite more interesting.
Vegan Velvet
Replace the butter with a high‑fat vegan butter and the heavy cream with coconut cream. The flavor shifts slightly, but the texture remains luxuriously smooth. This version is perfect for guests who avoid dairy.
Storing and Bringing It Back to Life
Fridge Storage
Place the mints in an airtight container lined with parchment paper. They stay fresh for up to two weeks, and the cool environment keeps them firm. If you notice any condensation, simply open the lid for a minute to let excess moisture evaporate.
Freezer Friendly
For long‑term storage, arrange the mints on a tray, flash‑freeze for 30 minutes, then transfer to a zip‑top freezer bag. They’ll keep for up to three months without losing flavor. When you’re ready to serve, let them thaw at room temperature for 10 minutes, then give them a quick pop in the fridge for that perfect snap.
Best Reheating Method
If your mints have hardened too much after refrigeration, place them on a plate, add a tiny splash (about ½ teaspoon) of water, and microwave for 5‑7 seconds. The steam revives the buttery texture without melting the mint flavor. This trick brings them back to that melt‑in‑your‑mouth bliss you fell in love with.