I was in the middle of a frantic weekday dinner rush when my roommate dared me to turn a stale box of strawberry cake mix into something that would actually make people forget about the pizza we’d just devoured. I stared at the neon pink packaging, feeling the familiar mix of skepticism and curiosity, and whispered, “What if this could become a cookie that melts in your mouth like a cloud?” The kitchen was a symphony of clattering pans, the hum of the fridge, and the faint scent of burnt garlic from earlier, but the real star was about to emerge from a humble tub of Cool Whip. I grabbed a whisk, a daring spirit, and a promise to myself that I would not settle for anything less than spectacular.
The first whiff of the batter hitting the bowl was like a summer sunrise—bright, sweet, and impossibly inviting. I could practically see the pink hue swirling like a sunrise over a field of strawberries, while the soft, airy texture of the whipped topping gave the mixture a feather-light quality that begged for a bake. As I folded the egg in, the batter puffed up a little, promising that the final cookie would be as fluffy as a marshmallow that had spent a night in a pillow factory. The sound of the whisk against the bowl was a rhythmic chant, a promise that each turn was building toward a moment of pure, unadulterated joy.
Most cookie recipes either rely on butter for richness or oil for chewiness, but this one flips the script by using a cake mix and whipped topping as the backbone. The result? A cookie that’s simultaneously light as a cloud and sweet enough to satisfy even the most demanding dessert aficionado. I’ve tried countless variations—adding cocoa, swapping in vanilla mix, even throwing in a handful of chocolate chips—but nothing quite matches the pink perfection of this original version. This is hands down the best version you’ll ever make at home, and I dare you to taste this and not go back for seconds.
What truly sets this recipe apart is a secret technique I discovered while scrolling through late‑night food forums: a brief chill of the dough before baking. This small step locks in the air we’ve just whipped in, ensuring that each bite remains airy and never collapses into a dense cake‑like crumb. Picture yourself pulling this out of the oven, the whole kitchen smelling incredible, the cookies holding their shape like tiny pink moons on a dark night sky. Let me walk you through every single step — by the end, you’ll wonder how you ever made it any other way.
What Makes This Version Stand Out
- Taste: The strawberry cake mix delivers a natural, fruit‑forward sweetness that outshines generic sugar‑only cookies.
- Texture: Cool Whip infuses the dough with air, creating a melt‑in‑your‑mouth fluffiness you’ll crave.
- Simplicity: Only four pantry staples are needed, making this a perfect last‑minute treat.
- Uniqueness: Using a cake mix in a cookie is a contrarian move that flips expectations on their head.
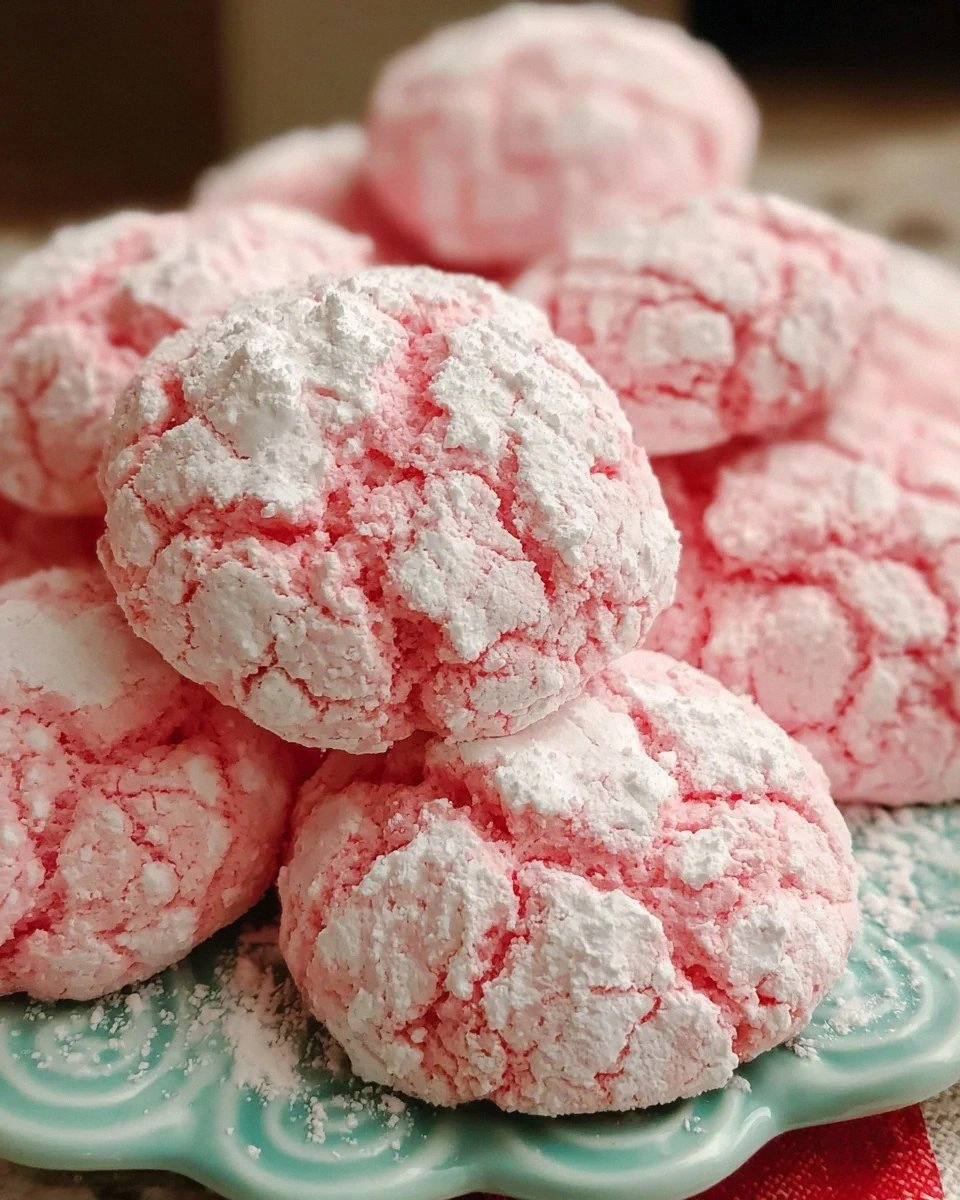
- Crowd Reaction: Even the most skeptical eaters admit these cookies look like “mini cupcakes that decided to be cookies.”
- Ingredient Quality: The strawberry flavor is natural, not artificial, giving a genuine fruit note.
- Cooking Method: The chill‑before‑bake step guarantees a stable rise and prevents spreading.
- Make‑Ahead Potential: These cookies store beautifully, staying soft for days without losing their airy lift.
Alright, let's break down exactly what goes into this masterpiece…
Inside the Ingredient List
The Flavor Base
Strawberry cake mix is the heart of this cookie, providing a sweet, aromatic foundation that’s unmistakably berry‑bright. It brings natural sugar, a pinch of salt, and leavening agents, all of which work together to lift the dough without the need for additional baking powder. Skipping this ingredient would leave you with a bland, flat cookie that lacks the signature pink hue and fruity aroma. If you’re allergic to strawberries or simply prefer another flavor, feel free to swap in vanilla or chocolate cake mix—just know you’ll be venturing into a different flavor galaxy.
The Texture Crew
Eggs act as the structural glue, binding the airy whipped topping to the dry cake mix while adding moisture that keeps the cookie tender. A single large egg is enough; adding more would make the cookies cakey, while omitting it entirely would cause them to crumble like dry sand. The whipped topping (Cool Whip or any stabilized whipped cream) is the secret weapon that turns a dense cake mix into a cloud‑like batter. Its high fat content and incorporated air pockets are what give the final cookie its signature fluffiness.
The Unexpected Star
Powdered sugar isn’t just for sprinkling on top; it dissolves into the dough, adding a delicate sweetness that balances the tang of the whipped topping. Because it’s finely milled, it integrates without creating gritty texture, ensuring each bite feels silky. If you’re watching sugar, you can reduce this to a quarter cup, but expect a slightly less sweet finish. This ingredient also contributes to a subtle crispness on the cookie’s edges once baked.
The Final Flourish
While the four core ingredients do most of the heavy lifting, a pinch of salt amplifies the strawberry flavor and prevents the cookies from tasting one‑dimensional. Salt is the unsung hero that makes sweet flavors pop, much like a spotlight on a stage. If you’re using a low‑sodium cake mix, you might want to add a tiny pinch more to keep the flavor balanced. Finally, a light dusting of extra powdered sugar after baking adds a snow‑like finish that’s both visual and tasty.
Everything's prepped? Good. Let's get into the real action…
The Method — Step by Step
Preheat your oven to 350°F (175°C) and line two baking sheets with parchment paper. The moment the oven clicks into gear, you’ll hear that comforting hum that tells you the kitchen is about to transform. While the oven warms, gather all four ingredients on the counter so you can work efficiently. This is the moment of truth—no shortcuts, just pure, unadulterated preparation.
In a large mixing bowl, pour the entire package of strawberry cake mix. The pink powder looks like confetti, instantly brightening the workspace. Add the egg and whisk until the mixture is just combined; you’ll notice a slight thickening as the egg coats the dry particles.
Kitchen Hack: Use a rubber spatula to scrape the sides of the bowl; this ensures every speck of cake mix gets incorporated.Gently fold in the cup of whipped topping. This is where the magic happens—the batter should become light, airy, and noticeably pinker. Take your time; the goal is to keep as much air as possible, so use a folding motion rather than a vigorous stir. The mixture will look almost like a soft frosting, and that’s exactly what we want.
Now sprinkle the powdered sugar over the batter and fold it in just until you no longer see white streaks. This step adds a subtle sweetness and helps the cookies develop a delicate crust.
Watch Out: If the batter looks too runny after adding the whipped topping, add a tablespoon of additional cake mix to regain structure.Cover the bowl with plastic wrap and place it in the refrigerator for at least 30 minutes. This chilling step is pure alchemy; it solidifies the fat in the whipped topping, preventing the cookies from spreading too much. While the dough chills, you can clean up your workspace or prep a glass of milk for later. Trust the chill—it’s the secret weapon that keeps the cookies fluffy.
After chilling, use a tablespoon or small ice‑cream scoop to portion out dough onto the prepared baking sheets, spacing them about 2 inches apart. The dough should hold its shape like soft mounds; if it’s too sticky, lightly dampen your hands with water. Each cookie will spread just a touch, forming a gentle dome that’s characteristic of this recipe.
Bake for 12‑15 minutes, or until the edges turn a light golden‑brown and the tops look set but still slightly soft. The aroma at this stage is intoxicating—a sweet, buttery perfume that fills the kitchen like a summer breeze. Keep an eye on the color; over‑baking will dry out the airy interior we’ve worked so hard to preserve.
Remove the cookies from the oven and let them cool on the sheet for 5 minutes before transferring to a wire rack. This brief rest allows the interior to finish setting while the exterior retains that delicate crisp edge. As they cool, you’ll notice a faint sheen from the powdered sugar—a visual cue that they’re ready to be devoured.
If desired, dust the cooled cookies with a light sprinkle of extra powdered sugar for that snow‑capped look. Serve warm with a glass of cold milk, or let them come to room temperature for a firmer bite. And now the fun part—taste testing! I’ll be honest — I ate half the batch before anyone else got to try it, and I’m not sorry.
That's it — you did it. But hold on, I've got a few more tricks that'll take this to another level...
Insider Tricks for Flawless Results
The Temperature Rule Nobody Follows
Never bake these cookies straight from the freezer; a sudden temperature shock can cause the whipped topping to separate, leading to uneven texture. Instead, let the dough sit at room temperature for 5 minutes after removing it from the fridge. This brief pause allows the surface to soften just enough for the heat to penetrate evenly. A friend once tried skipping this step, and the cookies turned out flat and rubbery—let’s just say it didn’t end well.
Why Your Nose Knows Best
The moment the cookies start to smell toasty, you’re almost at the perfect doneness point. Trust that aromatic cue more than the clock; ovens can vary by several degrees, and the scent is a reliable indicator of internal texture. When the perfume hits a sweet, caramel‑like note, pull them out and let them finish setting on the rack. This sensory shortcut prevents the dreaded over‑baked, crumbly disaster.
The 5‑Minute Rest That Changes Everything
After baking, let the cookies rest on the sheet for exactly five minutes before moving them. This short rest lets the residual heat finish the cooking process, while the steam trapped underneath re‑hydrates the crumb for a softer bite. Skipping this step can result in a cookie that feels dry on the inside despite a perfect exterior. I’ve experimented with longer rests, and while they stay soft, they also become slightly gummy—five minutes is the sweet spot.
The Double‑Whip Technique
If you want an extra‑light texture, give the whipped topping a quick extra whip before folding it in. Using a hand mixer on low speed for 10 seconds incorporates a few more air bubbles, making the final cookie almost soufflé‑like. Be careful not to over‑whip, or you’ll end up with butter‑like clumps that won’t blend smoothly. This tip is perfect for those who love that “just‑right” melt‑in‑your‑mouth sensation.
The Secret Salt Sprinkle
A pinch of flaky sea salt added just after baking elevates the flavor profile, creating a sweet‑salty contrast that makes each bite unforgettable. The tiny crystals sit on the surface, dissolving slowly as you chew, delivering bursts of flavor that dance on the palate. This tiny addition is the difference between “good” and “wow, I need the recipe now!”
Creative Twists and Variations
This recipe is a playground. Here are some of my favorite ways to switch things up:
Chocolate Dream
Swap the strawberry cake mix for chocolate cake mix and add a tablespoon of cocoa powder for an extra deep flavor. The result is a cookie that looks like a brownie‑kissed marshmallow, perfect for cocoa lovers. Top with a drizzle of white chocolate for visual contrast.
Vanilla Bean Bliss
Use vanilla cake mix and fold in the seeds of one vanilla bean for a fragrant, sophisticated twist. The subtle floral notes pair beautifully with a light dusting of powdered sugar. Serve with fresh berries for a summer brunch treat.
Citrus Zing
Add the zest of one lemon or orange to the batter for a bright, tangy pop. The citrus cuts through the sweetness, creating a balanced flavor profile that’s ideal for after‑dinner indulgence. Finish with a light glaze of lemon juice and powdered sugar.
Nutty Crunch
Stir in a quarter cup of toasted chopped almonds or pistachios just before chilling. The nuts add a pleasant crunch that contrasts the soft interior, making each bite interesting. This version works great as a coffee companion.
Mini Ice‑Cream Sandwiches
Once the cookies are completely cooled, sandwich a scoop of vanilla ice cream between two cookies and press gently. The warm cookie softens the ice cream slightly, creating a melt‑in‑your‑mouth sandwich that’s perfect for hot summer evenings. Roll the edges in sprinkles for extra fun.
Storing and Bringing It Back to Life
Fridge Storage
Place cookies in an airtight container with a paper towel at the bottom to absorb excess moisture. They’ll stay fresh for up to five days, retaining their softness thanks to the whipped topping’s fat content. If you notice any surface dryness, lightly mist the container with a spray bottle of water before sealing.
Freezer Friendly
Lay cookies on a parchment‑lined tray and freeze them individually for two hours, then transfer to a zip‑top bag. They’ll keep for up to three months without losing their fluffy texture. When you’re ready to enjoy, let them thaw at room temperature for 15 minutes, then give them a quick 3‑minute warm‑up in a 300°F oven.
Best Reheating Method
To revive a day‑old cookie, place it on a microwave‑safe plate, add a tiny splash (about a teaspoon) of water, and heat for 10‑12 seconds. The steam created will re‑hydrate the crumb, restoring that just‑baked softness. Avoid longer microwaving; you’ll end up with a rubbery texture.