I still remember the day my oven decided to play a cruel joke on me. There I was, craving lemon pie like my life depended on it, but I only had two eggs, some lemons, and a half-stick of butter. No crust, no patience, and a growling stomach that wouldn't take no for an answer. What happened next defied every baking law I'd ever learned — these mini lemon impossible pies emerged from the oven with golden tops that cracked like crème brûlée, releasing a citrus perfume so intoxicating that my neighbor knocked on my door asking if I was running a secret bakery. The impossible part? They create their own thin, tender crust while baking, no rolling pin required, like they're showing off for the pastry gods.
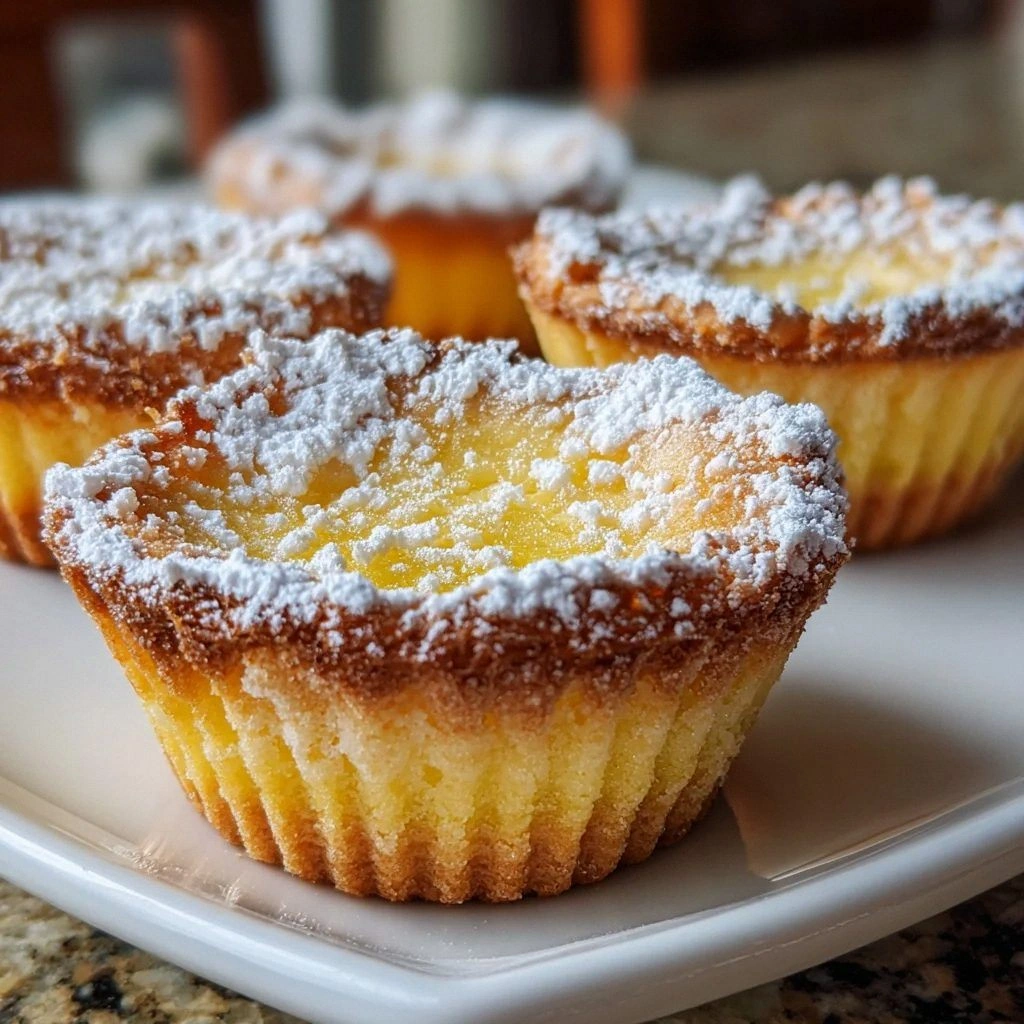
Picture this: you whisk together a thin, almost watery batter that smells like sunshine and promises, pour it into tiny ramekins, and slide them into the oven. Twenty-five minutes later, you're pulling out individual lemon clouds that have separated into three distinct layers — a delicate cake top, a silky custard middle, and a whisper-thin crust bottom that tastes like someone whispered sweet nothings to butter. The first bite makes your tongue do a happy dance between bright, zingy lemon and rich, comforting sweetness. I dare you to taste this and not go back for seconds. Actually, I double-dog dare you, because I ate four of these babies standing at my kitchen counter, still wearing my "Kiss the Cook" apron with the chocolate stain shaped like Texas.
Here's what makes these little miracles different from every other lemon dessert you've tried: they're impossible to mess up, impossible to forget, and impossible to share politely. Most recipes get this completely wrong by trying to make one large pie that collapses in the center or turns rubbery around the edges. The secret is going mini, letting each pie have its own personal space to work its magic. Future pacing for a second — picture yourself pulling these out of the oven, the whole kitchen smelling like a lemon grove in summer, your family hovering like vultures because they know something incredible just happened and they want first dibs on the warm, jiggly centers.
Stay with me here — this is worth it. These mini lemon impossible pies will become your go-to dessert for everything from fancy dinner parties to "I need something sweet right now" emergencies. They're faster than ordering takeout, cheaper than therapy, and more satisfying than finding money in your winter coat pocket. Let me walk you through every single step — by the end, you'll wonder how you ever made it any other way.
What Makes This Version Stand Out
Self-Crusting Magic: The batter separates during baking to create its own delicate crust, eliminating the need for pastry skills or store-bought shells. This isn't just convenient — it's pure kitchen wizardry that makes you feel like you've unlocked a secret level in baking.
One-Bowl Wonder: Everything mixes in a single bowl with a whisk, no fancy equipment needed. If you've ever struggled with multiple mixing bowls and timing issues, you're not alone — and I've got the fix that'll have you baking like a pro with minimal cleanup.
Perfect Portion Control: Individual servings mean everyone gets their own personal pie, no fighting over the biggest slice or awkward pie-cutting disasters. Plus, they look adorable on dessert plates, making you appear way more sophisticated than someone who just whipped up dessert in their pajamas.
Lemon Flavor That Pops: Using both zest and juice creates layers of citrus flavor that dance between bright and mellow, never harsh or artificial. This is hands down the best version you'll ever make at home, with a lemon intensity that makes your taste buds sit up and pay attention.
Make-Ahead Champion: These pies actually improve after a few hours in the fridge, making them perfect for dinner parties or potlucks where you want to impress without last-minute stress. The custard sets beautifully, and the flavors meld into something even more spectacular.
Vanilla's Supporting Role: A splash of vanilla doesn't just add flavor — it rounds out the sharp edges of lemon, creating a harmonious balance that makes people close their eyes in happiness. Trust me, skip the vanilla and you'll wonder why your pies taste flat.
Texture Contrast Heaven: The top forms a delicate, slightly crisp layer that gives way to a creamy custard center, creating a textural experience that keeps you coming back for another bite. That sizzle when the sugar caramelizes slightly on top? Absolute perfection.
Inside the Ingredient List
The Flavor Base
Unsalted butter forms the luxurious foundation of these impossible pies, melting into the batter to create richness that makes each bite feel indulgent. I specify unsalted because it lets you control the final seasoning — nobody wants a dessert that tastes like a stick of salted butter had an identity crisis. When the butter melts during baking, it creates tiny pockets of fat that help separate the layers, contributing to that impossible crust formation. If you're out of unsalted butter, you can use salted, but reduce the added salt by half and prepare for a slightly different flavor profile that leans more savory than sweet.
The Texture Crew
All-purpose flour acts as the quiet backbone of this operation, providing just enough structure to hold everything together while still allowing the custard to stay tender and wobbly. Too much flour and you'll have lemon-flavored hockey pucks; too little and you'll have lemon soup in ramekins. The magic ratio here creates a batter that's thin enough to separate during baking but thick enough to set into that dreamy custard layer. If you need a gluten-free version, substitute with a 1:1 gluten-free flour blend, but know that the texture will be slightly more delicate and you might need to reduce the baking time by 2-3 minutes.
Eggs are the real MVPs here, providing the protein structure that transforms a thin liquid into a velvety custard. The yolks contribute richness and that gorgeous yellow color that makes these pies look like sunshine captured in dessert form. Room temperature eggs incorporate more smoothly, preventing any weird scrambled egg bits that could ruin the silky texture. I'll be honest — I ate half the batch before anyone else got to try it, and I'm not sorry because the custard was so perfectly set it jiggled like a happy little lemon cloud.
The Unexpected Star
Fresh lemon zest is where the real lemon flavor lives, containing essential oils that pack way more punch than juice alone. Don't even think about skipping this step or substituting with that dried zest that's been in your spice cabinet since 2019. The zest adds brightness and complexity that makes people ask "what's your secret?" while they inhale their third pie. When zesting, only take the yellow part — the white pith underneath tastes bitter and will make your pies taste like lemon furniture polish instead of lemon heaven.
Whole milk creates the creamy base that carries all the flavors and provides the liquid necessary for the custard to form. Non-fat or low-fat milk can work in a pinch, but whole milk truly makes a difference in creating that luxurious mouthfeel that makes these pies feel special. The fat in whole milk helps prevent curdling and creates a smoother custard that sets perfectly every time. If you're feeling particularly indulgent, you can substitute half-and-half for an even richer dessert that will make your dinner guests propose marriage.
The Final Flourish
Vanilla extract might seem like an afterthought, but it's the ingredient that ties everything together, marrying the lemon and butter flavors into a cohesive dessert that tastes like summer vacation. Use real vanilla extract, not the imitation stuff that smells like cheap candles. A pinch of salt might seem counterintuitive in dessert, but it's essential for balancing sweetness and making the lemon flavor pop against the rich custard base. Think of salt as the backup singer that makes the lead vocalist sound even better — without it, the whole performance falls flat.
The Method — Step by Step
- Start by preheating your oven to 350°F (175°C) and positioning the rack in the center. This temperature is crucial — too hot and your pies will puff up like angry balloons then collapse into sad little craters. While the oven heats, generously butter six 4-ounce ramekins, making sure to get into every corner so your pies release like little soldiers marching out of formation. I like to place the ramekins on a baking sheet for easy transport and to catch any potential overflow, because nobody wants to scrub burnt custard off their oven floor.
- Melt 2 tablespoons of unsalted butter and let it cool slightly while you prepare the other ingredients. The butter should be liquid but not hot enough to scramble your eggs when mixed — think warm bath temperature, not molten lava. This step is where most people rush and end up with weird egg chunks in their custard, so patience here pays off big time. While you're waiting, zest your lemon using a microplane or fine grater, taking only the yellow outer layer and avoiding the bitter white pith underneath.
- In a large bowl, whisk together 2 large eggs and 1/2 cup granulated sugar until the mixture becomes pale yellow and slightly thickened, about 2 minutes of vigorous whisking. This step incorporates air that helps create the light, delicate texture that makes these pies so special. The sugar should be mostly dissolved, creating a smooth base that will prevent graininess in your final custard. Don't worry if your arm gets tired — think of it as your pre-dessert workout, and the reward is worth every whisk stroke.
- Whisk in the melted butter, 1/2 cup whole milk, 2 tablespoons fresh lemon juice, 1 teaspoon lemon zest, 1/2 teaspoon vanilla extract, and a pinch of salt until everything is beautifully combined. The batter will look thin and unimpressive at this stage, like lemon-scented dishwater, but don't panic — this is exactly what we want. The magic happens in the oven where the ingredients will separate into their distinct layers like they're following a choreographed dance routine. Make sure everything is incorporated but don't over-mix, or you'll develop the flour's gluten and end up with tough, rubbery pies.
- Sift in 1/4 cup all-purpose flour and whisk just until no lumps remain, being careful not to overwork the batter. The flour should disappear into the liquid, creating a smooth, pourable consistency that coats the back of a spoon. If you see tiny lumps, don't stress — they'll dissolve during baking, but larger lumps mean you need to whisk a bit more. This next part? Pure magic — the batter will seem too thin to ever become custard, but trust the process.
- Divide the batter evenly among your prepared ramekins, filling each about 3/4 full. The batter will seem to disappear into the bottom, but it will rise and puff during baking, creating those beautiful golden tops. Give each ramekin a gentle tap on the counter to release any large air bubbles that could create weird holes in your custard. Place the baking sheet with the ramekins into the preheated oven and set a timer for 25 minutes, resisting the urge to open the oven door and peek — these babies need consistent heat to work their impossible magic.
- Bake for 25-30 minutes until the tops are golden brown and slightly puffed, with centers that jiggle like a gentle wave when you shake the pan. The edges should look set and slightly pulled away from the sides of the ramekins, while the centers maintain that characteristic custard wobble. Don't wait for them to be completely firm — they'll continue cooking from residual heat and you want that creamy center, not rubbery disappointment. The smell wafting from your oven will make you want to grab a spoon and dive in immediately, but patience, grasshopper, patience.
- Remove from the oven and let cool for 10 minutes on a wire rack — this is the hardest part because they smell incredible and you want to dig in immediately. The cooling period allows the custard to finish setting and prevents tongue-burning disasters that could ruin your dessert experience. During this time, the tops will deflate slightly, creating the perfect little wells for a dusting of powdered sugar. If any pies have overflowed slightly, run a knife around the edges while they're still warm for easier cleanup later.
- Serve warm or at room temperature with a dusting of powdered sugar through a fine-mesh sieve, creating a snow-like topping that melts slightly on contact with the warm custard. These pies are best enjoyed the day they're made, but they'll keep in the fridge for up to 3 days, though the texture becomes more dense. For an extra special touch, add a few fresh berries or a dollop of whipped cream, though honestly, they're perfect just as they are — little individual lemon miracles that prove sometimes the impossible is totally possible.
That's it — you did it. But hold on, I've got a few more tricks that'll take this to another level...
Insider Tricks for Flawless Results
The Temperature Rule Nobody Follows
Room temperature ingredients aren't just a suggestion — they're the difference between silky smooth custard and lumpy disappointment. Cold eggs don't incorporate properly, leaving you with white streaks of egg white that refuse to blend into the batter. Take everything out of the fridge 30 minutes before you start, or speed things up by placing eggs in warm (not hot) water for 10 minutes. The butter should be melted but not hot, or you'll scramble the eggs when you mix them together. A friend tried skipping this step once — let's just say it didn't end well, and she ended up with lemon-flavored scrambled eggs that even her dog wouldn't eat.
Why Your Nose Knows Best
Your sense of smell is the most reliable indicator of when these pies are perfectly done. When the lemon fragrance suddenly intensifies and you can smell sweet custard notes, they're about 2 minutes from perfection. The visual cues matter — golden tops with slightly darker edges — but that aroma change is your secret weapon. If you wait for them to look completely firm, you've already overbaked them by about 5 minutes. Trust your nose, set a timer for 25 minutes, and start paying attention to the smell around minute 22.
The 5-Minute Rest That Changes Everything
After removing the pies from the oven, let them rest for exactly 5 minutes before dusting with powdered sugar. This brief rest allows the surface to cool slightly, preventing the sugar from immediately melting into a sticky mess. It also gives the custard time to finish setting from residual heat, ensuring that perfect creamy texture when you break through the top. During this time, the tops will develop a slight skin that provides the perfect canvas for your sugar snow. Skip this step and you'll have soggy, melted sugar that looks like someone cried on your dessert.
The Lemon Selection Secret
Choose lemons that feel heavy for their size and have smooth, thin skins — these contain the most juice and the zest will be more fragrant. Avoid lemons with thick, bumpy skins or brown spots, as they're older and will have less flavor. Roll them firmly on the counter before juicing to break down the cell walls and release more liquid. One medium lemon typically yields about 2-3 tablespoons of juice, so for this recipe you'll need about one lemon total. The zest should smell bright and citrusy when you scratch the surface with your nail — if it doesn't, find another lemon because this one has given up on life.
Creative Twists and Variations
This recipe is a playground. Here are some of my favorite ways to switch things up:
Lime-Coconut Tropical Escape
Swap the lemon juice and zest for lime, and replace the whole milk with coconut milk for a tropical vacation in dessert form. Add 2 tablespoons of sweetened shredded coconut to the batter for extra texture and flavor. The coconut milk creates an even creamier custard that pairs beautifully with the tart lime. Top with toasted coconut flakes and a small slice of fresh lime for a dessert that tastes like you're sitting on a beach somewhere fabulous.
Orange-Vanilla Dreamsicle
Replace the lemon with orange zest and juice, and double the vanilla extract for a creamsicle-inspired treat that will transport you back to childhood summers. The orange creates a milder, sweeter custard that kids absolutely love. Add a pinch of cardamom to enhance the orange flavor and make it taste sophisticated enough for adult palates. This version is perfect for brunch because it's less tart than the original and pairs beautifully with coffee or tea.
Grapefruit-Rose Sophisticate
Use ruby red grapefruit juice and zest, plus 1/4 teaspoon of rose water for an elegant, grown-up version that tastes like a garden party in dessert form. The grapefruit provides a more complex, slightly bitter citrus note that balances beautifully with the sweet custard. The rose water adds a floral note that makes this feel like something served at a fancy tea room. Garnish with candied grapefruit peel for an extra special touch that will impress even your most jaded dinner guests.
Meyer Lemon Luxury
Meyer lemons create a sweeter, more floral version that's less tart than regular lemons, perfect for those who find traditional lemon desserts too puckery. Reduce the sugar by 2 tablespoons since Meyer lemons are naturally sweeter. The resulting pies have a delicate, almost perfume-like quality that makes them feel incredibly special and sophisticated. Meyer lemons are usually available in winter, making this a perfect seasonal variation that celebrates citrus season.
Lavender-Honey Tranquility
Add 1/2 teaspoon of culinary lavender and replace 2 tablespoons of sugar with honey for a dessert that tastes like a Provencal afternoon. Steep the lavender in the milk for 10 minutes, then strain before using — this infuses the flavor without adding texture. The honey creates a more complex sweetness that pairs beautifully with the floral notes. This version is perfect for bridal showers or any event where you want to serve something delicate and memorable.
Blood Orange Beauty
Blood oranges create stunning pink-hued pies that look like they're blushing, with a unique raspberry-citrus flavor that's absolutely captivating. The color intensifies during baking, creating desserts that look like they belong in a French patisserie. Blood oranges are typically available in late winter, making this a perfect way to brighten up dreary winter days. The flavor is more complex than regular oranges, with wine-like notes that make these feel incredibly sophisticated.
Storing and Bringing It Back to Life
Fridge Storage
These mini pies will keep in an airtight container in the refrigerator for up to 3 days, though they're best within the first 24 hours when the texture is at its peak. Store them in their ramekins covered with plastic wrap, or remove them and store in a single layer separated by parchment paper. The custard will become more dense as it chills, but the flavor actually improves as the lemon has time to meld with the other ingredients. Bring them to room temperature for 30 minutes before serving for the best texture, or enjoy them cold for a refreshing treat on hot days.
Freezer Friendly
While these pies are best fresh, you can freeze them for up to 1 month if you absolutely must. Wrap each cooled pie (removed from the ramekin) tightly in plastic wrap, then in foil, and place in a freezer bag. Thaw overnight in the refrigerator, then bring to room temperature before serving. The texture won't be quite as silky as fresh, but they're still delicious and perfect for emergency dessert situations. Don't dust with powdered sugar before freezing — wait until serving for the best presentation.
Best Reheating Method
If you must reheat these (though they're wonderful cold), do it gently to prevent curdling the custard. Place them in a 300°F oven for 5-7 minutes, just until slightly warm to the touch. Avoid microwaving, which can create hot spots and turn your custard rubbery. Add a tiny splash of water before reheating — it steams back to perfection and prevents drying out. They're actually quite lovely at room temperature, so when in doubt, just let them sit out for 30 minutes and enjoy them as-is with fresh powdered sugar on top.