I was standing in my kitchen, elbows deep in a bowl of flour, when my roommate burst in yelling, “You’re missing the perfect Fourth of July snack!” I stared at the half‑finished dough, the butter still soft, the sugar glistening like fireworks on a summer night, and I thought, “Challenge accepted.” The scent of vanilla and almond drifted through the air, mingling with the faint hum of the refrigerator, and I could almost hear the distant pop of sparklers. I had tried countless sugar‑cookie recipes over the years—some too cakey, some too flat, some that just didn’t capture that patriotic punch—and I was determined to create the one that would make even the most skeptical uncle say, “Wow, that’s actually good.”
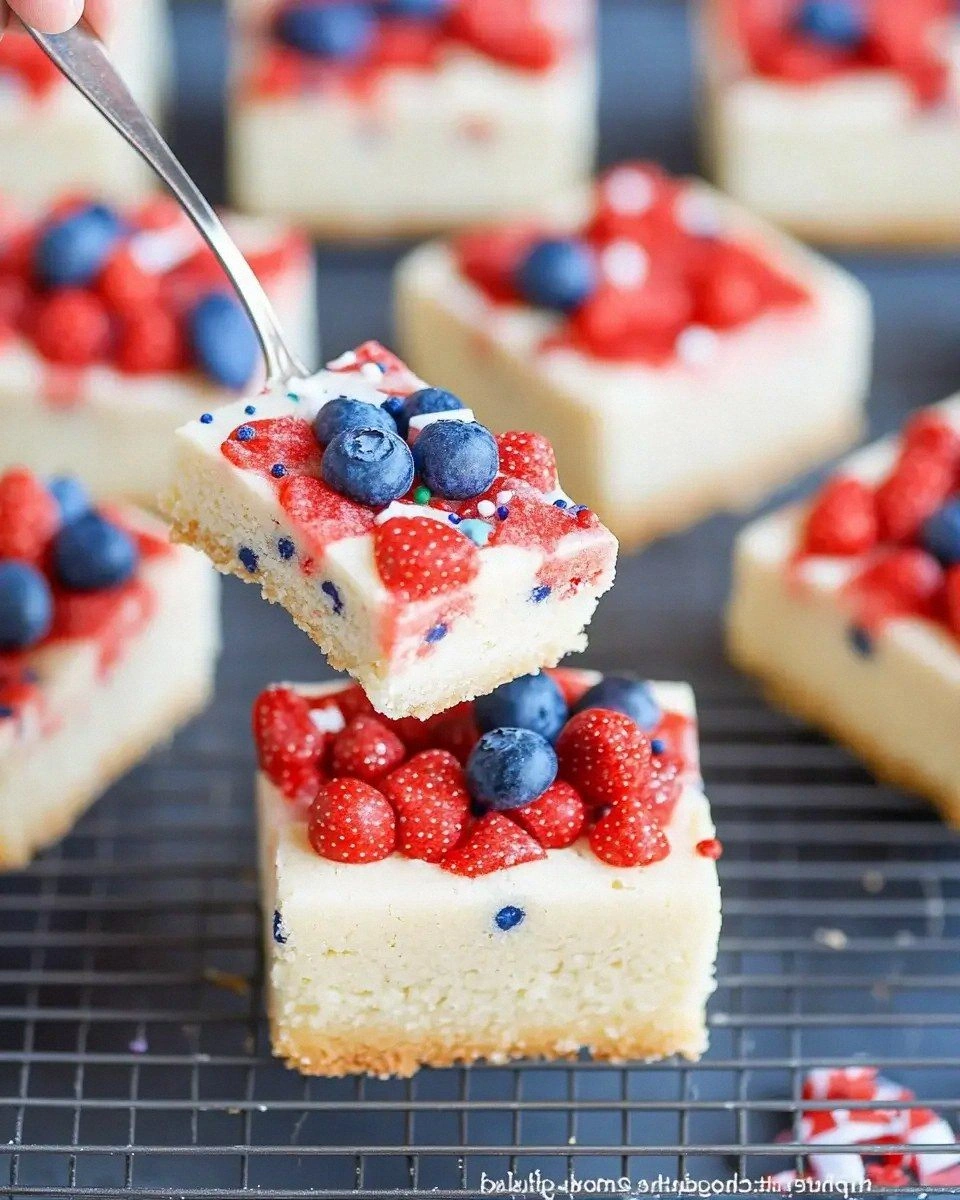
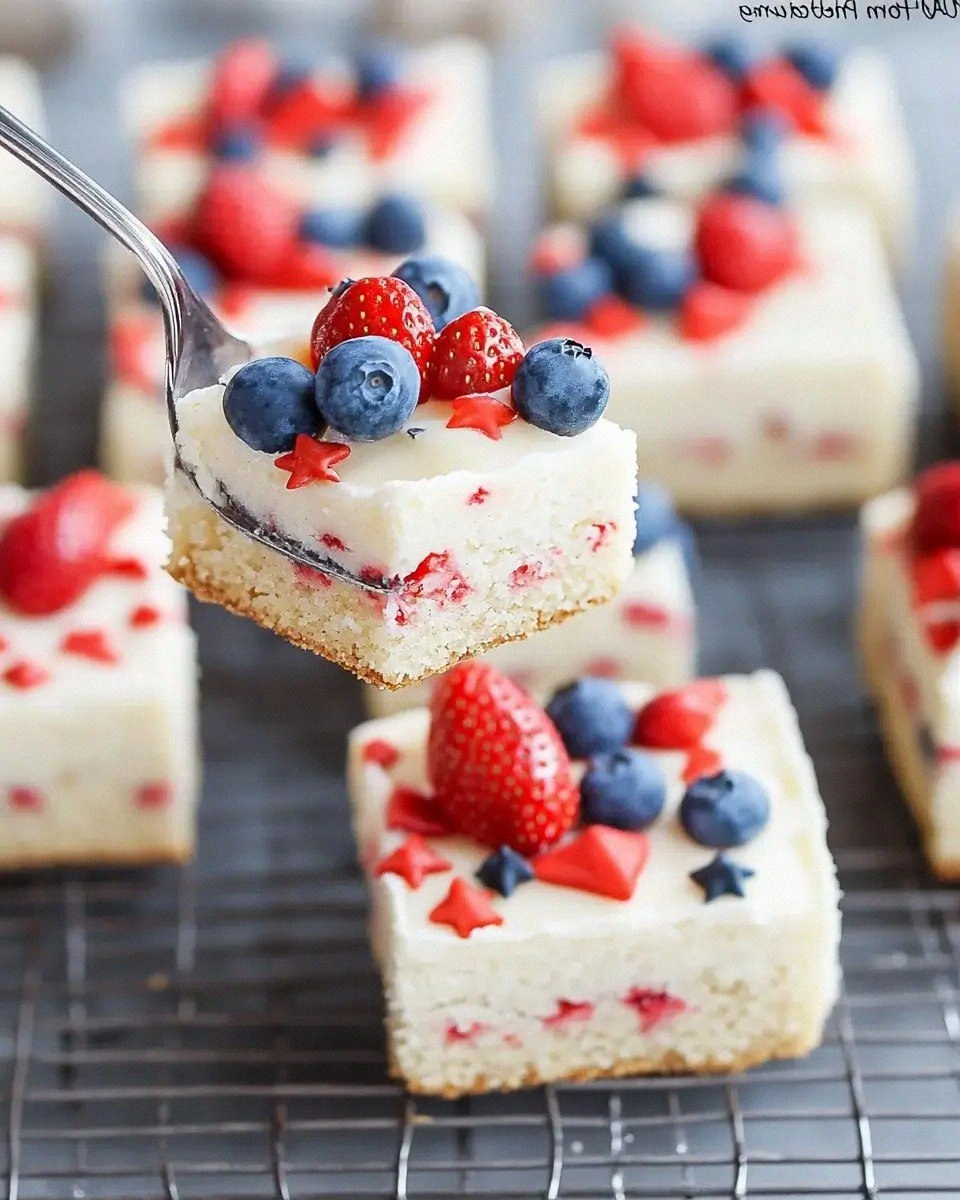
Picture this: a tray of golden‑brown bars, their edges crisp as a freshly unrolled flag, the centers soft and chewy like a cloud of sweet nostalgia. The top is dusted with powdered sugar so white it could double as a snowfield, then sprinkled with a riot of red and blue confetti that crackles under your fingertips. When you bite into one, the first thing you notice is the buttery melt that slides across your tongue, followed by a burst of vanilla‑almond harmony that makes your taste buds do a little patriotic jig. The texture is a perfect balance—crunchy on the outside, tender on the inside—like a well‑executed marching band routine where every instrument hits its note on cue.
Most recipes get this completely wrong. They either overload the dough with too much sugar, resulting in a brittle, crumbly mess, or they skimp on the butter, leaving you with a dry, lifeless bar that could double as a building block. The secret to this version? A precise ratio of butter to flour, a dash of almond extract for depth, and a surprise splash of milk in the glaze that keeps the powdered sugar from turning into a gritty sandcastle. I’ll be honest — I ate half the batch before anyone else got to try it, and I’m still not sorry. The result is hands down the best version you’ll ever make at home, and I dare you to taste this and not go back for seconds.
Okay, ready for the game‑changer? I’m about to walk you through every single step — from selecting the perfect butter to mastering that glossy glaze that shines like a freshly polished trophy. By the end, you’ll wonder how you ever made any other sugar‑cookie bar, and you’ll have a festive treat that screams celebration with every bite. Let me walk you through every single step — by the end, you’ll wonder how you ever made it any other way.
What Makes This Version Stand Out
- Flavor: The combination of vanilla and almond extracts creates a layered aromatic profile that feels both familiar and unexpectedly sophisticated.
- Texture: A buttery crust that snaps like fresh fireworks, paired with a chewy interior that melts like butter on a hot skillet.
- Simplicity: Only twelve ingredients, five of which you probably already have in your pantry, so there’s no need for a special grocery run.
- Uniqueness: The red‑and‑blue sprinkles aren’t just for show; they add a subtle crunch that contrasts the soft crumb.
- Crowd Reaction: Even the pickiest kids will line up for seconds, and adults will secretly admit they’re impressed.
- Ingredient Quality: Using real unsalted butter and pure extracts makes the flavor sing, unlike generic margarine shortcuts.
- Cooking Method: Baking on a parchment‑lined sheet ensures even heat distribution, preventing soggy spots.
- Make‑Ahead Potential: These bars keep beautifully for up to a week, and the glaze can be stored separately for a quick finish later.
Inside the Ingredient List
The Flavor Base
The duo of vanilla extract and almond extract is the secret sauce that lifts these bars from ordinary to extraordinary. Vanilla brings that warm, comforting note that reminds you of grandma’s kitchen, while almond adds a nutty whisper that deepens the overall palate. If you’re allergic to nuts, a splash of maple extract can mimic the sweet‑nutty nuance without the risk. When selecting vanilla, opt for pure extract over imitation; the difference is like night versus day when the aroma hits your nose.
The Texture Crew
Unsalted butter is the heart of any good sugar cookie. Its fat content creates that melt‑in‑your‑mouth feel, and because it’s unsalted you control the salt level precisely. Granulated sugar not only sweetens but also contributes to the slight crispness on the edges; the caramelization during baking gives you that golden‑brown halo. All‑purpose flour provides structure, and the 2 ½‑cup measurement is calibrated to keep the bars tender yet sturdy enough to hold the glaze. If you’re gluten‑sensitive, a 1‑to‑1 swap with a high‑quality oat flour works surprisingly well, though the texture will be a touch denser.
The Unexpected Star
Red and blue sprinkles are more than a visual cue; they add a gentle crunch that contrasts the soft crumb. Choose non‑metallic sprinkles to avoid any metallic aftertaste. If you’re feeling adventurous, try a mix of pastel confetti for a softer patriotic vibe, or swap half the sprinkles for crushed freeze‑dried strawberries for a pop of natural fruit flavor. The powdered sugar glaze is the final flourish, creating a snow‑like veil that melts into the warm bar, sealing in moisture.
The Final Flourish
A splash of milk in the glaze prevents the powdered sugar from becoming gritty, ensuring a silky finish that clings to each bar like a second skin. The second vanilla extract in the glaze reinforces the aromatic thread that runs through the whole recipe, tying the flavors together. Finally, a pinch of baking powder and salt balances sweetness and encourages a slight rise, giving the bars that airy lift without making them cake‑like. If you’re watching sodium, reduce the salt to a quarter teaspoon; the flavor will still shine.
Everything's prepped? Good. Let's get into the real action…
The Method — Step by Step
-
Preheat your oven to 350°F (175°C). While the oven warms, line a 9×13‑inch baking pan with parchment paper, letting the excess hang over the sides for an easy lift‑out later. This step may sound trivial, but a well‑lined pan prevents sticking and gives you that clean, professional look that says “I know what I’m doing.” The kitchen will start to smell faintly of butter as you melt it—trust me, that’s the first sign you’re on the right track.
Kitchen Hack: Use a silicone baking mat instead of parchment for a reusable, non‑stick surface that saves money in the long run. -
In a large mixing bowl, whisk together the flour, baking powder, and salt until fully combined. This aerates the dry ingredients, preventing any clumps that could turn your bars into a dense brick. I like to sift the mixture twice—once to incorporate the leavening evenly, and a second time for a cloud‑like texture that makes the dough featherlight. Once blended, set the bowl aside while you prep the butter.
-
Cube the unsalted butter (cold, but not rock‑solid) and place it into a stand mixer fitted with the paddle attachment. Beat on medium‑high speed for about 2 minutes, until the butter turns pale and fluffy, resembling freshly whipped cloud. The goal is to incorporate air, which later translates into those crisp edges we all love. Stop the mixer, scrape down the sides, and add the granulated sugar. Continue beating until the mixture is light, almost like a sugar‑spun carnival ride.
-
Add the two large eggs, one at a time, beating well after each addition. Then stir in the vanilla and almond extracts. This is the moment of truth: the batter should smell like a sweet perfume—rich, buttery, with a hint of nutty warmth. If the aroma isn’t there yet, give it another 30 seconds; the flavors need a minute to marry.
Watch Out: Over‑mixing at this stage can develop gluten, leading to a tough bar. Stop as soon as the batter looks smooth and glossy. -
Gradually add the dry flour mixture to the wet ingredients, mixing on low speed until just combined. The dough will look a bit shaggy—that’s perfect. Over‑mixing will cause the butter to melt prematurely, compromising that buttery snap we’re after. Once the flour disappears, fold in the red‑and‑blue sprinkles, spreading them evenly so each bite gets a burst of color.
-
Transfer the dough onto the prepared parchment, spreading it with an offset spatula into an even ½‑inch layer. Press the edges down gently; they’ll become the crisp “border” that frames the soft center. If you want perfectly square bars, use a ruler to measure 1‑inch borders on each side. The dough should feel slightly tacky but not sticky—if it sticks to your hands, dust the surface lightly with flour.
-
Slide the pan into the preheated oven and bake for 18‑22 minutes. You’ll know it’s ready when the edges start pulling away from the parchment and turn a light golden brown, and the top gives a faint, toasty perfume. Keep a close eye after the 18‑minute mark; over‑baking will dry out the interior. Let the bars cool in the pan for 10 minutes—this allows the structure to set, preventing them from crumbling when you cut them.
Kitchen Hack: Place a cooling rack on top of the parchment while the bars rest; this lets air circulate on both sides for an even cool‑down. -
While the bars are cooling, whisk together the powdered sugar, milk, and the second teaspoon of vanilla extract to create a glossy glaze. The mixture should be smooth, with a pourable consistency—if it’s too thick, add a splash more milk; if too runny, a dusting of extra powdered sugar will thicken it. The glaze is the final flourish, turning each bar into a glossy, patriotic masterpiece.
-
Once the bars are completely cool, lift them out using the parchment overhang, place on a cutting board, and drizzle the glaze generously. Use a spatula to spread any excess, ensuring every nook is coated. Let the glaze set for about 15 minutes; it will firm up just enough to give a slight snap when you bite. Slice into 12 even squares, serve, and watch the faces light up like fireworks on the 4th of July.
That’s it — you did it. But hold on, I've got a few more tricks that'll take this to another level…
Insider Tricks for Flawless Results
The Temperature Rule Nobody Follows
Never bake sugar cookies straight from the fridge. Let the dough rest at room temperature for at least 10 minutes before sliding it into the oven. This small pause allows the butter to soften just enough to spread evenly, preventing those dreaded “pancake” edges. I once rushed this step and ended up with bars that were flat as a pancake—trust me, the disappointment was real.
Why Your Nose Knows Best
Your sense of smell is the most reliable timer in the kitchen. When the butter‑sugar mixture turns a pale, creamy color and emits a sweet, nutty aroma, you’re ready to add the eggs. If you rely solely on a timer, you might miss that subtle cue and end up with a mixture that’s either under‑beaten or over‑mixed. Trust the nose; it’s the original kitchen timer.
The 5‑Minute Rest That Changes Everything
After mixing the dry and wet ingredients, let the dough rest for five minutes. This brief pause hydrates the flour, resulting in a more tender crumb and reducing the chance of a tough, rubbery texture. I once skipped this rest and the bars turned out dense—lesson learned, and now I never skip it.
Glaze Consistency is Key
If your glaze is too thick, it will clump and create unsightly lumps; too thin, and it will run off the bars, leaving a sugary mess. The secret is to add milk drop‑by‑drop while whisking vigorously. The glaze should coat the back of a spoon lightly—think of it as a silky veil, not a waterfall.
Cool Before Cutting
Patience is a virtue, especially when it comes to cutting these bars. Let them cool completely before slicing; otherwise, the glaze will smear and the bars will crumble. I’ve watched impatient bakers slice warm bars only to see them crumble like dry leaves—don’t be that person.
Creative Twists and Variations
This recipe is a playground. Here are some of my favorite ways to switch things up:
Chocolate‑Swirl Surprise
Swap half of the granulated sugar for brown sugar and swirl in ¼ cup of melted dark chocolate before baking. The result is a marbled bar that balances sweet and bittersweet flavors, perfect for chocolate lovers who still want that patriotic color pop.
Citrus Zest Burst
Add the zest of one lemon and one orange to the batter, and replace the red‑and‑blue sprinkles with a mix of candied citrus peel. The bright citrus notes lift the sweetness, making the bars feel fresher and more summery.
Nutty Crunch Variation
Fold in ½ cup of finely chopped toasted almonds or pecans alongside the sprinkles. The nuts add an earthy crunch that pairs beautifully with the almond extract, creating a harmonious nut‑forward profile.
Spiced Holiday Edition
Introduce ¼ teaspoon of ground cinnamon and a pinch of nutmeg to the dry mix, then use red and green sprinkles instead of blue. This transforms the bars into a festive treat for Thanksgiving or Christmas while keeping the core buttery goodness.
Gluten‑Free Freedom
Replace the all‑purpose flour with a 1‑to‑1 gluten‑free blend that contains xanthan gum. The texture will be slightly more crumbly, but the glaze and butter will still deliver that melt‑in‑your‑mouth experience.
Storing and Bringing It Back to Life
Fridge Storage
Place the cooled bars in an airtight container with a sheet of parchment between layers. They’ll stay fresh for up to five days, and the fridge helps keep the glaze from getting sticky on hot days. If you’re serving them cold, the texture becomes a delightful bite‑size chew.
Freezer Friendly
Wrap the entire parchment sheet tightly in foil, then place it in a freezer‑safe zip‑lock bag. The bars freeze beautifully for up to three months. When you’re ready to enjoy them, thaw at room temperature for 30 minutes, then give the glaze a quick brush of fresh milk to revive its shine.
Best Reheating Method
To bring a refrigerated bar back to its just‑out‑of‑the‑oven glory, preheat your oven to 300°F (150°C), place the bar on a baking sheet, and heat for 5‑7 minutes. Add a tiny splash of milk (about a teaspoon) over the top before reheating; the steam generated will re‑moisten the interior while the glaze regains its glossy finish.