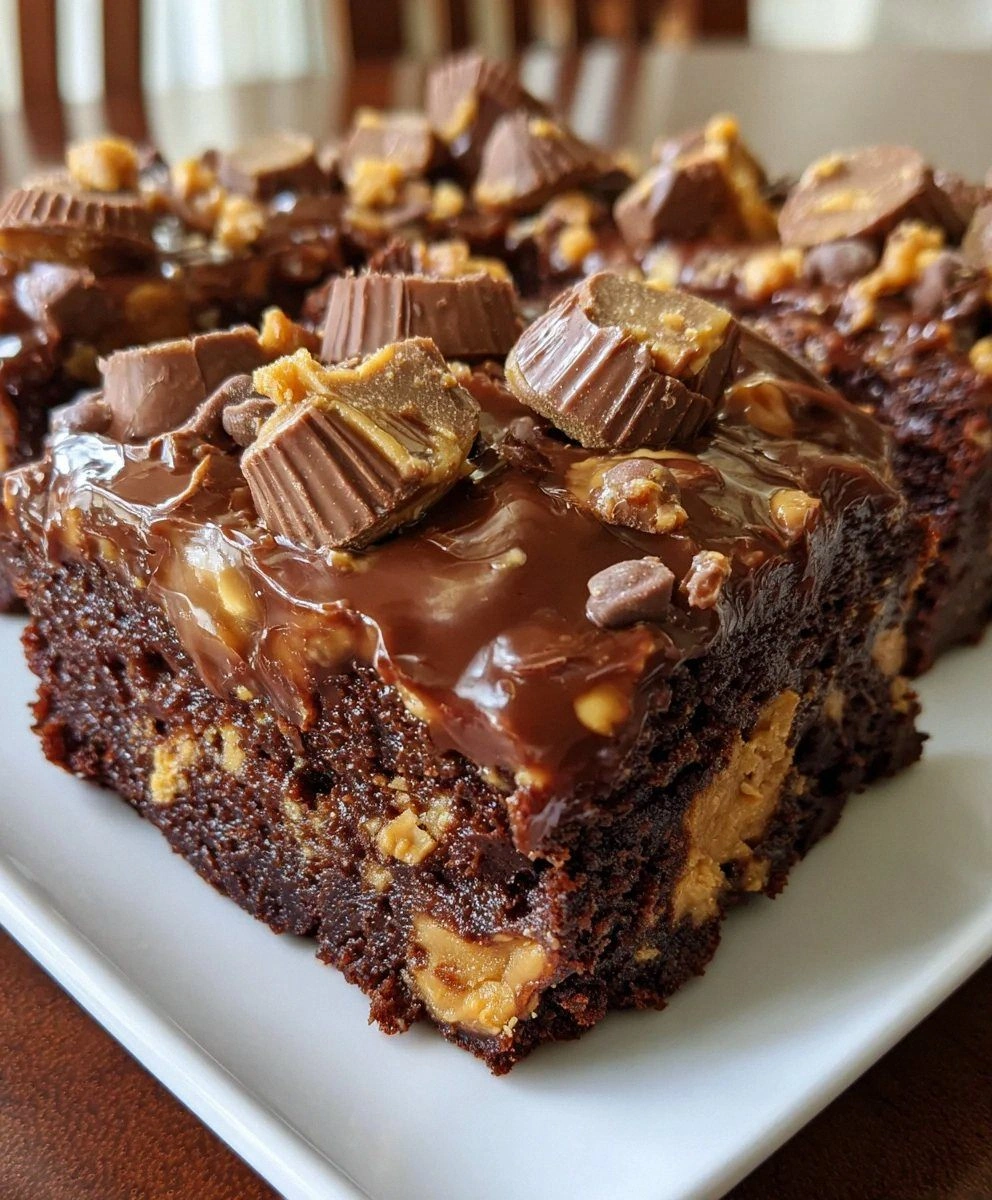
I still remember the night this Peanut Butter Cup Dump Cake saved my sanity. It was one of those evenings when the universe conspires against you: the dog had rolled in something unmentionable, my phone buzzed with a "we're five minutes away" text from my in-laws, and the smell of burnt lasagna still clung to the air like an unwelcome guest. In desperation, I started flinging pantry staples into a baking dish, muttering words that would make a sailor blush. Twenty-five minutes later, the most intoxicating aroma of molten chocolate and peanut butter wafted through the house, wrapping around us like a warm hug. My mother-in-law took one bite, raised an eyebrow, and asked if I'd been secretly taking pastry classes. If she only knew the truth—that this glorious mess of chocolate cake, pudding, and candy was born from pure chaos—she might have fainted on the spot.
But that's the beauty of this dessert. It doesn't care if you're a seasoned baker or someone who usually burns water. It rewards impulsive midnight cravings, soothes broken hearts after brutal breakups, and turns casual weeknight dinners into legendary family stories. The first forkful hits you with that familiar chocolate cake comfort, then bam—those pockets of melted mini peanut butter cups explode like tiny flavor bombs, creating this ridiculous dance between rich cocoa and salty-sweet peanut butter. The pudding layer sneaks in underneath, keeping everything absurdly moist, almost fudgy, like someone accidentally dropped a brownie into your cake and decided that was the best mistake ever.
Most dump cake recipes play it safe, settling for canned fruit and boxed cake mix in a marriage of convenience that tastes exactly like what it is: lazy. This version flips the script entirely. We start with the same humble boxed mix, sure, but we coax it into something extraordinary by layering in chocolate pudding for silkiness, using room-temperature milk for better absorption, and folding in chopped mini Reese's so every bite has that candy-bar nostalgia. The result? A dessert that tastes like someone spent hours on it, when really you spent more time unwrapping candy than actually cooking.
Picture yourself pulling this out of the oven, the whole kitchen smelling like a Willy Wonka fever dream. The top is crackly and golden, the edges bubbling like a chocolate lava field, and you can already see those peanut butter cups melting into gooey pools of heaven. Let me walk you through every single step—by the end, you'll wonder how you ever made it any other way.
What Makes This Version Stand Out
Instant Crowd Magnet: Bring this to any potluck and watch grown adults elbow each other for corner pieces. I've seen it disappear in under eight minutes at office parties, leaving behind only smears of chocolate on paper plates and a lot of sheepish grins.
Zero Skill Required: If you can operate a can opener and remember to breathe, you can nail this recipe. No creaming butter, no folding egg whites, no praying to the baking gods that your cake won't sink like a stone in the middle.
Pure Texture Heaven: Every spoonful delivers the holy trinity of dessert textures: soft cake, creamy pudding, and those glorious candy chunks that stay slightly firm, giving you something to sink your teeth into.
Pantry Raid Champion: Uses ingredients you probably already have lurking in your cabinets right now. That half-used box of cake mix? The pudding mix you bought for that diet you abandoned? They're about to become legends.
Make-Ahead Magic: This actually improves after a day in the fridge, turning into this dense, almost truffle-like confection that you can slice like brownies. I dare you to taste this and not go back for seconds.
Endless Flexibility: Swap in different cake flavors, use white chocolate pudding, try chopped Snickers or Heath bars—it's like a Choose Your Own Adventure book, but every ending is delicious.
Pure Comfort Factor: This is the edible equivalent of your favorite worn-in sweatshirt, delivering that same cozy satisfaction but with way more chocolate and zero calories from self-control.
The Final Flourish
While the cake bakes, those mini peanut butter cups undergo a fascinating transformation. The chocolate shell melts first, creating little chocolate puddles, while the peanut butter interior stays slightly firmer due to its lower sugar content. This temperature differential is what gives you those distinct peanut butter pockets instead of everything just dissolving into chocolate-peanut butter soup. The candy near the edges gets toastier, developing these caramelized notes that taste like someone invented peanut butter dulce de leche.
Everything's prepped? Good. Let's get into the real action...
The Method — Step by Step
- Preheat your oven to 350°F (175°C) and position the rack in the center—this ensures even heat distribution so you don't end up with a soupy middle and burnt edges. While it's heating, grab a 9x13-inch baking dish and give it a light coating of non-stick spray, but don't go overboard or the bottom will fry and get weirdly crispy. This is the moment of truth where we transform humble boxed mix into something that tastes like it came from a boutique bakery. The anticipation building right now? That's completely normal—embrace it.
- Open your chocolate cake mix and dump it directly into the baking dish, spreading it into an even layer with the back of a spoon. Resist the urge to mix up the batter first—that's not how dump cakes roll. We're creating a foundation that will absorb all the liquid ingredients like a chocolate sponge, resulting in that signature gooey-underneath, cakey-on-top texture that makes people fight over corner pieces. If you've ever struggled with dry cake, you're not alone—and I've got the fix right here.
- In a medium bowl, whisk together the chocolate instant pudding mix and room-temperature milk for exactly two minutes—set a timer because under-mixing leaves powdery pockets while over-mixing activates too much starch and creates a gummy texture. The mixture should look like thick chocolate soup and coat your whisk in velvety ribbons. This next part? Pure magic. Stir in that tablespoon of smooth peanut butter until it disappears completely, creating this luscious backdrop that will make your cake taste like a giant Reese's exploded in the best possible way.
- Now comes the fun part: scatter your unwrapped mini peanut butter cups across the dry cake mix. Don't just dump them in a pile—think of it like planting a candy garden where every bite will harvest peanut butter treasure. Press them down slightly so they're nestled in but still peeking out; this prevents them from floating to the top and burning while ensuring they don't sink completely to the bottom where they'll turn into a sticky mess. If you've ever wondered why most recipes get this completely wrong, it's because they either bury the candy or leave it exposed—neither works as well as this happy medium.
- Pour the pudding mixture slowly over the entire surface, resisting the urge to stir—this is where the "dump" in dump cake earns its name. The liquid will look like it's not enough coverage, but trust the process as it seeps into every crack and crevice, transforming your candy garden into a chocolate swamp that will bake into pure decadence. Use a spatula to gently nudge the liquid into corners, but stop before you start mixing layers; maintaining those distinct strata is what creates the magical texture contrast.
- Slide the dish into your preheated oven and bake for 30-35 minutes, but don't walk away from the kitchen here. Around the 25-minute mark, you'll notice the edges start to bubble like a chocolate lava field—that's your cue to check for doneness. The center should jiggle slightly like set gelatin, while the edges pull away from the pan and look glossy. If you insert a toothpick, it should come out with moist crumbs, not wet batter, because this cake is supposed to be fudgy and will continue cooking from residual heat.
- While it's baking, your house will start smelling like a chocolate factory had a baby with a peanut butter processing plant, and neighbors may spontaneously appear at your door with empty plates. This is hands down the best version you'll ever make at home because the combination of boxed convenience with candy bar luxury creates something greater than the sum of its parts. The aroma alone is worth the price of admission—rich chocolate notes mingling with toasty peanut butter, creating an olfactory experience that should be bottled and sold as aromatherapy.
- Remove from the oven and let it rest for exactly ten minutes—this is the 5-minute rest that changes everything, extended to ten because we're dealing with molten candy here. During this time, the pudding layer settles, the cake finishes its final baking from residual heat, and those peanut butter cups achieve their optimal gooey-yet-held-together texture. Sprinkle that pinch of flaky sea salt across the top now while the surface is still tacky; it'll adhere gently and start dissolving just enough to create flavor-enhancing pockets of salinity without overwhelming the sweetness.
- Serve warm in generous spoonfuls, ideally with vanilla ice cream that melts into the cracks and creates rivers of creamy contrast against the dense chocolate. The edges will have formed this delicate crust that's slightly crisp like a brownie's top, while the interior remains spoonably soft with candy surprises in every bite. If you've ever struggled with serving temperature, room temperature is fine, but warm is where the magic happens—the peanut butter stays fluid, the chocolate melts on your tongue, and you achieve that restaurant-quality experience that makes people close their eyes involuntarily.
That's it—you did it. But hold on, I've got a few more tricks that'll take this to another level...
Insider Tricks for Flawless Results
The Temperature Rule Nobody Follows
Room temperature isn't just a suggestion—it's the difference between a smooth, evenly textured cake and one with weird dry spots where the cold milk caused the pudding to seize up before it could distribute. Take your milk out of the fridge when you start preheating the oven, and let your eggs (if you're adding any extras) hang out on the counter too. This tiny bit of patience pays off in a cake that bakes evenly instead of having a sunken middle where cold ingredients slowed down the rising action. Your nose knows best when it's done: when you can smell chocolate and peanut butter in equal measures, it's usually ready or within two minutes of perfection.
Why Your Nose Knows Best
Professional bakers don't rely on timers alone—they use all their senses, and your sense of smell is particularly tuned into when this cake hits its peak. When the aroma shifts from raw chocolate to something deeper, almost caramel-like, with toasty peanut butter notes, that's your cake talking to you. If you wait for a timer while ignoring these signals, you'll likely overbake and lose those glorious gooey candy pockets that make this dessert legendary. Trust the process: when your kitchen smells like a candy shop exploded in the best possible way, grab your oven mitts.
The 5-Minute Rest That Changes Everything
I know patience is in short supply when warm chocolate is calling your name, but those five minutes of resting time allow the pudding layer to set just enough to create distinct textures instead of everything collapsing into chocolate soup. During this time, the candy firms up slightly so you get that perfect contrast between soft cake and slightly chewy candy pieces. Skip this step and you'll have a dessert that tastes delicious but lacks the textural interest that makes people ask for the recipe before they've even swallowed their first bite.
The Salt Timing Secret
Adding salt before baking causes it to dissolve completely and season the entire cake, but sprinkling it on immediately after baking creates these tiny pockets of salinity that make the chocolate taste more chocolatey and the peanut butter more peanut-buttery. It's like having a built-in flavor enhancer that activates differently in each bite. Use flaky sea salt if you have it—the larger crystals provide little bursts of contrast, while table salt just makes everything taste vaguely salty. A friend tried skipping this step once—let's just say it didn't end well, and she still texts me every time she makes it to confirm the salt quantity.
Creative Twists and Variations
This recipe is a playground. Here are some of my favorite ways to switch things up:
White Chocolate Wonderland
Swap the chocolate cake mix for yellow cake and use white chocolate pudding mix instead. The result tastes like a giant peanut butter cup that's been kissed by vanilla, creating this elegant flavor profile that works surprisingly well for bridal showers or baby gender reveals. Add white chocolate chips on top for extra visual drama and textural variety—those little white specks against the golden cake look professionally styled even when you just threw it together in a panic.
Salty Caramel Crush
Drizzle caramel sauce over the top during the last five minutes of baking, then sprinkle with crushed pretzels immediately after removing from the oven. The sweet-salty combination elevates this from comforting to completely addictive, and the pretzels stay surprisingly crisp in the caramel, giving you these delightful crunchy surprises. If you've ever struggled with desserts that are too one-note, this variation adds complexity while maintaining the original's crowd-pleasing appeal.
Dark Chocolate Decadence
Use devil's food cake mix and dark chocolate pudding, then fold in chopped dark chocolate peanut butter cups (Trader Joe's makes excellent ones). This version tastes like it belongs in a fancy chocolate shop, with deeper, more sophisticated flavors that make chocolate snobs weak in the knees. The darker chocolate balances the peanut butter's sweetness, creating a more adult version that pairs beautifully with espresso or red wine.
Holiday Spice Spectacular
Add a teaspoon of cinnamon and a quarter-teaspoon of cayenne to the dry cake mix for a Mexican hot chocolate vibe that makes this perfect for winter gatherings. The spices warm everything up without overwhelming the chocolate-peanut butter dynamic, and the slight heat makes people reach for cold milk or vanilla ice cream, extending the eating experience. This is my go-to for holiday potlucks where everyone expects the same old desserts—watch their faces when they get that subtle spicy kick.
Banana Split Remix
Layer thin banana slices over the cake mix before adding the pudding, then top with chopped peanuts and maraschino cherries during the last few minutes of baking. The bananas melt into the cake, adding moisture and that nostalgic banana split flavor that makes everyone feel like a kid again. If you think peanut butter and banana is a cliché, this combination will remind you why classics become classics in the first place.
Kid-Friendly M&M Explosion
Replace half the peanut butter cups with mini M&Ms for a colorful, fun version that disappears faster at birthday parties than the actual cake. The candy coating stays crisp while the chocolate inside melts slightly, creating these little bursts of color and texture that make kids think you're a kitchen wizard. Adults sneak pieces too—they just can't resist the nostalgia factor of those bright candy shells.
Storing and Bringing It Back to Life
Fridge Storage
Cover tightly with plastic wrap or transfer to an airtight container—this cake actually improves after a day in the fridge, turning dense and fudgy like a cross between cake and candy. It'll keep for up to five days, though honestly, it's never lasted more than two in my house. The peanut butter cups firm up slightly but maintain their distinctive flavor, while the pudding layer thickens into this almost truffle-like consistency that you can slice like brownies. Pro tip: add a tiny splash of water before reheating—it steams back to perfection instead of drying out like most refrigerated cake.
Freezer Friendly
Cut into individual portions and wrap each piece in plastic wrap, then foil—these frozen squares are like homemade candy bars that you can grab for emergency chocolate cravings. They'll keep for two months in the freezer, though the texture changes slightly, becoming more dense and candy-like. Thaw overnight in the fridge or for 30 seconds in the microwave, but don't overdo it or you'll lose those glorious textural contrasts. If you've ever struggled with portion control, having pre-cut frozen pieces means you can enjoy just one serving instead of accidentally eating half the pan while standing at the counter.
Best Reheating Method
Individual portions reheat beautifully in the microwave for 15-20 seconds—just enough to warm the chocolate and soften the peanut butter without turning everything into hot lava. For larger portions, cover with foil and warm in a 300°F oven for 10-12 minutes, adding that splash of water to create steam. The cake revives like magic, returning to that fresh-from-the-oven experience that makes people think you baked it that day. Room temperature works too, but warm is where the flavors really sing and the textures achieve their optimal gooey-cakey balance.