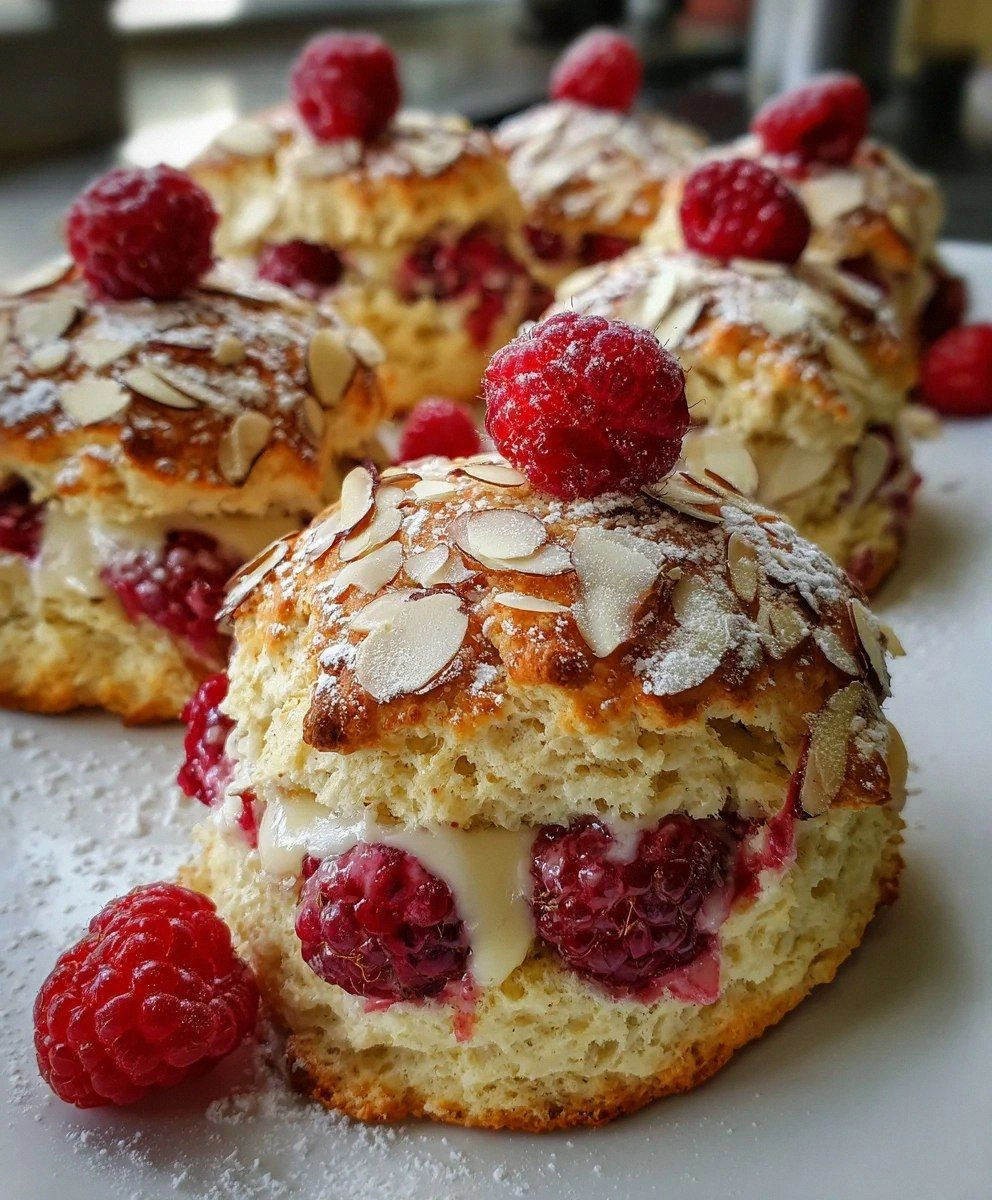
I still remember the day I nearly gave up on scones forever. There I was, standing in my tiny kitchen at 6 AM, flour in my hair, staring at a tray of what looked like hockey pucks with berries. The recipe promised "fluffy, tender scones" but delivered something that could chip a tooth. My neighbor, who'd volunteered to be my taste-tester, took one bite, made that face — you know the one — and politely asked if these were "some kind of artisanal dog treats." That was my breaking point. I became obsessed with creating the perfect scone, one that would make you close your eyes and sigh with the first bite. After months of testing, tweaking, and eating more failed attempts than I care to admit, I finally cracked the code. These Raspberry Almond Scones Soft are everything those rock-hard disasters weren't: cloud-like tender, bursting with juicy berries, kissed with almond perfume, and so delicate they practically melt on your tongue.
Picture this: golden-brown wedges studded with ruby raspberries, their edges just crisp enough to provide a whisper of resistance before giving way to an almost cake-like interior. The almond extract weaves through each bite like a sweet secret, while the crunchy sugar top crackles between your teeth. That first warm scone, split open and steaming, releases a perfume that makes your neighbors knock on your door asking what you're baking. I dare you to taste one and not immediately reach for a second — I certainly couldn't, and I'll be honest, I ate half the batch before anyone else got to try it. The secret isn't just in the ingredients, though we'll get to those. It's in the technique that most recipes get completely wrong, turning what should be ethereal into edible bricks.
Here's what actually works: keeping everything colder than your ex's heart, handling the dough less than you'd pet a cat that doesn't want to be touched, and understanding that scones are basically sophisticated little dramas of steam and butter. Most recipes treat them like tough cookies, but we're making tender pillows of joy that practically float off the baking sheet. The combination of Greek yogurt and cream creates this magical tenderness that makes people ask if you added some kind of kitchen wizardry. Trust me, once you master this technique, you'll never look at another scone recipe again. Picture yourself pulling these out of the oven, the whole kitchen smelling like a French bakery had a baby with an almond orchard, and knowing you've got something that'll make even that one friend who "doesn't like sweets" beg for the recipe.
Let me walk you through every single step — by the end, you'll wonder how you ever made it any other way. We're going to cover everything from why your butter temperature matters more than your dating profile pictures to the game-changing move that happens right before baking. Get ready to become the person everyone asks to bring scones to brunch, the one whose house smells like heaven on Sunday mornings, the baker who actually knows what "soft" really means in a scone.
What Makes This Version Stand Out
Cloud-Soft Texture: These aren't your typical dry, crumbly scones that require a gallon of tea to wash down. We're talking pillow-soft interior that practically melts on your tongue, achieved through a combination of Greek yogurt and chilled cream that creates steam pockets during baking. The result is a scone that's more like a tender biscuit had a beautiful baby with a coffee cake — utterly irresistible and completely redefining what you thought a scone could be.
Explosive Berry Flavor: Instead of those sad, shriveled berries you find in coffee shop scones, we're using fresh raspberries that burst with tart-sweet juice in every bite. The secret is folding them in frozen-solid, which prevents them from turning into mush and creates little pockets of bright flavor that cut through the richness like a ray of sunshine through clouds.
Almond Essence Magic: While most recipes barely whisper almond, we're having a full conversation with it. The combination of almond extract and sliced almonds creates this haunting, perfume-like quality that makes people close their eyes and say "what IS that amazing flavor?" It's subtle enough to be sophisticated, present enough to be unforgettable.
Foolproof Technique: I've stripped away all the fussy, intimidating steps that make people think they can't bake. No pastry cutters, no rolling pins, no cutting out shapes like you're making Christmas cookies. This is a rustic, forgiving method that actually improves from looking a little homemade — perfect for beginners who want professional results without the stress.
Make-Ahead Champion: Here's the real game-changer: you can mix up a double batch, shape them, freeze them solid, and bake them off fresh whenever you want. Having homemade scones on a Tuesday morning becomes as easy as preheating your oven. Your future self will thank you when you're pulling golden, fragrant scones out of the oven while your coffee brews.
Crowd-Pleasing Power: I've served these at baby showers, book clubs, and that awkward work breakfast where you need to impress your boss's boss. They disappear faster than free concert tickets, and I've literally watched people sneak extras into their purses "for the road." This is the recipe that makes you the designated baker for life.
Breakfast Versatility: While they're undeniably perfect for fancy brunches, these scones are humble enough for Tuesday morning coffee. Dress them up with lemon glaze for special occasions, or serve them plain with good butter for everyday luxury. They're equally at home on a silver platter or wrapped in a napkin for your commute.
Inside the Ingredient List
The Flavor Foundation
All-purpose flour forms the backbone of our scones, but here's where it gets interesting — we're using a lower protein content than bread flour, which keeps things tender instead of chewy. If you've ever bitten into a tough scone, it was probably made with the wrong flour. The protein strands in all-purpose flour are like Goldilocks: not too strong, not too weak, just right for creating structure without turning your breakfast into a jaw workout. For an extra nutty dimension that plays beautifully with the almond theme, you can swap in up to a quarter cup of almond flour, which adds richness and a subtle sweetness that makes people wonder what your secret ingredient is.
Granulated sugar does more than just sweeten — it's creating tenderness by interfering with gluten development, ensuring your scones stay soft instead of turning into sweet bricks. We're not going overboard here, just enough to balance the tart berries and complement the natural sweetness of the cream. If you want to get fancy, replace the sprinkling sugar on top with raw sugar for a delightful crunch that crackles between your teeth like tiny sugar fireworks.
Salt is the unsung hero that makes everything else taste more like itself. Without it, your scones will taste flat and one-dimensional, like listening to music with the bass turned off. Just a pinch awakens the almond essence, brightens the berry flavor, and transforms sweet into complex and interesting. Skip it at your peril — I've seen too many otherwise perfect batches taste like sugary nothingness because someone got timid with the salt.
The Texture Crew
Unsalted butter is where the magic really happens, but only if you treat it right. We're talking cold, cold, cold — like, just pulled from the freezer cold. Those little flecks of butter create steam pockets as they melt, producing the lift and flakiness that separates divine scones from sad, dense pucks. When you cut it in properly (which we'll get to), each bit becomes a tiny flavor bomb that melts into the dough, creating those coveted layers that shatter delicately when you bite into them.
Full-fat Greek yogurt is my secret weapon for scones that stay moist for days instead of turning into edible chalk. The acidity tenderizes the flour while adding a subtle tang that makes the sweetness more complex. Plus, the protein content helps create structure without toughness — think of it as the scaffolding that holds everything together while keeping things soft and luxurious. Don't even think about using low-fat here; we need the richness for that melt-in-your-mouth texture.
Light cream or half-and-half brings everything together into a cohesive dough while adding richness that milk simply can't achieve. The fat content coats the flour particles, limiting gluten development and ensuring tenderness. If you're in a pinch, whole milk works, but you'll lose some of that luxurious mouthfeel that makes these scones feel like a special occasion even on a random Wednesday morning.
The Unexpected Star
Fresh raspberries are the jewels in this crown, but timing is everything. We're adding them at the last possible moment, when the dough is just barely holding together, to prevent them from breaking down and turning everything into a purple mess. The trick is using berries that are just ripe enough to be sweet-tart but still firm enough to hold their shape. When you bite into a warm scone and encounter one of these burst berries, it's like finding treasure — a pocket of bright, tangy flavor that cuts through the richness and makes your taste buds sing.
The egg does double duty here, binding everything together while adding richness and helping with that gorgeous golden color. We're using just one, beaten well, to create structure without making the scones taste eggy. It's the difference between a scone that holds its shape and one that spreads into a sad, flat puddle on your baking sheet.
The Final Flourish
Pure almond extract is where we separate the amateurs from the aficionados. Too much and your scones taste like marzipan candy, too little and you lose that haunting nuttiness that makes people ask for your secret. We're using just enough to complement the raspberries without overwhelming them — it's like a whisper of almond that lingers after each bite, making you reach for another piece just to experience it again.
Sliced almonds on top aren't just for show — they toast up beautifully in the oven, adding a satisfying crunch and intensifying the almond flavor through the Maillard reaction. They also give your scones that professional bakery appearance that makes people think you spent hours slaving away when really you just sprinkled them on in thirty seconds.
The Method — Step by Step
- Start by placing your stick of butter in the freezer for at least 30 minutes — this is non-negotiable. While that's happening, line a baking sheet with parchment paper and clear some space in your freezer for later. In a large bowl, whisk together your flour, sugar, baking powder, and salt until they're so well combined you can't see individual components. This initial mixing ensures every bite will be perfectly seasoned and leavened, preventing those sad pockets of baking powder that taste like aluminum.
- Grab your frozen butter and the large holes of a box grater — yes, we're grating butter like cheese, and it's going to change your life. Working quickly so it doesn't warm up, grate the butter directly into your flour mixture, tossing the shreds gently with a fork to coat them. Those little butter curls will create incredible flakiness as they melt during baking, producing layers that separate into delicate sheets. When you're done, the mixture should look like coarse sand with visible butter bits — if you see any large chunks, break them up with your fingers, but work fast.
- In a separate bowl, whisk together the Greek yogurt, cream, egg, vanilla, and almond extract until smooth and homogenous. The mixture will be thick and luxurious, like the best breakfast custard you've ever imagined. Make a well in the center of your dry ingredients and pour in this liquid gold, using a fork to gently incorporate everything. Stop mixing as soon as you see no dry flour — overmixing is the enemy of tenderness, and we're going for a shaggy, barely-holding-together dough that looks like it needs more liquid (it doesn't).
- This next part? Pure magic. Turn your dough out onto a lightly floured surface and gather it into a loose ball, handling it as little as humanly possible. Pat it into a circle about an inch thick, then using a bench scraper or sharp knife, fold it in thirds like a letter, pat it back into a circle, and repeat twice more. This creates those coveted layers without the fuss of rolling and cutting, and it's oddly satisfying — like origami with dough.
- Now for the berries — scatter your frozen raspberries across the surface and gently press them in, folding the dough over itself once or twice to distribute them. The key is using a light touch; think of it as tucking the berries into bed rather than punching them into submission. If any berries break, that's fine — those will create beautiful purple marbling throughout your scones, like natural food coloring from the gods.
- Shape the dough into a circle about 3/4-inch thick, then using that same bench scraper, cut it into 8 wedges like you're slicing a pizza. Place the wedges on your prepared baking sheet with space between them for spreading. At this point, you could wrap the whole tray in plastic wrap and freeze for later, or proceed to bake them off. If baking immediately, pop the tray in the freezer for 15 minutes — this step is crucial for preventing spread and ensuring tall, proud scones.
- Preheat your oven to 400°F while your scones chill — that sizzle when cold dough hits hot air? Absolute perfection. Just before baking, brush the tops with cream and sprinkle generously with coarse sugar and sliced almonds. The cream helps the sugar adhere and promotes browning, while the almonds toast up into crunchy little gems that add texture and intensify the almond flavor through caramelization.
- Bake for 18-22 minutes, rotating the pan halfway through, until the scones are golden brown on top and the bottoms are nicely caramelized. They should have puffed up dramatically, with the berries bubbling and the almonds toasted to a deep golden color. The aroma wafting from your oven will make it nearly impossible to wait for them to cool — resist the urge to grab one immediately unless you enjoy burning your mouth on molten raspberry lava.
Insider Tricks for Flawless Results
The Temperature Rule Nobody Follows
Here's the thing about scones — they're basically a race between butter melting and dough setting. If your butter melts before the structure sets, you get greasy, flat failures that taste like disappointment. This means everything needs to be cold: your bowl, your flour, your hands if possible. I actually run my hands under cold water for 30 seconds before handling the dough, and if my kitchen is warm, I'll stick my mixing bowl in the freezer for ten minutes. A friend tried skipping this step once — let's just say her "scones" could have been used as paperweights, and not the decorative kind.
Why Your Nose Knows Best
Don't rely on a timer alone — your nose is the most sophisticated piece of kitchen equipment you own. When these scones are perfectly baked, your kitchen will smell like a French bakery married an almond orchard and had a raspberry-themed wedding. The scent changes from raw and floury to rich and nutty with hints of caramelized sugar. When you catch yourself unconsciously drifting toward the oven, nose in the air like a cartoon character, they're probably done. Overbaking is the kiss of death for tender scones, so pull them when they smell amazing and are just golden — they'll finish cooking from residual heat.
The 5-Minute Rest That Changes Everything
After they come out of the oven, let your scones rest on the pan for exactly five minutes — no more, no less. Too short and they'll fall apart when you move them; too long and the bottoms get soggy from steam. During this critical window, the structure sets, the berries calm down from their bubbling frenzy, and the sugars finish caramelizing. It's the difference between a scone that holds its shape and one that crumbles into a heap of delicious rubble. Set a timer and walk away — don't poke, don't prod, don't try to sneak one early (okay, maybe sneak one, but use a spatula).
The Gentle Fold Technique
When incorporating the raspberries, think of yourself as a berry whisperer rather than a dough dominator. Use a large rubber spatula and fold from the bottom of the bowl up and over, rotating the bowl as you go. The berries should look like they're floating in the dough, not mashed into it. If you see purple streaks starting to form, stop immediately — that's the sign you're about to turn everything into a tie-dye mess. A few white streaks of flour are actually good; they'll disappear during baking and ensure you haven't overmixed.
Creative Twists and Variations
This recipe is a playground. Here are some of my favorite ways to switch things up:
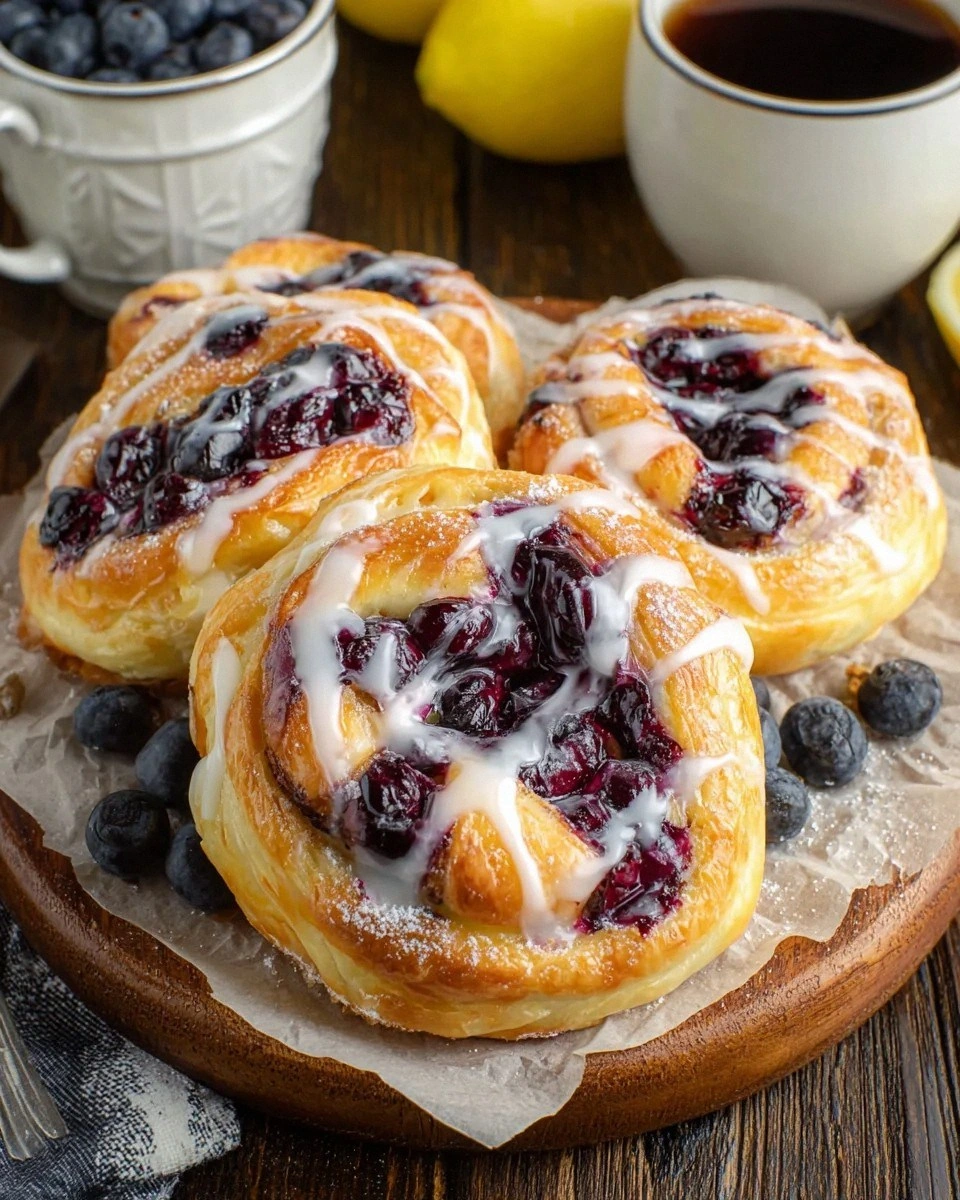
Lemon-Blueberry Bliss
Swap the almond extract for lemon zest and use blueberries instead of raspberries. The combination creates this incredible fresh flavor that tastes like summer in baked form. Add a simple lemon glaze made with fresh juice and powdered sugar, and you've got a scone that makes people forget their manners as they reach for seconds.
Chocolate-Cherry Decadence
Replace raspberries with dried cherries and fold in mini chocolate chips instead of almonds on top. The cherries rehydrate slightly during baking, becoming plump and jammy, while the chocolate melts into little pockets of richness. It's like black forest cake met a scone and had a beautiful, delicious baby.
Savory Herb and Cheese
Omit the sugar and berries, reduce the salt slightly, and fold in sharp cheddar, fresh chives, and a touch of black pepper. These savory beauties are incredible with soup or as the base for breakfast sandwiches. The technique stays exactly the same, proving this recipe is more versatile than a Swiss army knife.
Peach-Ginger Sunshine
Use diced fresh peaches and crystallized ginger for a scone that tastes like a warm hug from your Southern grandmother. The peaches get jammy and concentrated, while the ginger adds little spicy surprises that wake up your palate. A dusting of cinnamon sugar on top takes it over the edge into pure comfort food territory.
Salted Caramel Apple
Fold in tiny cubes of apple and drizzle caramel sauce over the top before baking, finishing with a sprinkle of flaky salt. The apples soften into tender bites, the caramel bubbles and browns, and the salt makes everything pop. It's like someone turned autumn into a breakfast food.
Mocha Madness
Dissolve a tablespoon of instant espresso powder in the cream, add mini chocolate chips to the dough, and top with a coffee glaze. These are dangerous — they taste like your favorite coffee shop drink but in edible form. Perfect for those mornings when you need caffeine and carbs in one efficient package.
Storing and Bringing It Back to Life
Fridge Storage
Completely cooled scones will keep in an airtight container in the fridge for up to 5 days, though they're best within the first 3. The cold actually helps them firm up nicely, making them easier to slice for toasting. Bring them back to room temperature for 30 minutes before serving, or better yet, give them a quick warm-up in a 300°F oven for 5-7 minutes. This revives the crisp edges and makes the berries taste fresh-baked again.
Freezer Friendly
These scones are freezer champions — both before and after baking. For unbaked scones, flash-freeze the shaped wedges on a tray, then transfer to a freezer bag for up to 3 months. Bake them straight from frozen, adding 3-5 extra minutes to the cooking time. For baked scones, wrap individually in plastic wrap, then foil, and freeze for up to 2 months. Thaw overnight in the fridge, then warm in a 300°F oven for 8-10 minutes until heated through.
Best Reheating Method
Skip the microwave — it'll turn your beautiful scones into rubbery disappointments faster than you can say "break emergency." Instead, wrap them in foil and warm in a 300°F oven for 10 minutes, uncovering for the last 2 minutes to crisp the tops. Add a tiny splash of water to the foil packet before sealing — it steams back to perfection, reviving that just-baked texture that makes people think you baked them fresh this morning.