I was sitting on my kitchen floor, elbows propped on a splintered cutting board, when my roommate dared me to create something that would make the summer heat feel like a gentle hug rather than a scorching oven. I stared at a half‑opened bag of frozen raspberries and thought, “What if I could marry that tart punch with clouds of sweet meringue and a buttery crumb that crumbles like a dream?” The result? Raspberry Meringue Bars: A Tart & Sweet Summer Delight—a dessert that makes you question every store‑bought bar you’ve ever bought. I’ll be honest — I ate half the batch before anyone else got to try it, and the look on their faces was worth every stolen bite.
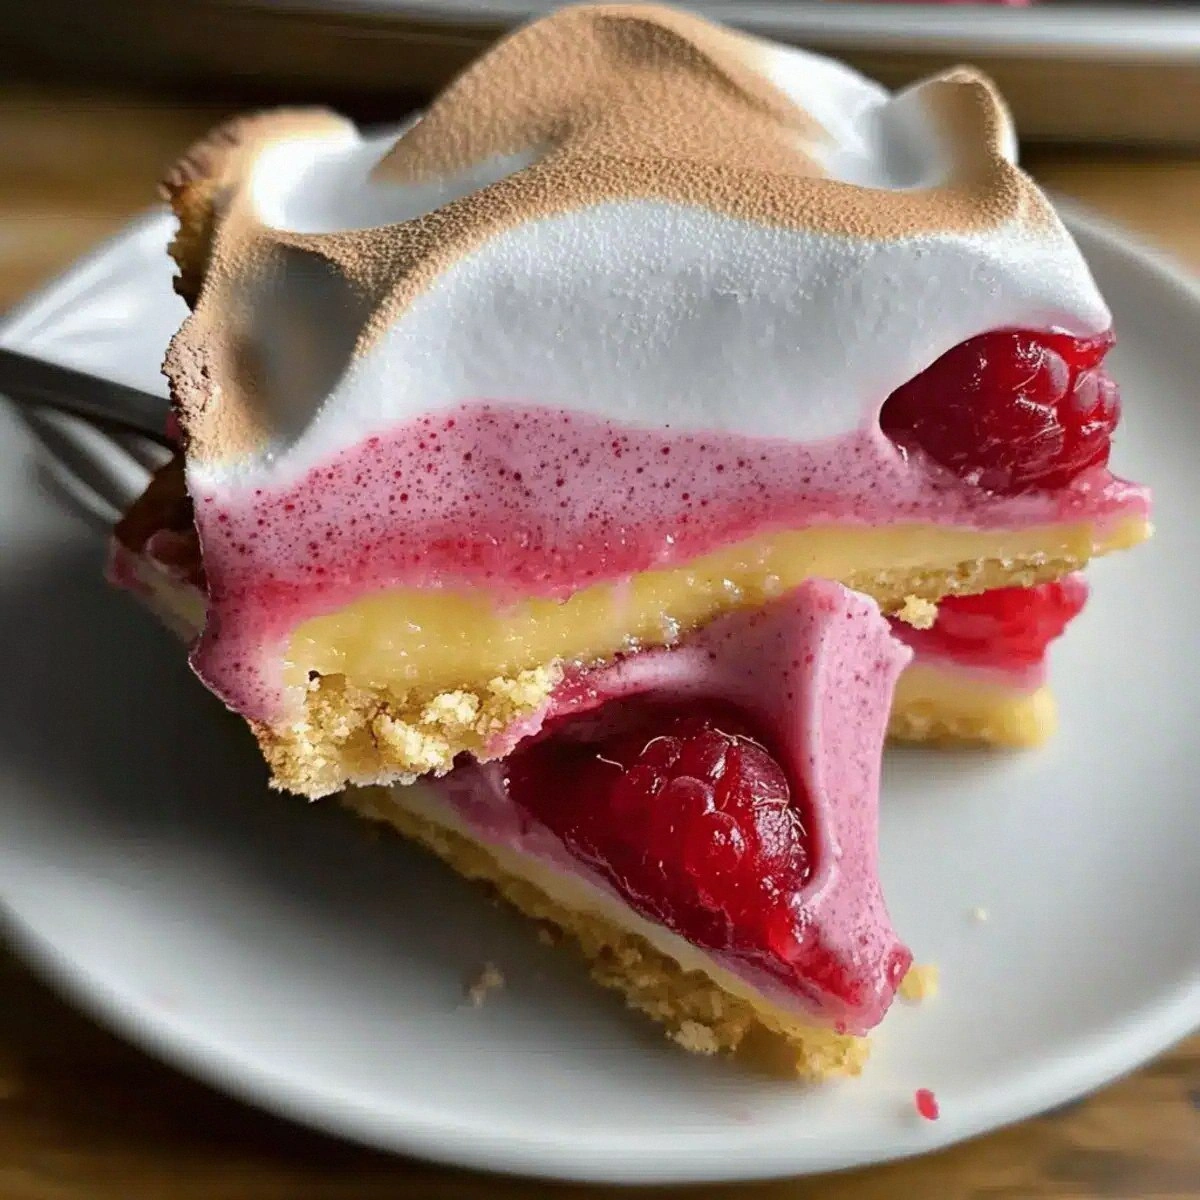
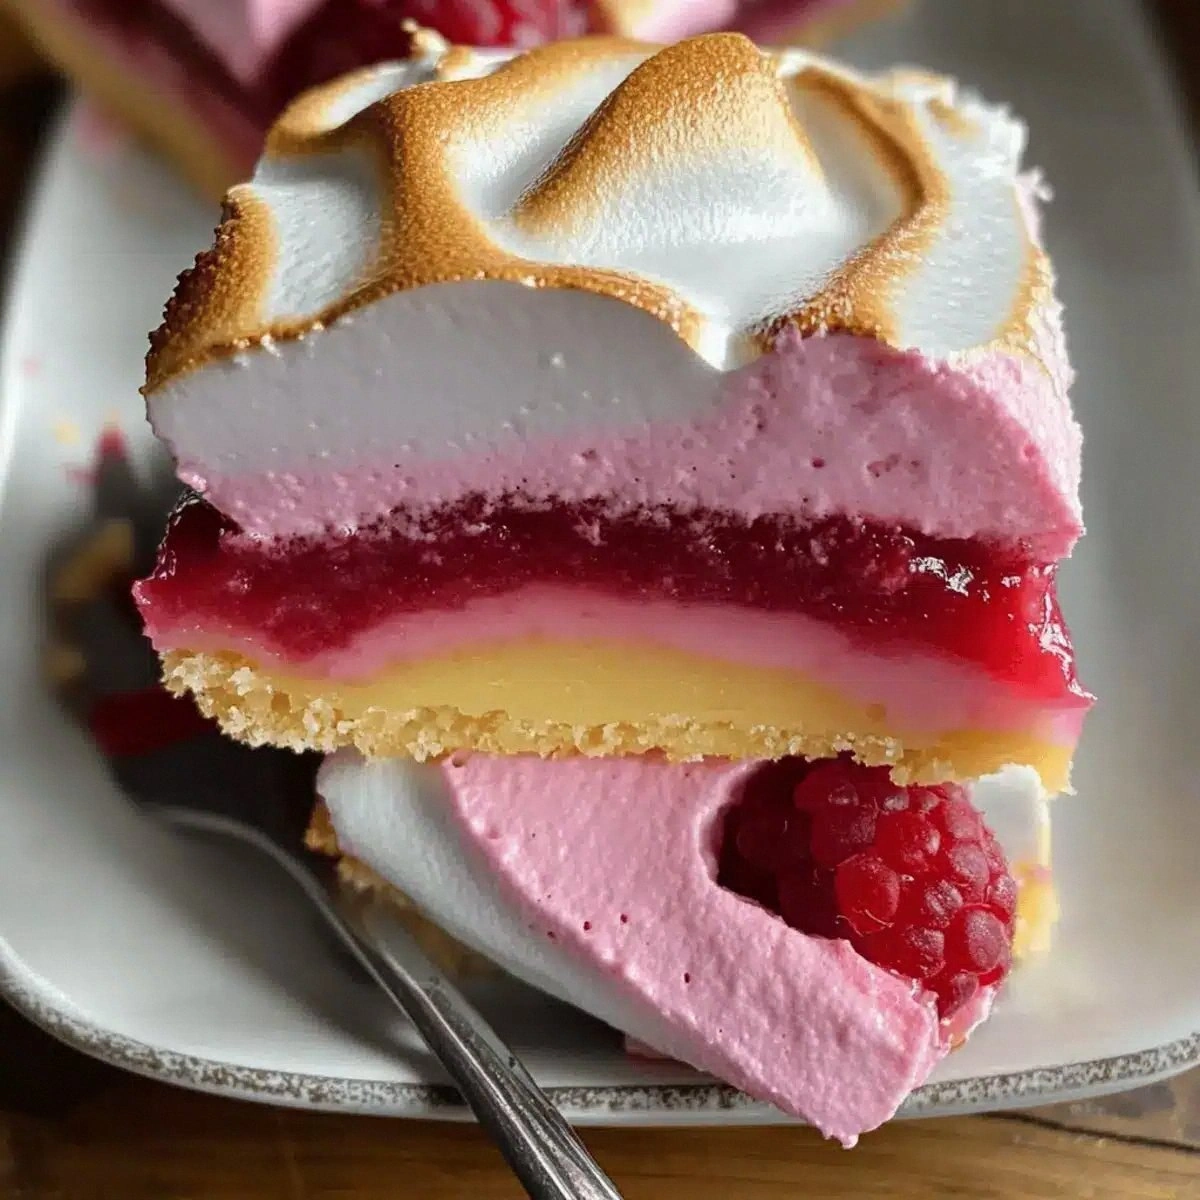
Imagine the moment you pull these bars from the oven: the buttery crust is golden, the raspberry filling glistens like a ruby‑red sunrise, and the meringue peaks are toasted to a delicate caramel hue, whispering promises of airy sweetness. The scent that wafts through the kitchen is a heady mix of toasted butter, fresh raspberries, and a faint citrus zing that makes you want to inhale deeply, as if you could bottle that aroma for a lifetime. When you bite in, the crust shatters with a crisp snap, the raspberry filling bursts with a tart‑sweet symphony, and the meringue melts on your tongue like clouds made of sugar. That sizzle when the meringue browns? Absolute perfection.
Most recipes get this completely wrong. They either drown the raspberries in sugar, or they bake the meringue too long, turning it rubbery. This version stands out because I’ve balanced every element like a tightrope walker—no one ingredient dominates, yet each shines. The secret? A pinch of raspberry powder that intensifies the fruit flavor without extra moisture, and a dash of lemon zest that lifts the whole thing into a bright, summery orbit. I dare you to taste this and not go back for seconds; the combination is addictive, and you’ll be bragging about it at every gathering.
Okay, ready for the game‑changer? The technique that will make your meringue stay light and airy is to whisk the egg whites to soft peaks, then gradually fold in the fine sea salt—a tiny trick that stabilizes the foam without making it stiff. And the crust? I use a blend of granulated and powdered sugar that creates a tender crumb while still giving you that satisfying snap. Let me walk you through every single step — by the end, you’ll wonder how you ever made it any other way.
What Makes This Version Stand Out
- Taste: The tartness of frozen raspberries is amplified by raspberry powder, while the lemon zest adds a bright counterpoint, creating a flavor profile that dances on the palate.
- Texture: A buttery, crumbly crust meets a glossy, jam‑like filling, topped with a cloud‑soft, lightly toasted meringue that cracks delicately with each forkful.
- Simplicity: Only thirteen ingredients, most of which you already have in your pantry, and a straightforward method that even a kitchen novice can master.
- Uniqueness: The inclusion of raspberry powder is a secret weapon that boosts flavor without extra liquid, keeping the crust crisp.
- Crowd Reaction: Guests invariably ask for the recipe, and the bars become the centerpiece of any summer gathering, from picnics to brunches.
- Ingredient Quality: Using unsalted butter and fine sea salt lets you control the seasoning, while frozen raspberries guarantee peak flavor year‑round.
- Cooking Method: Baking the crust first creates a sturdy base; the final quick broil gives the meringue that perfect golden kiss.
- Make‑Ahead Potential: Assemble the bars a day ahead, store them airtight, and they’ll stay fresh, making them ideal for potlucks.
Inside the Ingredient List
The Flavor Base
The 1 cup of all‑purpose flour forms the backbone of the crust. It provides structure without overpowering the delicate flavors. If you substitute cake flour, the crust will be too tender and may crumble under the weight of the filling. For a gluten‑free twist, use a 1‑to‑1 blend of rice flour and almond flour, but expect a slightly denser bite.
The 1/4 cup granulated sugar and 1/4 cup powdered sugar work together to give the crust a subtle sweetness and a fine, melt‑in‑your‑mouth texture. Granulated sugar caramelizes during baking, creating that golden edge, while powdered sugar keeps the crumb tender. Skipping the powdered sugar will make the crust gritty, and using only granulated sugar can lead to a dry, overly crisp base.
The Texture Crew
1/2 cup unsalted butter, softened, is the fat that binds the crust together. Butter adds richness and a buttery aroma that pairs perfectly with the raspberries. If you opt for margarine, you’ll lose that nuanced flavor and the crust may become greasy. A tip for selecting butter: choose a brand with a high butterfat content (82% or higher) for the best flavor and texture.
2 tablespoons cornstarch is the unsung hero that keeps the raspberry filling from turning watery. It acts like a sponge, soaking up excess juice and giving the filling a glossy, set finish. If you replace it with flour, the filling may taste chalky; if you omit it entirely, you’ll end up with a soggy bottom that ruins the entire bar.
The Unexpected Star
2 tablespoons raspberry powder is the secret weapon that intensifies the berry flavor without adding extra moisture. This fine powder is made from dehydrated raspberries, and a little goes a long way. If you can’t find raspberry powder, grind freeze‑dried raspberries in a spice grinder until they become a fine dust. Using fresh raspberries instead will give you flavor but will also add more liquid, compromising the crust’s crispness.
1 tablespoon lemon zest lifts the entire flavor profile, cutting through the sweetness and adding a bright, citrusy note. The zest should be finely grated, avoiding the bitter white pith. If you don’t have fresh lemons, a pinch of lemon extract can work, but the fresh zest provides a more aromatic experience.
The Final Flourish
4 large egg yolks enrich the raspberry filling, giving it a silky mouthfeel and a golden hue. They also act as an emulsifier, binding the sugar and cornstarch together. Skipping the yolks will result in a thinner, less luxurious filling.
4 large egg whites become the airy meringue that crowns the bars. Whipping them to stiff peaks with a pinch of 1/4 teaspoon fine sea salt creates a stable foam that holds its shape during the quick broil. Over‑whipping will make the meringue grainy; under‑whipping will cause it to collapse.
Everything's prepped? Good. Let's get into the real action…
The Method — Step by Step
- Preheat and Prep: Preheat your oven to 350°F (175°C). Line a 9×13‑inch baking pan with parchment paper, allowing the paper to overhang for easy removal later. This step ensures the bars lift cleanly without sticking, and the parchment acts as a barrier that prevents the crust from over‑browning.
- Make the Crust: In a food processor, pulse the flour, granulated sugar, powdered sugar, and raspberry powder until well combined. Add the softened butter and pulse until the mixture resembles coarse crumbs, then drizzle in the lemon zest and pulse a few more times. The texture should be slightly sandy but hold together when pressed.
- Bake the Crust: Bake the crust for 12‑15 minutes, or until the edges turn a light golden brown and you can smell a nutty, toasted aroma. Remove from the oven and let cool for 5 minutes while you prepare the raspberry filling. The crust should feel firm to the touch but still be pliable enough for the topping.
- Prepare the Raspberry Filling: In a medium saucepan, combine the frozen raspberries, 1 cup of sugar, cornstarch, and lemon zest. Cook over medium heat, stirring constantly, until the mixture thickens and the raspberries break down, about 8‑10 minutes. The mixture should coat the back of a spoon and look glossy. Remove from heat and whisk in the egg yolks one at a time, ensuring they’re fully incorporated before adding the next.
- Spread the Filling: Pour the raspberry filling over the baked crust, spreading it evenly with a spatula. The filling should be about 1/4‑inch thick; if it’s too thin, the meringue will dominate, and if it’s too thick, the bars may become soggy.
- Whip the Meringue: In a clean, dry mixing bowl, beat the egg whites on medium speed until they become frothy. Add the fine sea salt, then increase to high speed, adding a pinch of sugar if desired for extra stability. Whisk until stiff peaks form—when you lift the beaters, the peaks should stand up straight and not droop.
- Top with Meringue: Spoon the meringue over the raspberry layer, using a spatula to create swirls or peaks. Aim for an even layer about 1/2‑inch thick; the peaks will expand slightly as they bake, giving you that classic marshmallow‑like look.
- Bake the Bars: Return the pan to the oven and bake for 12‑15 minutes, or until the meringue is lightly golden and the edges of the crust are firm. If you prefer a deeper color, switch to broil for the last 1‑2 minutes, watching closely to avoid burning.
- Cool and Cut: Allow the bars to cool completely in the pan; this lets the filling set and the meringue firm up. Once cooled, use the parchment overhang to lift the entire slab onto a cutting board, and cut into squares or rectangles with a sharp knife. For clean cuts, dip the knife in hot water and wipe dry between slices.
That's it — you did it. But hold on, I've got a few more tricks that'll take this to another level, ensuring every bite is as perfect as the first.
Insider Tricks for Flawless Results
The Temperature Rule Nobody Follows
Never bake the crust and the meringue at the same temperature. Start with a moderate 350°F for the crust to set without over‑browning, then finish the meringue at a higher heat (or under the broiler) for that golden kiss. This two‑stage approach prevents the meringue from melting into the filling and ensures the crust stays crisp.
Why Your Nose Knows Best
Your sense of smell is the ultimate doneness gauge. When the crust is done, you’ll detect a nutty, buttery aroma that’s unmistakable. Likewise, the meringue should emit a faint caramel scent when it’s ready for that final browning. Trust those olfactory cues more than the clock; ovens vary, and your nose will keep you from under‑ or over‑cooking.
The 5‑Minute Rest That Changes Everything
After the bars come out of the oven, let them sit uncovered for five minutes before covering. This short rest lets the steam escape, preventing the meringue from becoming soggy. Then, cover loosely with foil if you need to store them longer; the foil will keep the meringue from drying out while preserving its airy texture.
The Salt‑Stabilizer Secret
A pinch of fine sea salt in the egg white foam isn’t just for flavor; it strengthens the protein network, making the meringue less likely to weep. This tiny adjustment can be the difference between a glossy, stable topping and a watery, collapsed one.
The Gentle Fold
When incorporating the whipped meringue onto the raspberry layer, use a gentle folding motion rather than vigorous stirring. This preserves the air bubbles that give the meringue its lightness. Over‑mixing will deflate the foam, resulting in a dense, heavy topping.
Creative Twists and Variations
This recipe is a playground. Here are some of my favorite ways to switch things up:
Berry Medley Madness
Swap half of the raspberries for blueberries or blackberries. The mix adds a deeper color palette and a subtle variation in tartness, pleasing guests who love a more complex berry profile.
Citrus Zing
Add a tablespoon of orange zest to the crust and a splash of orange liqueur to the raspberry filling. The citrus notes brighten the dessert, making it perfect for brunches where mimosa vibes are welcome.
Nutty Crunch
Fold in ¼ cup of finely chopped toasted almonds into the crust mixture before baking. The nuts add a pleasant crunch that contrasts the soft meringue and adds a nutty aroma.
Chocolate Drizzle
Once the bars are cooled, drizzle melted dark chocolate over the meringue. The bitter chocolate pairs beautifully with the sweet meringue and tart raspberry, creating a sophisticated flavor combo.
Spiced Surprise
Add a pinch of ground cardamom to the raspberry filling for an exotic twist. Cardamom’s floral notes complement the fruit without overwhelming it, ideal for a holiday twist.
Storing and Bringing It Back to Life
Fridge Storage
Cover the bars loosely with parchment and then with plastic wrap. Store in the refrigerator for up to three days. The meringue will stay soft, but you may notice a slight loss of crispness in the crust; a quick re‑bake at 300°F for 5 minutes revives it.
Freezer Friendly
Wrap each bar individually in foil, then place them in a freezer‑safe bag. They’ll keep for up to two months. To serve, thaw in the fridge overnight, then bring to room temperature for 30 minutes before enjoying.
Best Reheating Method
Add a tiny splash (about 1 teaspoon) of water to the plate before microwaving for 10‑15 seconds. The steam gently revives the meringue’s softness while keeping the crust from becoming soggy. Alternatively, a quick 2‑minute pass under a hot broiler restores the golden top.