I was standing in my kitchen, the kind of kitchen that smells like a mixture of old coffee grounds and the faint hope that tonight’s dinner won’t be a disaster. I had just burned the garlic in a pan for the third time that week, and the smoke alarm was doing its best impression of a siren at a rock concert. In the midst of that chaos, my roommate dared me: “Make something that actually tastes good, or you’re ordering pizza.” I laughed, I sighed, and then I remembered the lemon I had juiced for a salad that never got finished. That tiny citrus burst sparked a wild idea—what if I could combine the zing of lemon, the depth of garlic, and the comforting familiarity of chicken into bite‑size wonders? I was skeptical, but I was also hungry enough to give it a shot.
Fast forward a few minutes of frantic chopping, a splash of olive oil, and a pan that finally decided to behave. The moment the chicken pieces hit the hot surface, they let out a sizzle that sounded like applause at a theater premiere. The aroma that rose was a heady blend of garlic’s earthy perfume and lemon’s bright, almost floral notes—so intoxicating that I nearly forgot to stir. I could feel the heat radiating from the stovetop, the heat of the pan searing the meat, and the cool anticipation of that first bite. My senses were on overdrive: the sight of golden‑brown edges, the sound of the crust cracking as I flipped the bites, the smell that made my stomach growl louder than my roommate’s complaints about the burnt garlic.
What set this version apart from every other chicken bite recipe I’d tried was the balance of flavors and the simplicity of the technique. Most recipes either drown the chicken in heavy sauces or rely on a complicated marinating process that leaves you waiting for hours. I, on the other hand, am serving you a dish that comes together in under an hour, with ingredients you already have on hand, yet delivers a punch that feels like you’ve spent a day perfecting it. The secret? A quick lemon‑garlic glaze that coats each piece like a silk scarf, and a brief, high‑heat sear that creates a crispness you can hear when you bite—think of it as the chicken’s version of a drum solo.
I’ll let you in on a tiny twist that most cooks overlook: I finish the dish with a splash of fresh lemon zest right at the end, which adds a burst of aroma that’s impossible to replicate with bottled lemon juice alone. This final flourish is what makes the bites sing, and trust me, I dare you to taste this and not go back for seconds. Let me walk you through every single step — by the end, you’ll wonder how you ever made it any other way.
What Makes This Version Stand Out
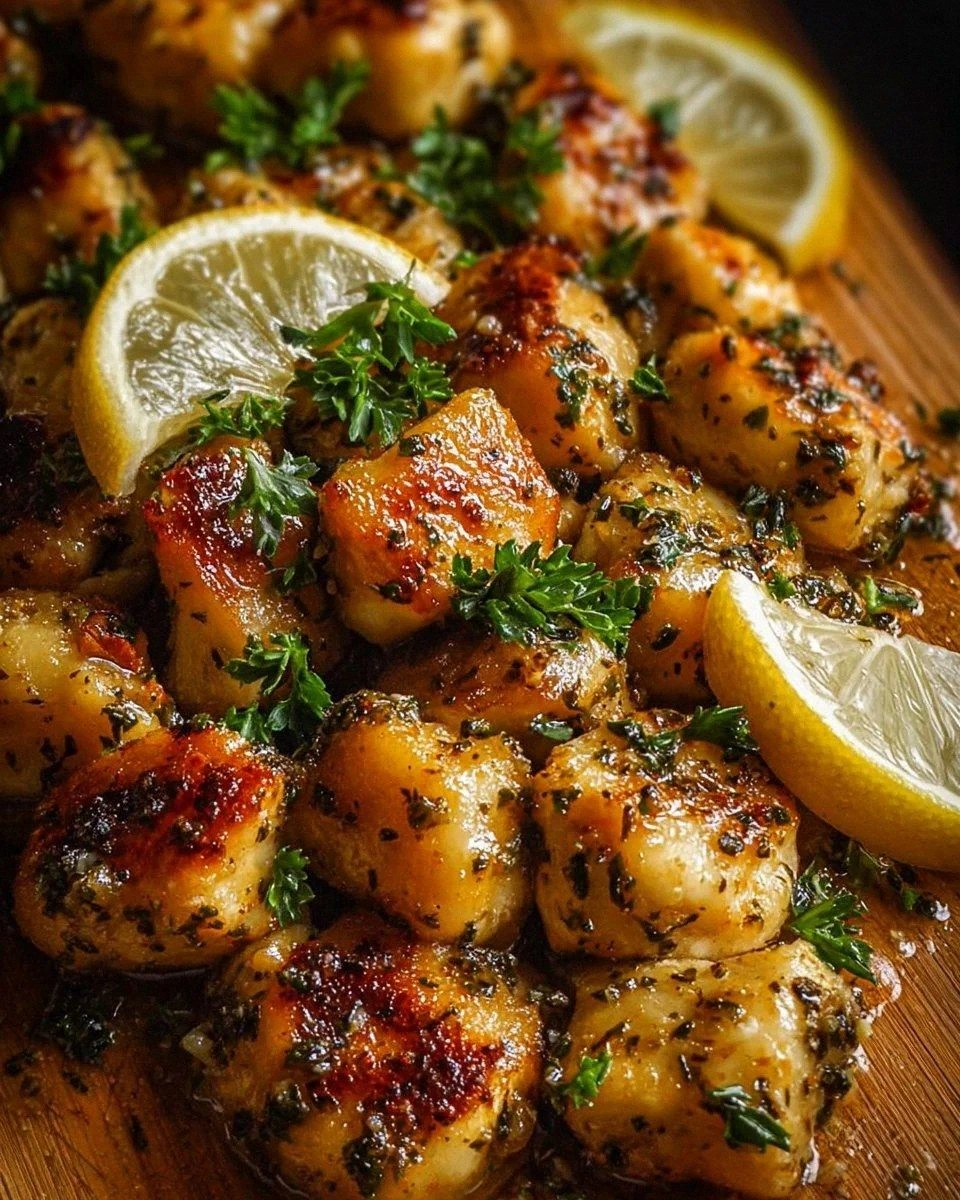
- Taste: The lemon‑garlic glaze delivers a bright, tangy punch that cuts through the richness of the chicken, while the optional paprika adds a subtle smoky heat that lingers pleasantly on the palate.
- Texture: A quick sear creates a caramelized crust that shatters like thin ice when you bite, contrasted with a juicy, tender interior that stays moist thanks to the brief cooking time.
- Simplicity: Fewer than ten ingredients, no fancy equipment, and a total prep‑to‑plate time under 45 minutes—perfect for weeknight cravings or impromptu gatherings.
- Uniqueness: The finishing zest is the game‑changer; it adds an aromatic lift that most recipes miss, making each bite feel fresh even after the plate cools.
- Crowd Reaction: Guests often claim they’ve never tasted chicken this flavorful, and the “wow” factor is immediate—people start reaching for extra servings before you even finish plating.
- Ingredient Quality: Using fresh lemon juice and real garlic (not powder) ensures the flavor is bright, natural, and far superior to any pre‑made sauce.
- Cooking Method: High‑heat pan‑searing locks in juices while creating that coveted crust, a technique that’s both reliable and forgiving when you keep an eye on the heat.
- Make‑Ahead Potential: These bites store beautifully in the fridge and can be reheated in a skillet or oven without losing their crispness—perfect for meal prep or a party platter.
Inside the Ingredient List
The Flavor Base
The cornerstone of this dish is the lemon‑garlic glaze. Fresh lemon juice provides acidity that brightens the palate, while the zest adds an aromatic oil that’s impossible to replicate with bottled juice. Garlic, minced finely, releases allicin, giving the dish its unmistakable depth. If you skip the garlic, you’ll lose that earthy backbone that balances the lemon’s sharpness, and the dish will feel flat. A good swap for garlic, if you’re out, is a teaspoon of garlic powder, but the texture and punch won’t be the same.
The Texture Crew
Olive oil is the silent hero that ensures a golden crust without burning. It also helps the lemon juice adhere to the chicken, creating a glossy finish. Using extra‑virgin olive oil gives a fruitier note, but if you’re watching the smoke point, a light olive oil works just as well. The chicken breast itself should be cut into uniform bite‑sized pieces; this ensures even cooking and that each bite gets the same perfect crust.
The Unexpected Star
Paprika is optional, but when used, it adds a whisper of smoky heat that elevates the flavor without overpowering the lemon. If you love spice, swap it for a pinch of cayenne or smoked chipotle powder for a bolder kick. Skipping it entirely won’t ruin the dish, but you’ll miss out on that subtle depth that makes the flavor profile feel complete.
The Final Flourish
Fresh parsley or cilantro garnish adds a pop of color and a hint of herbal freshness that cuts through the richness. It’s purely visual and aromatic—if you’re not a fan of cilantro, parsley works just as well. The garnish should be added after the pan is off the heat; otherwise, the bright green will wilt and lose its vibrancy.
Everything's prepped? Good. Let's get into the real action...
The Method — Step by Step
First, gather all your ingredients and set up a clean workspace. Pat the chicken pieces dry with paper towels—this is crucial because moisture is the enemy of a good sear. While the chicken is drying, whisk together the olive oil, fresh lemon juice, lemon zest, minced garlic, salt, pepper, and paprika in a shallow bowl. This mixture should look glossy and slightly thickened; it’s your flavor‑bomb glaze.
I like to let the mixture sit for a minute so the garlic can mellow a touch—this prevents any raw bite from sneaking through later. If you’re feeling daring, add a pinch of crushed red pepper flakes for an extra layer of heat.
Now, toss the chicken pieces into the bowl, making sure each piece is evenly coated. The lemon‑garlic mixture should cling to the chicken like a thin veil. Let the chicken marinate for about five minutes; this short rest is enough for the flavors to penetrate without making the meat start to cook in the acid.
While it’s marinating, preheat a large skillet over medium‑high heat. I recommend a heavy‑bottomed stainless steel or cast‑iron pan because they retain heat better, giving you that coveted crust.
Add the chicken to the hot pan in a single layer, making sure not to overcrowd—crowding creates steam, which prevents browning. You should hear an immediate, satisfying sizzle that tells you the pan is hot enough. Let the pieces sit untouched for about 2‑3 minutes; this is the time when the crust forms.
After the first side develops a golden‑brown hue and the edges start pulling away from the pan, flip each piece using tongs. The second side will cook a bit faster, about 2 minutes, because the chicken is already partially cooked.
Once both sides are beautifully browned, lower the heat to medium and pour any remaining glaze from the bowl into the pan. Stir gently to coat the chicken evenly; the glaze will thicken quickly, clinging to each bite like a glossy varnish.
At this point, you’ll notice the aroma intensifying—this is the moment of truth. Let the glaze simmer for another minute, allowing the lemon zest to release its fragrant oils fully.
Turn off the heat and immediately sprinkle fresh parsley or cilantro over the top. The residual heat will wilt the herbs just enough to release their scent without losing their bright green color.
Give the pan a final gentle toss to distribute the herbs, then transfer the bites to a serving platter. The dish should look glossy, speckled with flecks of zest and herbs, and steam gently as you set it down.
Taste a piece right away—this is the part where you’ll decide if you’ve truly nailed the balance. The first bite should hit you with a crisp exterior, a juicy interior, and a zing that makes your taste buds do a little dance.
If you feel the lemon is a touch shy, drizzle an extra teaspoon of fresh lemon juice over the top; just a little more brightness never hurts.
Serve the bites hot, either as an appetizer with a side of cool tzatziki or as a main paired with a light quinoa salad. They also make a stellar addition to a taco night—just tuck them into warm tortillas and top with slaw.
And now the fun part: watch your guests devour them, eyes widening with each bite. That’s the payoff for all the sizzle, the zest, and the daring flavor experiment.
Insider Tricks for Flawless Results
The Temperature Rule Nobody Follows
Most home cooks crank the heat up to “as hot as possible” and then wonder why their chicken turns rubbery. The secret is to start medium‑high, get that initial sear, then drop to medium for the glaze. This two‑stage heat prevents the exterior from burning while still allowing the interior to stay juicy. I once tried a single high‑heat blast and ended up with charred edges and a raw center—lesson learned, never sacrifice the middle for a quick crust.
Why Your Nose Knows Best
Your sense of smell is a more reliable timer than any clock when it comes to sautéing. When the garlic starts to turn golden and you catch that sweet, nutty aroma, you know it’s time to flip. If you wait too long, the garlic will become bitter, and the whole dish will suffer. Trust that nose; it’s the kitchen’s built‑in timer.
The 5‑Minute Rest That Changes Everything
After the pan is off the heat, let the chicken rest for exactly five minutes. This short pause lets the juices redistribute, preventing them from spilling out when you bite. I used to serve immediately and was always disappointed by the dry pockets. A five‑minute rest is like a micro‑marinade—simple but transformative.
Zest Timing Is Everything
Add the lemon zest at the very end, right before serving. If you add it too early, the delicate oils evaporate, and you lose that bright punch. Think of zest as the final brushstroke on a painting; it’s what makes the piece pop.
Pan Choice Matters
A heavy‑bottomed pan distributes heat evenly, ensuring each bite gets that uniform crust. Thin, cheap pans create hot spots that can scorch the garlic while leaving some pieces under‑cooked. Investing in a decent skillet pays off in flavor consistency.
Creative Twists and Variations
This recipe is a playground. Here are some of my favorite ways to switch things up:
Spicy Sriracha Kick
Swap the paprika for a teaspoon of sriracha and add a drizzle of honey after plating. The sweet‑heat combo turns the bites into a bold appetizer perfect for game night.
Herb‑Infused Mediterranean
Replace parsley with a mix of oregano and thyme, and add a splash of white wine to the glaze. The result is a breezy, Mediterranean‑inspired bite that pairs beautifully with olives and feta.
Coconut Curry Fusion
Add a tablespoon of coconut milk and a pinch of curry powder to the glaze. The creamy, aromatic twist transports you straight to a tropical street market.
Garlic‑Butter Finish
After the chicken is cooked, finish it with a knob of butter and a sprinkle of fresh chives. The butter adds richness, while chives bring a subtle onion note.
Crunchy Almond Coating
Toss the chicken in finely chopped toasted almonds before the final sear. The nuts add an unexpected crunch that elevates the texture profile.
Storing and Bringing It Back to Life
Fridge Storage
Place the cooled bites in an airtight container and store them in the refrigerator for up to three days. For best texture, line the container with a paper towel to absorb excess moisture.
Freezer Friendly
Arrange the bites in a single layer on a baking sheet, freeze until solid, then transfer to a zip‑top freezer bag. They’ll keep for up to two months. When you’re ready to eat, skip the thawing step and pop them straight into a hot skillet.
Best Reheating Method
Add a tiny splash of water (about a tablespoon) to the pan before reheating; cover the pan for a minute to create steam, then uncover to let the crust re‑crisp. This trick restores the original texture without drying out the chicken.