The first time I made these caramel bars, I burned the sugar so badly that the smoke alarm became my kitchen soundtrack for three solid minutes. My roommate came running in with a dish towel, ready to battle whatever inferno I'd created, only to find me standing over a pan of what looked like volcanic rock, absolutely devastated. But here's the thing — that disaster led me to discover the exact temperature where sugar transforms into liquid gold without turning into a bitter, acrid mess. Now, after what feels like a hundred batches (and yes, I confess I've eaten half of them before they even cooled), I've cracked the code to the most insanely delicious caramel bars you'll ever taste.
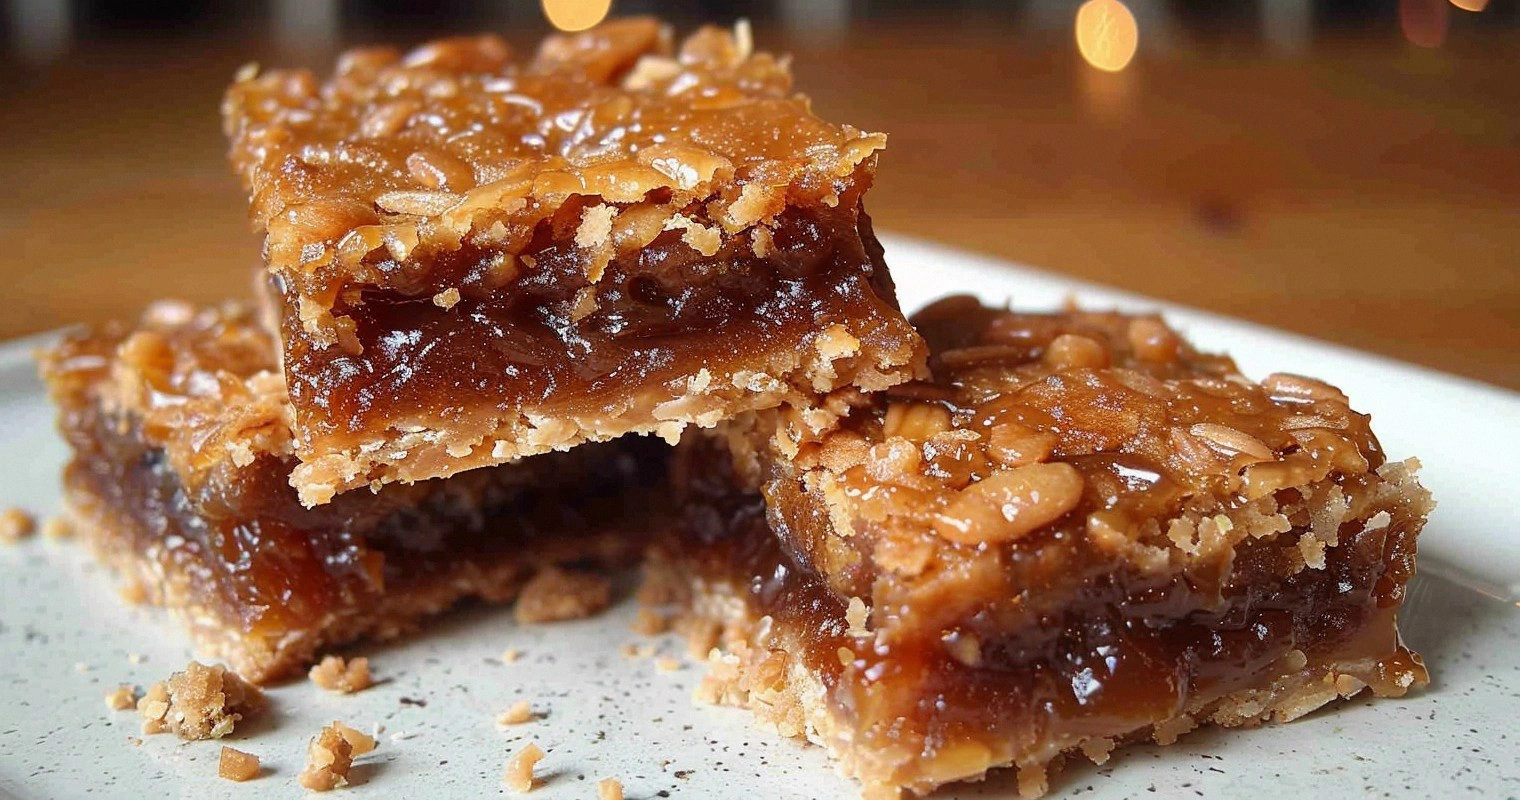
Picture this: a buttery shortbread base that shatters like thin ice under your fork, giving way to a layer of caramel so silky and rich it makes store-bought versions taste like plastic. The top gets sprinkled with chocolate that melts into the warm caramel, creating these gorgeous marbled swirls that look like abstract art. The first bite hits you with that perfect contrast — crisp, then gooey, then the way the chocolate melts on your tongue like velvet. I dare you to taste this and not go back for seconds. Actually, I double-dog dare you, because I've watched grown adults fight over the last piece like it was the last lifeboat on the Titanic.
Most recipes get this completely wrong. They'll tell you to dump everything in a pan and hope for the best, or they'll have you making caramel with corn syrup (why would you do that to yourself?). What makes this version different? We're building layers of flavor like a symphony — toasty brown butter in the base, a touch of espresso powder that makes the caramel taste more caramel-y, and a finishing sprinkle of flaky salt that makes your taste buds sit up and pay attention. If you've ever struggled with grainy caramel or soggy bottoms, you're not alone — and I've got the fix.
Stay with me here — this is worth it. We're going to cook side by side, just like friends in the kitchen, and I'm going to show you every single trick I've learned through my caramel-soaked experiments. By the end, you'll be pulling these golden beauties out of your oven, your whole kitchen smelling like a French patisserie, and you'll wonder how you ever made it any other way.
What Makes This Version Stand Out
Restaurant-Quality Caramel: This isn't your average sweet-and-sticky situation. We're taking the sugar to exactly 338°F where it develops those complex, almost smoky notes that professional pastry chefs charge eight dollars a slice for. The addition of heavy cream that's been warmed with vanilla bean creates this luxurious texture that coats your mouth like silk.
Shatter-Crisp Base: While other recipes give you a doughy, disappointing foundation, we're pre-baking our brown butter shortbread until it's golden and crisp. It stays crunchy even after the caramel goes on top, giving you that essential textural contrast that makes people close their eyes when they take a bite.
Genius Make-Ahead Magic: Here's what nobody tells you — these bars actually get BETTER after a day in the fridge. The flavors meld and deepen, the caramel sets to the perfect chewy consistency, and you can slice them into immaculate squares without any oozing. I always make a double batch because they disappear faster than free samples at Costco.
Chocolate That Actually Stays Shiny: Most recipes just throw chocolate chips on top and call it a day, leaving you with dull, bloomed chocolate that looks as sad as it tastes. We're using a specific ratio of chocolate to coconut oil that keeps the top glossy and snappy, even after refrigeration.
Intuitive Temperature Cues: Forget candy thermometers that fog up and leave you guessing. I'll teach you how to read the caramel's color, smell, and even the way it moves in the pan to know exactly when it's ready. Your nose knows best — when it smells like toasted marshmallows and butterscotch, you're there.
Crowd-Pleasing Size: This recipe makes enough for a party, but here's the thing — you can freeze individual bars wrapped in parchment for up to three months. Having a stash means you're always five minutes away from dessert that'll make people think you spent all day in the kitchen.
Alright, let's break down exactly what goes into this masterpiece...
Inside the Ingredient List
The Flavor Foundation
The butter matters more than you'd think. Use European-style butter with 82% fat content — it creates a richer, more tender shortbread base that tastes like it came from a Parisian bakery. The higher fat content means less water, which translates to a crisper, more flavorful crust that won't get soggy under the caramel. I've made these with regular grocery store butter and the difference is like comparing a symphony to a kazoo. The brown butter step is non-negotiable — those nutty, toasted milk solids add depths of flavor that plain melted butter can't touch.
Dark brown sugar isn't just for color — it brings molasses notes that make the caramel taste like it's been aging in oak barrels. The extra moisture in brown sugar also prevents the caramel from becoming rock-hard when it cools. Light brown sugar works in a pinch, but you'll miss that robust, almost smoky undertone that makes people ask "what's your secret ingredient?"
The Texture Crew
Heavy cream with 36% fat content creates that luxurious mouthfeel that separates amateur caramel from professional versions. Don't substitute half-and-half or milk — the water content is too high and your caramel will weep and separate. Bring the cream to just a warm room temperature before adding it to the hot sugar; cold cream causes violent bubbling that can burn you and crystallize your caramel.
Golden syrup might seem obscure, but it's the insurance policy against grainy caramel. The invert sugars prevent crystallization better than corn syrup ever could, plus it adds this subtle butterscotch note that makes people hover around the kitchen. If you absolutely can't find it, honey works, but you'll get a floral note that changes the character entirely.
The Unexpected Star
Espresso powder is my secret weapon — just 1/4 teaspoon amplifies the caramel flavor without making it taste like coffee. It's like turning up the volume on all the caramel notes while staying invisible. I've had friends ask if I used fancy vanilla or expensive chocolate, but nope, it's this magic dust that costs pennies but adds dollars of perceived value.
Flaky sea salt isn't just for sprinkling on top. A pinch in the caramel itself balances the sweetness and makes the flavors pop like 3D glasses for your taste buds. Maldon salt is my go-to — the pyramid-shaped crystals dissolve on your tongue in bursts that make each bite interesting rather than just sweet.
The Final Flourish
Bittersweet chocolate (70%) provides the perfect counterpoint to the sweet caramel. The higher cocoa content means it won't compete with the caramel's complexity, and it sets with a satisfying snap. Milk chocolate makes these cloyingly sweet — trust me, I learned this the hard way when my sweet-toothed cousin begged me to try it. The result was like candy bar on candy bar violence.
Everything's prepped? Good. Let's get into the real action...
The Method — Step by Step
- Start by browning your butter — this is where the magic begins. Place the butter in a light-colored pan over medium heat and watch closely as it melts, foams, then turns golden with tiny brown specks. That nutty aroma? That's the milk solids toasting, creating flavor compounds that'll make your shortbread taste like it came from a French bakery. Swirl the pan occasionally, and the moment you see the color of hazelnuts and smell something like toasted nuts and caramel, pull it off the heat. This takes about 5-7 minutes, but don't walk away — butter goes from perfect to burnt faster than you can say "smoke alarm."
- While the butter cools slightly, line your 9x13 pan with parchment paper, leaving wings on the sides for easy removal later. Mix your flour, brown sugar, and salt in a bowl, then pour in that liquid gold butter (scraping in all those toasted bits — that's pure flavor). The dough will seem crumbly at first, but trust the process. Press it firmly and evenly into the pan using the bottom of a measuring cup — compacted dough means no soggy bottoms later. Pop this into a 350°F oven for 20-22 minutes until the edges are golden and the center looks set but still pale.
- Now for the caramel — this is the moment of truth. In a heavy-bottomed saucepan, spread your sugar in an even layer and resist the urge to stir. Just let it melt over medium heat, swirling occasionally when the edges start to liquefy. The sugar will go through stages: chunky, then sandy, then liquid around the edges. When it's mostly melted with just a few stubborn lumps, you can gently stir, but patience here prevents crystallization. You're looking for a deep amber color like an old penny — this happens fast once it starts, so don't blink.
- Here's where people panic, but stay with me — this is worth it. Remove the pan from heat and pour in your warm cream mixture (cream, butter, vanilla, espresso powder, and salt). It will bubble violently and steam like a witch's cauldron — this is normal and exciting! Whisk constantly until smooth, then return to medium heat. Cook for 3-4 minutes until the caramel coats the back of a spoon and registers 238°F on a candy thermometer. If you don't have one, drop a bit in cold water — it should form a soft ball that you can squish between your fingers.
- Pour that gorgeous caramel over your cooled shortbread base — it should spread into an even layer about 1/4 inch thick. Tilt the pan gently to coax it into the corners, but don't scrape the bottom of the pan. The caramel that's been in direct contact with the hot pan can be grainy, so leave those last bits behind. Let this sit for exactly 5 minutes — this is when the caramel starts to set but is still warm enough to melt chocolate.
- Scatter your chocolate pieces evenly over the warm caramel, then cover with a baking sheet for 2 minutes. The trapped heat creates a mini sauna that melts the chocolate perfectly without scorching it. Use an offset spatula to spread the chocolate into beautiful swirls — don't overwork it or you'll lose that gorgeous marbled effect. While the chocolate is still soft, shower it with flaky sea salt. That sizzle when the salt hits the warm chocolate? Absolute perfection.
- Now comes the hardest part — waiting. These need to cool completely at room temperature for at least 2 hours, then chill in the fridge for another hour. I know, I know, patience isn't my virtue either. But cutting into warm caramel is like trying to slice honey — messy and frustrating. When they're firm, lift the whole thing out using the parchment wings and cut into squares with a sharp knife warmed in hot water. Clean the knife between cuts for bakery-perfect edges that'll make you look like a professional.
- Store these beauties in an airtight container with parchment between layers. They'll keep at room temperature for 3 days (though they've never lasted that long in my house), or refrigerated for up to a week. The flavor actually intensifies after the first day — something about the salt and chocolate and caramel having time to get acquainted makes them even more addictive. I've been known to hide a stash in the back of the fridge behind the kale, where sweet-toothed family members would never think to look.
- That's it — you did it. But hold on, I've got a few more tricks that'll take this to another level...
Insider Tricks for Flawless Results
The Temperature Rule Nobody Follows
Your caramel's success lives or dies by temperature, but here's what the recipes don't tell you — altitude matters, humidity matters, even the age of your sugar affects the outcome. I live at high altitude, so I take my caramel off the heat 2 degrees earlier than sea level recipes suggest. The caramel continues cooking from residual heat, and I'd rather have it slightly soft than dental work hard. A friend tried skipping this adjustment once — let's just say it didn't end well, and her dentist got a new patient.
Here's the real game-changer: use an infrared thermometer for quick, accurate readings without disturbing the caramel. Traditional candy thermometers take forever to register, and by the time they do, your caramel might be overcooked. The infrared gives you instant feedback, plus you feel like a kitchen spy using fancy technology.
Why Your Nose Knows Best
Professional pastry chefs don't just use thermometers — they use their senses, and you should too. When your caramel hits the sweet spot, it will smell like a perfect balance between butterscotch and toasted nuts, with none of that bitter, burnt sugar aroma. The color should remind you of antique mahogany furniture, not dark coffee. These sensory checkpoints have saved me more times than I can count when my thermometer decided to give up mid-recipe.
Listen to the caramel too — it goes from a vigorous boil to a slower, more viscous bubble as it approaches the right temperature. The sound becomes deeper, almost like slow applause. Okay, ready for the game-changer? When you swirl the pan, the caramel should move like warm honey, leaving a trail that disappears after a second. Too thick and you've gone too far; too thin and you need more time.
The 5-Minute Rest That Changes Everything
After you pour the caramel over the base, walk away for exactly 5 minutes. Don't poke it, don't tilt the pan, don't even look at it sideways. This rest allows the caramel to start setting from the bottom up, creating a stable foundation for the chocolate. I've watched people immediately add chocolate and end up with a marbled mess where the chocolate sinks into the caramel instead of sitting prettily on top.
During this rest, the caramel's surface develops a slight skin — not enough to affect the texture, but just enough to support the chocolate. It's like the difference between dropping a stone into a pond versus onto wet cement. This next part? Pure magic.
The Salt Timing Secret
Don't just sprinkle salt on top and call it done. The best results come from layering salt throughout — a pinch in the shortbread base to enhance the butter flavor, a bit in the caramel to balance sweetness, and finally that finishing sprinkle of flaky salt for texture and visual appeal. This creates a complexity that makes people ask for your recipe before they've even finished chewing.
But here's the key — add the final salt when the chocolate is just set but still slightly tacky. This way, some salt dissolves into the chocolate while some crystals remain intact, giving you little bursts of saltiness instead of just a uniform salty top. It's these tiny details that separate good bakers from legendary ones.
Creative Twists and Variations
This recipe is a playground. Here are some of my favorite ways to switch things up:
Smoky Bourbon Caramel Bars
Add 2 tablespoons of good bourbon to the cream mixture before heating it — the alcohol cooks off, leaving behind vanilla and oak notes that make the caramel taste like it was aged in barrels. Use smoked salt instead of regular flaky salt on top. The combination creates this sophisticated flavor that tastes like something you'd pay twelve dollars for at a trendy dessert bar.
Peanut Butter Lover's Dream
Swirl 1/3 cup of creamy peanut butter into the caramel just before pouring it over the base. The peanut butter adds richness and that nostalgic flavor that makes everyone smile. Top with chopped roasted peanuts for crunch, and use milk chocolate instead of bittersweet for a candy-bar vibe that'll transport you back to childhood lunchboxes.
Salted Maple Walnut
Replace the golden syrup with pure maple syrup and fold in 1 cup of toasted walnuts into the caramel before pouring. Use maple sugar in the shortbread base if you can find it — the maple flavor becomes this whisper of autumn that makes these perfect for Thanksgiving dessert tables. The walnuts add texture and that earthy flavor that pairs beautifully with maple.
Spicy Mexican Chocolate
Add 1/2 teaspoon of cinnamon and a pinch of cayenne to the caramel — not enough to make it hot, just enough to add warmth and complexity. Use Mexican chocolate (like Abuelita) grated on top instead of regular chocolate. The cinnamon and spice create this intriguing flavor that keeps people guessing what's in there.
White Chocolate Raspberry
Swap the bittersweet chocolate for white chocolate and scatter freeze-dried raspberries on top of the chocolate before it sets. The tart raspberries cut through the sweetness of white chocolate and caramel, while the white chocolate adds vanilla notes that make these taste like a fancy box of chocolates.
Coconut Macadamia
Add 1/2 cup of toasted coconut to the shortbread base and use coconut sugar instead of brown sugar. Top with toasted macadamia nuts pressed into the chocolate. The tropical flavors make these perfect for summer potlucks, and the coconut oil in the chocolate keeps everything glossy even in humid weather.
Storing and Bringing It Back to Life
Fridge Storage
These keep beautifully in the fridge for up to a week — actually, I prefer them cold because the caramel firms up to the perfect chewy texture. Store in an airtight container with parchment between layers to prevent them from sticking together. The cold intensifies the flavors, especially the salt, so they're even more addictive after a day or two. If they last that long, you're stronger than anyone in my household.
Here's a pro tip — cut them into smaller pieces before refrigerating. Cold caramel can be tough to cut cleanly, so pre-slicing while they're at room temperature saves you from wrestling with a sharp knife later. Plus, smaller pieces mean you can justify having "just one more" because they're bite-sized, right?
Freezer Friendly
These freeze like champions for up to three months. Wrap individual bars in parchment paper, then store in a freezer bag with as much air removed as possible. The key is letting them thaw slowly — 30 minutes at room temperature brings them back to their original glory without any condensation that could make the chocolate bloom. I've been known to microwave a frozen bar for 10 seconds when desperate, but don't tell anyone I admitted that.
For emergency dessert situations (we've all been there), you can eat them frozen — the caramel becomes this amazing toffee-like texture that's incredibly satisfying. My sister swears the frozen version is even better than room temperature, especially in summer when you want something sweet but not melty.
Best Reheating Method
While these are best at room temperature or chilled, sometimes you want that just-made warmth. The trick is using very low heat — 200°F oven for 5 minutes max, just until the chocolate starts to lose its chill. Any hotter and the caramel will liquefy and run out, creating a sticky mess that defeats the whole purpose. Add a tiny splash of water to a small dish in the oven — it creates steam that prevents the chocolate from drying out.
Never microwave these unless you want caramel soup with chocolate islands. If you must use a microwave (and I judge you slightly), do 5-second bursts at 20% power, checking after each burst. But honestly, they're so good cold that reheating is usually unnecessary — just let them come to room temperature for maximum flavor impact.