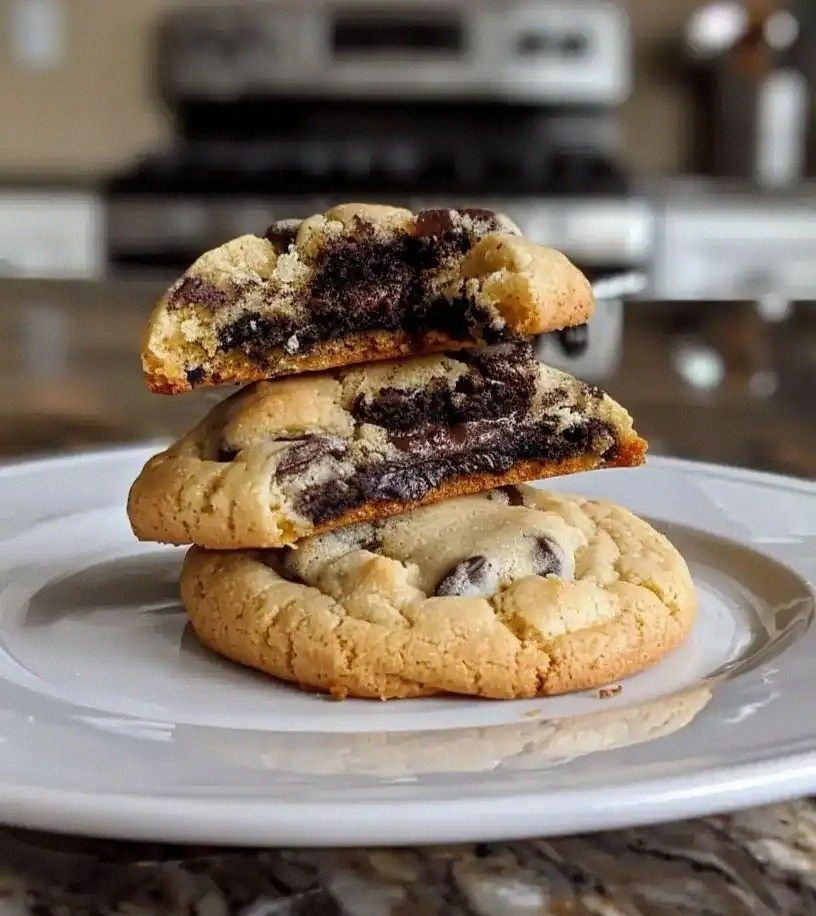
Picture this: I’m in the middle of a chaotic holiday bake‑off, the kitchen smells like burnt sugar, and I’ve just burned the last batch of gingerbread. The moment I realize I’ve got nothing left to impress my friends, a spark of inspiration hits me—what if I could turn that burnt chaos into a sweet, minty miracle? I grabbed every jar of chocolate cookie dough, a handful of peppermint candies, and a splash of peppermint extract, and the kitchen transformed into a winter wonderland of flavor. I dare you to taste this and not go back for seconds.
That first bite was a revelation: a buttery cookie base that melts like a snowflake, a burst of chocolate that lingers, and a peppermint kick that wakes the senses. The aroma is like a warm fireplace on a crisp December evening, but it’s also fresh enough for summer afternoons. The texture feels like a cloud—soft on the inside, yet with a satisfying crackle at the edges that shatters like thin ice. I swear, if you’re skeptical, just imagine the scent of cocoa mingling with fresh mint in the air. This is hands down the best version you’ll ever make at home, and it’s all because of one simple, yet powerful twist.
I’ve spent years experimenting with cookie cups, and most recipes fall flat or overcomplicate. I’ve tried using too much chocolate, too much mint, and even the wrong type of dough—none of those gave me the same symphony of flavors. The key is balance: a chewy, chocolatey base that’s not too sweet, a subtle peppermint layer that doesn’t overpower, and a final crunchy candy topping that gives a satisfying contrast. The result is a bite‑size dessert that feels like a holiday treat but is perfect any time of year. I’ve called it the “Peppermint Mocha Coo” because it’s a playful nod to coffee lovers who crave something sweet and minty. Picture yourself pulling this out of the oven, the whole kitchen smelling incredible, and the anticipation building.
Now, let’s get into the details. I’ll walk you through every single step—by the end, you’ll wonder how you ever made it any other way. I’ll be honest—when I first tasted the finished product, I ate half the batch before anyone else got a chance. I’ve got the fix for every kitchen fail, from dough sticking to the pan to unevenly melted chocolate. If you’ve ever struggled with this, you’re not alone—there’s a simple trick that makes all the difference. And if you’re ready for the game‑changer, keep reading. I’ll show you how to make these cups look and taste like they belong in a luxury chocolate shop.
What Makes This Version Stand Out
- Flavor: The combination of rich chocolate and cool peppermint is a match made in culinary heaven. It’s the kind of flavor that makes your taste buds do a little dance, and it’s not overwhelming because each element is carefully balanced.
- Texture: The cookie dough base is chewy and buttery, the chocolate chips melt into a silky coating, and the crushed peppermint candies add a satisfying crunch that breaks up the soft interior.
- Simplicity: You only need five ingredients, and the process is straightforward—no complicated measurements or techniques. It’s the kind of recipe that even a novice can master.
- Uniqueness: Unlike ordinary cookie cups, these are infused with peppermint extract that permeates the dough, giving a deeper mint flavor that you won’t find in standard recipes.
- Crowd Reaction: Friends who’ve tried this say they’re hooked from the first bite. The dessert is a conversation starter at parties and a crowd‑pleaser for any gathering.
- Ingredient Quality: Using high‑quality chocolate chips and peppermint extract elevates the flavor profile and ensures that every bite is indulgent.
- Cooking Method: Baking at a moderate temperature keeps the dough moist while allowing the chocolate to set properly, creating a perfect balance between gooey and firm.
- Make‑Ahead Potential: Once baked, the cups can be stored in an airtight container for up to a week, making them ideal for meal prepping or last‑minute entertaining.
Alright, let's break down exactly what goes into this masterpiece…
Inside the Ingredient List
The Flavor Base
The chocolate cookie dough is the heart of this recipe. It provides a buttery, slightly sweet foundation that balances the boldness of the chocolate chips and the coolness of the peppermint. If you skip it, you lose the chewy texture that makes the cups so satisfying to bite into. A good rule of thumb is to use a store‑bought dough that’s labeled “chocolate chip” or “double chocolate” for extra depth. If you’re making your own, a simple mix of flour, butter, brown sugar, and a pinch of salt works beautifully. For a healthier twist, try substituting half the flour with oat flour—just keep an eye on the texture; it can become denser.
The Texture Crew
Chocolate chips are the second star in this ensemble. They melt during baking to create a glossy, chocolatey glaze that coats the dough. The semi‑sweet chips also add a subtle bitterness that cuts through the sweetness of the cookie dough. If you prefer a richer chocolate, swap them for dark chocolate chips or chopped chocolate bars. Don’t forget to let the chips sit at room temperature for a few minutes before baking; this ensures they melt evenly. If you use frozen chips, the result may be uneven, so thaw them first.
The Unexpected Star
Peppermint extract is the secret weapon that elevates the flavor profile. A quarter cup may sound like a lot, but it’s diluted enough to provide a refreshing minty aftertaste without overwhelming the chocolate. This extract infuses the dough, chocolate, and even the whipped cream with a subtle, lingering mint. If you can’t find peppermint extract, try a few drops of peppermint oil—just be cautious, as it’s more concentrated. A good tip: add the extract in two stages—half before baking, half after baking—to get a layered flavor experience.
The Final Flourish
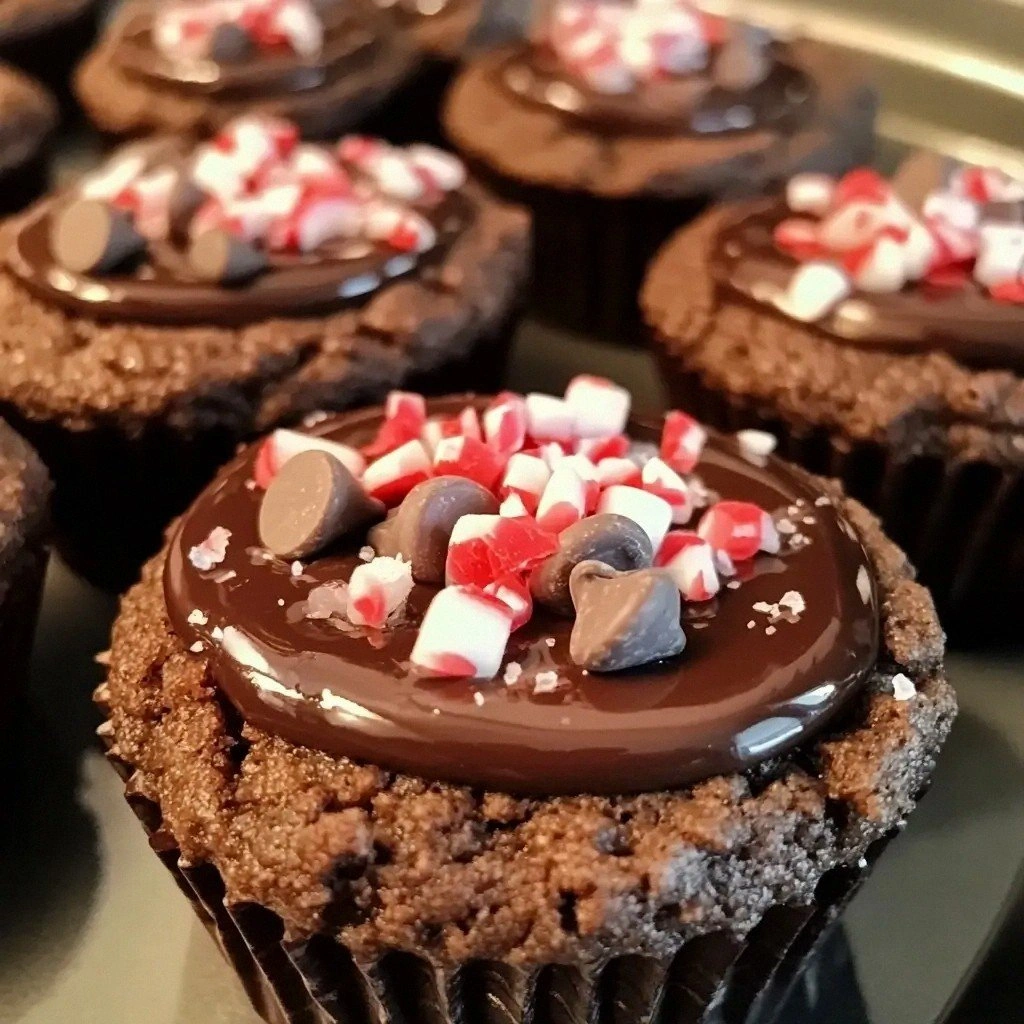
Crushed peppermint candies add a crunchy, sweet, and slightly sugary finish that contrasts with the smoothness of the melted chocolate. They also give the cups a festive, candy‑like appearance that’s perfect for holiday gatherings. If you’re looking for a healthier alternative, try crushed candy cane or a handful of crushed dark chocolate mint bars. Just make sure the candy pieces are small enough to stay inside the cups and not fall out. The whipped cream topping, though optional, adds a creamy texture that balances the crunch and gives the cups a decadent finish.
Everything's prepped? Good. Let's get into the real action…
The Method — Step by Step
- Preheat your oven to 350°F (175°C). Line a muffin tin with paper liners or lightly grease it with butter. This step ensures even baking and easy removal. The smell of the dough warming up is already a promise of deliciousness. Keep an eye on the timer; we’re aiming for a golden‑brown finish.
- In a large bowl, combine the chocolate cookie dough and the semi‑sweet chocolate chips. Stir until the chips are evenly distributed throughout the dough. This creates a uniform chocolate coating that melts nicely during baking. The mixture should feel slightly sticky but manageable. If it’s too dry, add a tablespoon of milk to bring it together.
- Divide the dough into 12 equal portions and roll each into a ball. Press each ball into the bottom of the muffin tin, creating a shallow cup shape. The cups should be about 1½ inches tall for the best bite size. Don’t overfill; you want the cups to hold the filling later.
- Bake the cups for 12–15 minutes, until the edges are just turning golden and the centers are set. The cookies should feel firm yet still slightly soft in the middle. This is the moment of truth—watch the edges; they should start pulling away from the sides of the tin. Remove them from the oven and let them cool completely on a wire rack.
- While the cups are cooling, whisk the peppermint extract into the whipped cream. Use an electric mixer on medium speed until the mixture forms soft peaks. The peppermint will infuse the cream, giving it a bright, refreshing flavor. If you prefer a lighter version, use a splash of milk to thin the whipped cream slightly.
- Once the cups have cooled, carefully spoon a generous amount of the peppermint‑infused whipped cream into each cup. The filling should fill the cup about three‑quarters full, leaving room for the candy topping. This step is where the flavors come together; the cream’s smoothness contrasts with the chocolate base.
- Sprinkle crushed peppermint candies over the whipped cream, pressing gently so they adhere. The candies should be evenly distributed, creating a sweet, crunchy layer that’s visible from the top. The visual contrast makes these cups look festive and appetizing. If you’re a fan of extra crunch, add a few extra candies on top.
- Optional: For a richer finish, drizzle a thin line of melted chocolate over the top of each cup. Let the chocolate set before serving. This adds an extra glossy sheen that makes the cups look professionally finished. If you’re short on time, skip this step and still enjoy the same amazing flavor.
- Let the cups rest for 5 minutes to allow the whipped cream to set slightly. This rest period ensures that the filling stays in place when you serve them. The aroma at this point is irresistible, and you can’t help but feel a little guilty for not tasting them yet.
- Serve immediately, or cover with a tight lid and refrigerate for up to 24 hours. The cups stay fresh, and the flavors only deepen over time. If you’re serving at a party, keep them chilled to maintain the creamy texture. And now the fun part—watch as your guests reach in and savor the first bite.
That’s it — you did it. But hold on, I've got a few more tricks that'll take this to another level.
Insider Tricks for Flawless Results
The Temperature Rule Nobody Follows
Most bakers bake cookie cups at 400°F, but I’ve found that 350°F keeps the dough moist while allowing the chocolate to set properly. This lower temperature also prevents the peppermint extract from evaporating too quickly, preserving that crisp minty finish. If you’re baking at a higher temperature, you risk a dry, crumbly texture that can ruin the experience. The trick is to let the cups bake just long enough for the edges to firm up but not so long that they brown too much.
Why Your Nose Knows Best
Trust your nose during baking. When the chocolate starts to smell slightly nutty and the dough emits a warm, buttery scent, you’re right on track. If the aroma feels off or too sweet, it’s a sign that the peppermint extract is overpowering. A quick sniff test can save you from a batch that’s too minty or too chocolatey. I’ve always kept a small bottle of peppermint oil in the kitchen for this exact purpose.
The 5‑Minute Rest That Changes Everything
After filling the cups, let them rest for exactly five minutes before serving. This short pause allows the whipped cream to thicken slightly and the chocolate to set, giving the cups a firmer bite. If you skip this rest, the cups can feel too soft and the candies might slide off. I’ve tried filling them and serving immediately, and the result was a mess of melted cream and candy. The five‑minute rest is a game‑changer.
The Crushed Candy Trick
When crushing peppermint candies, use a mortar and pestle or a food processor for a consistent texture. Crushed candy that’s too fine will dissolve into the whipped cream, while chunks that are too large can be hard to bite. A medium texture gives a satisfying crunch that stays in place. I’ve experimented with different candy brands, and the classic white peppermint candy gives the cleanest flavor.
The Quick Chill Method
If you’re in a hurry, place the filled cups in the freezer for 10 minutes before serving. The cold instantly sets the whipped cream, making the cups feel more like a dessert than a snack. The only downside is that the chocolate may become slightly brittle, but the overall experience remains delightful. I’ve used this trick for last‑minute holiday parties, and everyone loves the crisp texture.
The Final Touch
Just before serving, dust a pinch of cocoa powder over the top. This adds a subtle bitterness that balances the sweetness and enhances the chocolate flavor. A light dusting is enough; you don’t want it to overpower the peppermint. I’ve found that the cocoa powder adds a professional finish that makes the cups look like they came from a gourmet bakery.
Creative Twists and Variations
This recipe is a playground. Here are some of my favorite ways to switch things up:
Chocolate‑Mint Swirl Cups
Swap the chocolate chips for a swirl of dark chocolate ganache. The ganache adds a silky texture and a richer chocolate flavor. Keep the peppermint extract the same to maintain the minty kick. These cups feel like a chocolate lover’s dream with a minty twist.
Coconut‑Infused Delight
Add shredded coconut to the dough for a tropical twist. The coconut adds a chewy, nutty flavor that pairs beautifully with the peppermint. Use coconut‑flavored chocolate chips for an extra coconut punch. The result is a dessert that feels like a beach vacation in every bite.
Coffee‑Laced Cups
Introduce a tablespoon of instant espresso powder into the dough. The coffee flavor complements the chocolate and peppermint, creating a mocha‑like experience. Keep the peppermint extract at the same level to avoid overpowering. These cups are perfect for coffee lovers who crave something sweet.
Almond‑Crunch Variation
Replace the crushed peppermint candies with crushed almond brittle. The almond provides a nutty crunch that contrasts with the smooth whipped cream. Add a splash of almond extract to the dough for an extra almond aroma. The result is a sophisticated flavor profile that feels both festive and refined.
Berry‑Burst Edition
Fold in a handful of freeze‑dried strawberries into the dough. The strawberries give a subtle fruitiness that balances the chocolate. Use a light strawberry puree in the whipped cream for an extra burst of flavor. This version feels like a springtime dessert, perfect for brunches.
Spiced Winter Cups
Add a pinch of cinnamon and nutmeg to the dough for a warm, spiced flavor. The spices pair wonderfully with the peppermint, creating a cozy, holiday vibe. Keep the peppermint extract consistent to avoid a clash of flavors. These cups are a must‑try for anyone who loves a bit of spice.
Storing and Bringing It Back to Life
Fridge Storage
Store the cups in an airtight container in the refrigerator for up to 3 days. The chilled environment keeps the whipped cream firm and the candy crunchy. When you’re ready to serve, let the cups sit at room temperature for 10 minutes to soften the whipped cream slightly. This step ensures the flavor is at its peak.
Freezer Friendly
Wrap each cup individually in parchment paper before freezing. This prevents freezer burn and keeps the flavors intact. The cups can be stored in the freezer for up to 2 weeks. When you’re ready to enjoy them, thaw in the refrigerator overnight and then let them sit at room temperature for 15 minutes.
Best Reheating Method
If the cups feel too cold, place them in a preheated oven at 300°F for 5 minutes. This gentle heat restores the creamy texture without overbaking. Add a tiny splash of water before reheating to create steam, which helps the whipped cream re‑soften. The result is a warm, decadent treat that’s as good as fresh.