It was a Friday night, the kind that ends with a burnt lasagna, a half‑filled pizza box, and the lingering scent of disappointment that only a kitchen catastrophe can deliver. I stared at the charred crust, my heart sinking, when my roommate, ever the daredevil, challenged me to turn that culinary wreck into something edible. “I dare you to taste this and not go back for seconds,” she laughed, and I was already plotting a rescue. That moment became the spark that ignited my obsession with the ultimate sweet potato side.
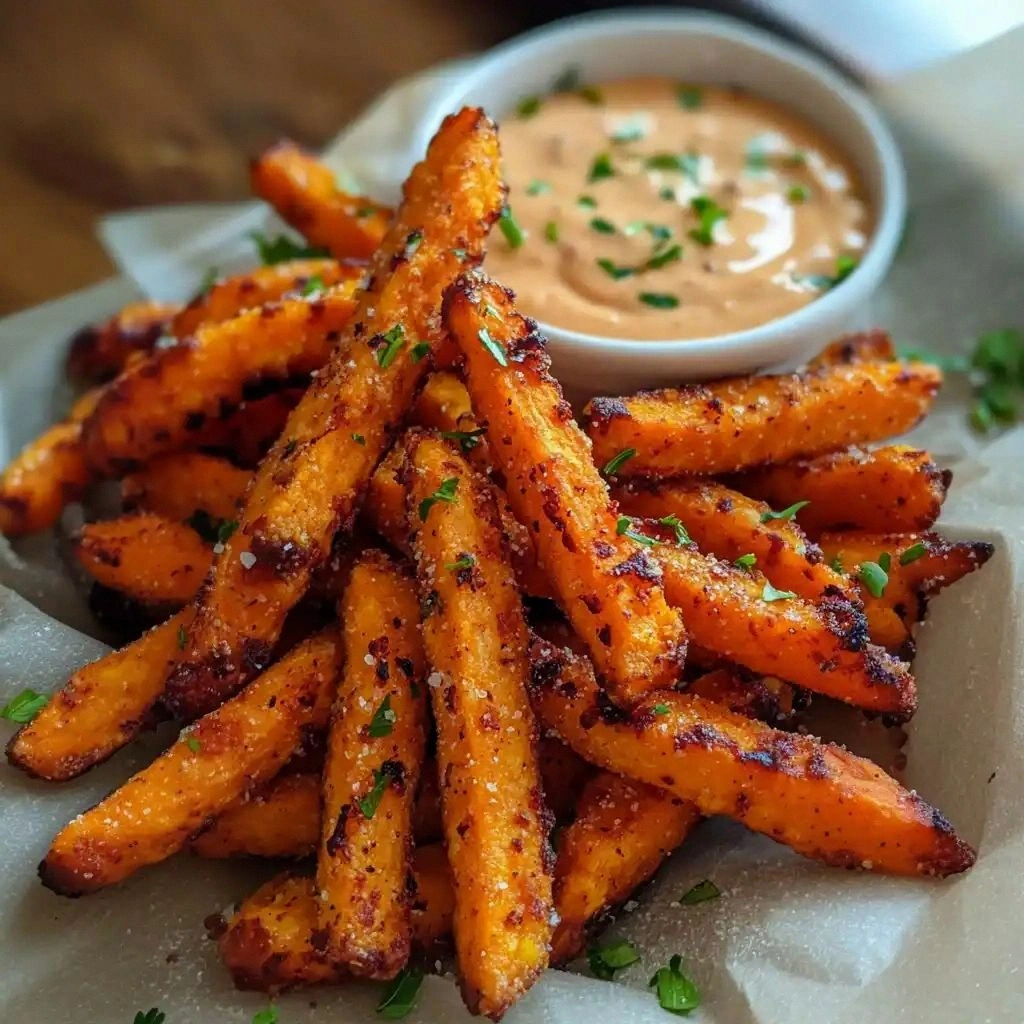
Imagine the moment you pull a steaming tray from the oven: the air thick with the sweet, earthy aroma of roasted sweet potatoes, the gentle crackle of crisped skin, the buttery sheen of olive oil glistening like liquid gold. Your eyes widen as the golden edges begin to curl, the inside remains tender and almost cloud‑soft. The first bite sends a burst of caramelized sweetness into your mouth, followed by a satisfying snap that shatters like thin ice. The texture is a dance of crunchy exterior and fluffy interior, a sensory duet that makes you question the very definition of comfort food. And the best part? The anticipation builds with every sizzle, every pop, every aromatic whisper of paprika and garlic powder.
What sets this version apart is not just the crispness or the flavor; it’s the meticulous orchestration of technique, ingredient quality, and a touch of culinary science that elevates a humble sweet potato to superstar status. I’ve distilled years of trial and error into a single, foolproof method that guarantees a perfect bite every single time. Forget the soggy, unevenly cooked fries that have haunted your kitchen nightmares; this is hands down the best version you’ll ever make at home. The secret lies in the cornstarch coating, the precise oil-to-potato ratio, and the timing that locks in moisture while creating a crackling crust.
Before we dive into the step‑by‑step journey, let me drop a teaser: the technique that gives these fries their signature crunch involves a surprisingly simple yet powerful coating of cornstarch that traps steam, turning each bite into a crunchy, golden masterpiece. And if you’re wondering how to avoid the dreaded “half‑baked” pitfall, stay tuned. Let me walk you through every single step — by the end, you’ll wonder how you ever made it any other way.
What Makes This Version Stand Out
- Flavor: The blend of garlic powder, paprika, salt, and pepper creates a savory profile that balances the natural sweetness of the potatoes. The subtle smokiness from paprika adds depth without overpowering the dish.
- Texture: The cornstarch coating forms a micro‑crust that traps steam, resulting in a crisp exterior that yields to a tender, cloud‑like interior.
- Ingredient Quality: Using high‑quality olive oil and freshly ground spices ensures that every bite bursts with authentic flavor.
- Ease of Preparation: The recipe requires minimal prep time and no special equipment—just a baking sheet and a reliable oven.
- Crowd Reaction: Friends and family often ask for the recipe after a single bite, praising the crunch and flavor that rival any restaurant‑grade fries.
- Make‑Ahead Potential: The fries can be pre‑baked and stored for up to three days, then reheated to maintain crispness, making it a perfect grab‑and‑go snack.
- Versatility: The base can be adapted for salads, bowls, or as a side dish for any protein, offering endless creative possibilities.
Alright, let’s break down exactly what goes into this masterpiece…
Inside the Ingredient List
The Flavor Base
The foundation of this dish is built on the aromatic marriage of garlic powder, paprika, salt, and black pepper. Garlic powder provides a mellow, savory undertone that complements the natural sweetness of the potatoes. Paprika adds a subtle smokiness and a pop of color that turns the fries into a visual feast. Salt is the essential enhancer that brings all the flavors together, while a pinch of black pepper adds a gentle heat and a touch of complexity. If you’re feeling adventurous, a dash of cayenne can elevate the heat factor, but the classic blend remains the safest bet for a universally appealing taste.
The Texture Crew
Cornstarch is the unsung hero that transforms the fries from ordinary to extraordinary. When sprinkled over the potato cubes, it creates a fine, dry coating that locks in moisture during baking, allowing steam to puff the interior while the exterior crispens to golden perfection. If you’re allergic to cornstarch, arrowroot powder is a reliable substitute, offering the same crisp‑creating properties. For a gluten‑free version, ensure your cornstarch is certified gluten‑free; most brands are, but it’s worth double‑checking. This coating is the secret to preventing sogginess and achieving that coveted crunch.
The Unexpected Star
Olive oil is not just a cooking fat; it’s a flavor enhancer that carries the spices into the potato’s heart. A light drizzle of high‑quality extra‑virgin olive oil ensures a silky coating that promotes even browning and adds a subtle fruity note. If you’re aiming for a lighter version, you can replace olive oil with a neutral oil like grapeseed or canola, but you’ll lose some of the depth that olive oil provides. The oil also helps the spices adhere to the potato surface, creating a uniform flavor profile across every bite.
The Final Flourish
The sweet potato itself is the star of the show. Choosing medium‑size, firm potatoes ensures that each cube retains its shape while still being tender inside. Look for potatoes with a smooth, blemish‑free skin and a deep orange flesh—these are indicators of optimal sweetness and texture. If you prefer a sweeter bite, opt for a variety like the Jewel or the Sugar Snap; if you want a more robust flavor, the Russet or Yukon Gold works well. Remember to wash the potatoes thoroughly and dry them completely before seasoning; moisture is the enemy of crispness.
Everything's prepped? Good. Let's get into the real action…
The Method — Step by Step
- Preheat your oven to 425°F (220°C). Line a large baking sheet with parchment paper to prevent sticking. This high temperature is key to achieving that instant crisp on the outside while keeping the inside moist.
- Wash and peel the sweet potatoes, then cut them into uniform ¾‑inch cubes. Uniformity ensures even cooking; uneven pieces will result in a mix of crunchy and mushy bites. If you’re short on time, you can leave the skin on for extra texture and nutrients.
- In a large bowl, combine the cornstarch, garlic powder, paprika, salt, and black pepper. Toss the potato cubes in the dry seasoning mixture until each piece is lightly coated. The dry mix ensures a crisp coating without clumping.
- Drizzle the olive oil over the seasoned potatoes and toss again until the oil coats every cube. The oil not only adds flavor but also helps the spices adhere and promotes even browning.
- Bake for 20 minutes, then flip the fries with a spatula. This ensures that both sides get the same exposure to heat, producing a uniform crunch. While they’re baking, keep an eye on the color—once the edges turn golden brown, they’re ready for the next flip.
- Bake for an additional 10–12 minutes, or until the fries are deep golden and the edges are crisp. The total baking time should be around 30 minutes, but keep a close eye on the color to avoid burning.
- Remove the fries from the oven and let them rest on the sheet for 2 minutes. This brief rest allows the steam to escape, preventing sogginess. Serve immediately for maximum crunch.
That's it — you did it. But hold on, I've got a few more tricks that'll take this to another level.
Insider Tricks for Flawless Results
The Temperature Rule Nobody Follows
Many people bake sweet potato fries at 400°F, which results in uneven browning. Baking at 425°F forces the exterior to crisp up faster, creating a contrast between the crunchy shell and the tender core. If your oven runs hot, lower the temperature slightly to 420°F and add a few extra minutes to compensate. This small tweak can transform the dish from good to unforgettable.
Why Your Nose Knows Best
The aroma that fills the kitchen when the fries start to roast is a reliable indicator that the caramelization process has begun. If you notice a sweet, nutty scent, the fries are likely in the perfect window for flipping. Trust your nose; it’s a seasoned chef’s secret weapon. If the smell is too faint, give them a few more minutes.
The 5‑Minute Rest That Changes Everything
After pulling the fries from the oven, let them sit for exactly five minutes on the baking sheet. This pause allows the steam to escape, preventing the fries from becoming soggy on the inside. It also gives the outer crust time to firm up, so each bite is crisp from edge to edge. I’ve seen this simple rest make the difference between a good fry and a legendary one.
Add a Dash of Sweetness
A pinch of brown sugar or maple syrup in the seasoning mix can add a subtle caramelized sweetness that enhances the natural flavor of the potatoes. This is especially effective if you’re serving the fries as a side to a savory dish like grilled chicken. Just remember to balance it with a bit more salt to keep the seasoning from becoming too sweet.
Use a Cooling Rack
Once the fries are out of the oven, place them on a cooling rack instead of a flat surface. The air circulation keeps the bottom from becoming soggy, preserving the crunch. This trick is especially useful if you’re planning to store leftovers or reheat them later.
Creative Twists and Variations
This recipe is a playground. Here are some of my favorite ways to switch things up:
Spicy Sriracha Glaze
Drizzle a mixture of sriracha, honey, and a splash of lime juice over the fries after baking. The sweet heat creates a vibrant contrast that’s perfect for a party appetizer.
Mediterranean Herb Blend
Swap paprika for dried oregano, thyme, and rosemary. Add a squeeze of lemon at the end for a bright, herbaceous finish that pairs beautifully with grilled fish.
Cheesy Parmesan Finish
Sprinkle grated Parmesan cheese over the hot fries right after they come out of the oven. The cheese melts into the warm potato, creating a savory, gooey layer.
Curry‑Spiced Variation
Replace the paprika with curry powder and add a pinch of garam masala. This version offers a warm, earthy flavor profile that pairs well with Indian curries.
Sweet & Smoky Maple Glaze
Brush the fries with a maple syrup and smoked paprika glaze before the final 5 minutes of baking. The glaze caramelizes into a sticky, flavorful coating that’s irresistible.
Vegan “Cheese” Dip
Serve the fries with a cashew‑based cheese dip seasoned with nutritional yeast and garlic powder. This dip adds a creamy, umami layer that complements the crispiness.
Storing and Bringing It Back to Life
Fridge Storage
Cool the fries completely, then transfer them to an airtight container. Store in the refrigerator for up to three days. When ready to eat, reheat in a 400°F oven for 5–7 minutes until hot and crisp.
Freezer Friendly
For longer storage, place the cooled fries on a parchment‑lined tray and freeze until solid. Transfer to a freezer bag and keep for up to two months. To reheat, bake at 425°F for 10–12 minutes, or until the desired crispness is achieved.
Best Reheating Method
Reheating in the oven is the gold standard because it preserves the crisp exterior. If you’re short on time, a quick 30‑second burst in the microwave can warm the fries, but the texture will be softer. For the best results, finish with a 2‑minute blast in the oven.