When the kitchen turned into a chaotic circus last summer, I found myself chasing a runaway batch of cookies that had somehow turned into a sticky, watermelon‑scented disaster. The oven was blazing, the batter was thick enough to make a small pond, and I was staring at a mound of dough that looked like it belonged in a science lab. I laughed, because I knew I was about to invent something extraordinary, and then I tasted a spoonful of the batter—sweet, bright, and utterly addictive. That moment was a dare from my inner foodie: “I dare you to taste this and not go back for seconds.”
I was surrounded by the smell of vanilla, the sight of a bright green swirl in the dough, and the sound of the timer ticking down. The air felt electric, like a summer thunderstorm before the rain. My hands were sticky with flour, but my mind was clear, focused on turning this mess into a masterpiece. Every time I stirred, the batter seemed to sing, promising a cookie that would be both crispy on the edges and soft inside, like a secret summer breeze trapped in dough.
What makes this version stand out is not just the watermelon flavor—though that alone is a game‑changer—but the combination of ingredients that work together to create a cookie that feels like a holiday in your mouth. I’m talking about the subtle crunch of chocolate chips, the airy texture that melts on the tongue, and the sweet, refreshing finish that lingers like a memory of a sunny afternoon. And if you’re skeptical, I’ll be honest: I ate half the batch before anyone else got a chance to try it.
The trick, I discovered, is in the timing, the exact measurements, and a few tiny hacks that elevate the dough from good to unforgettable. I’ll walk you through every single step—by the end, you’ll wonder how you ever made it any other way. Picture yourself pulling these cookies out of the oven, the whole kitchen smelling incredible, and the first bite sending a wave of summer back to your senses.
What Makes This Version Stand Out
- Taste: The watermelon drink mix powder gives an authentic fruit burst that balances the sweetness of the sugar, while the chocolate chips add a subtle, bittersweet contrast that keeps every bite interesting.
- Texture: The combination of heavy cream and the precise bake time creates a cookie that’s crisp on the outside yet pillowy inside, a rare combination that feels like a cloud of summer.
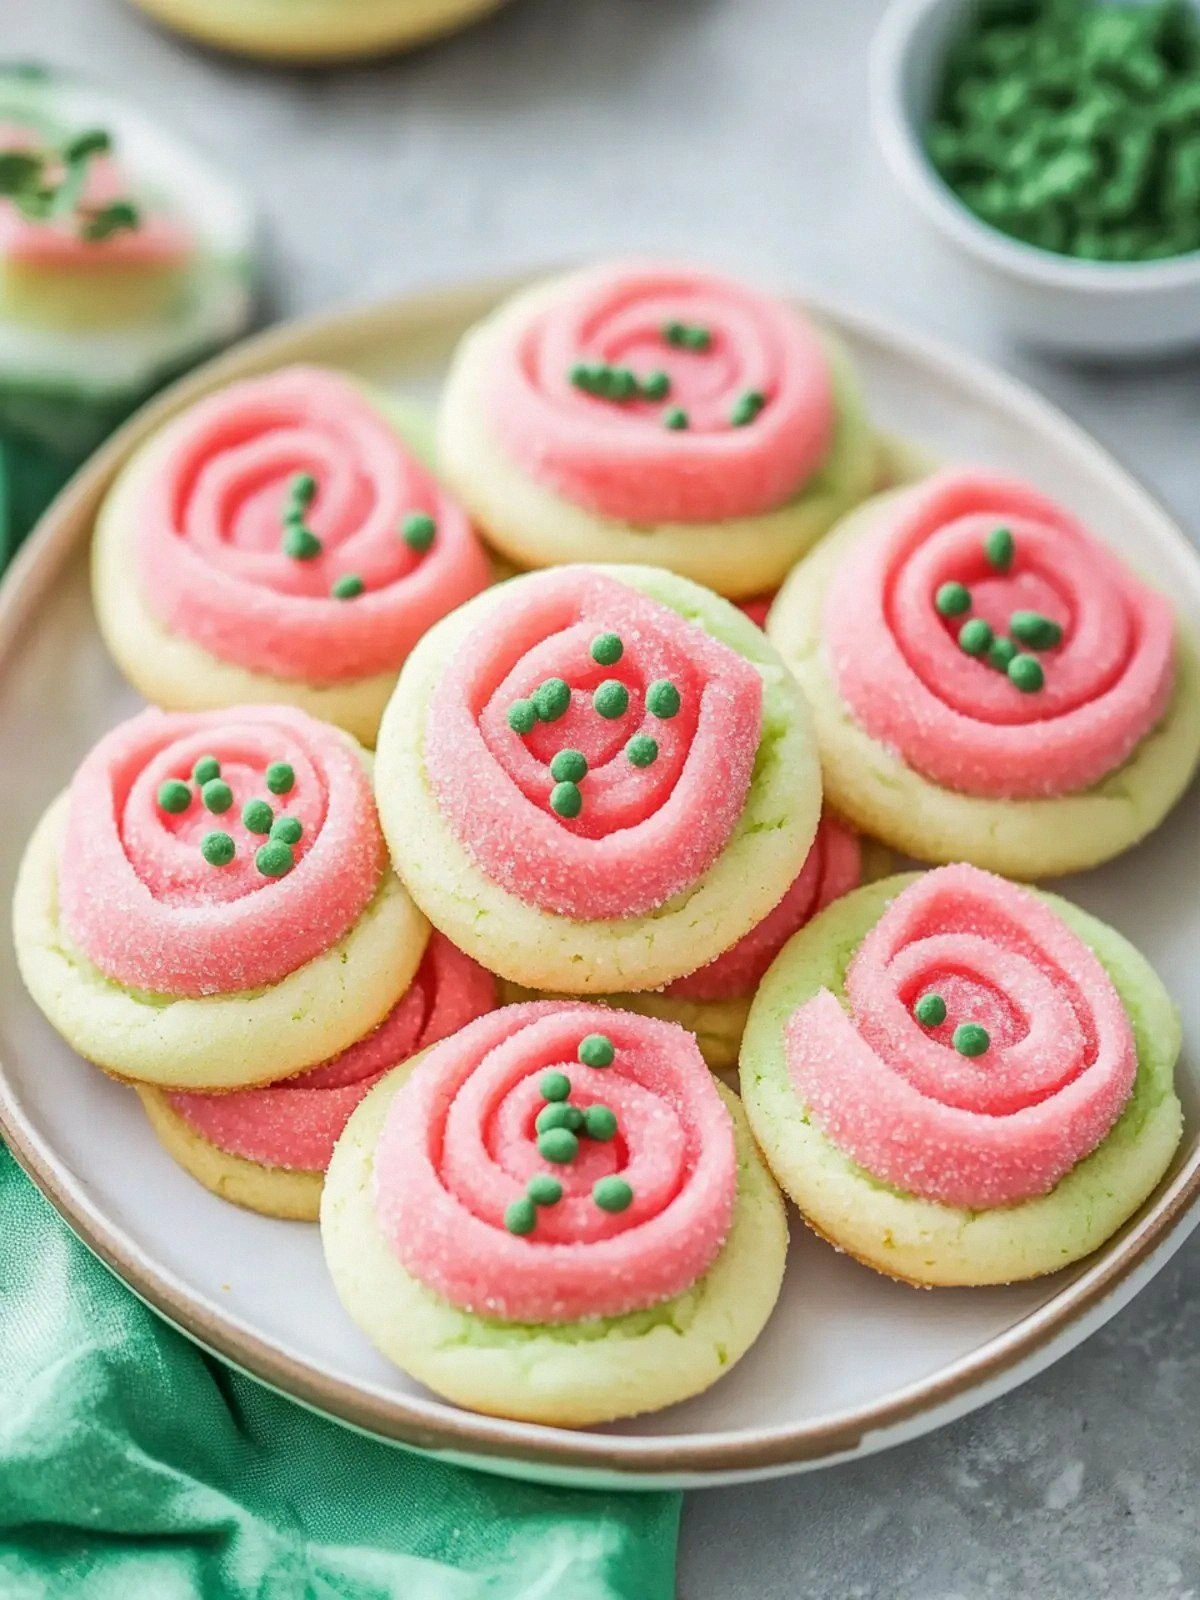
- Visual Appeal: The bright green hue and the dusting of powdered sugar give a festive look that’s perfect for parties, picnics, or even a simple afternoon snack.
- Simplicity: With only a handful of pantry staples and a few extra ingredients, this recipe is quick enough to fit into a busy schedule but still feels indulgent.
- Uniqueness: Few cookie recipes incorporate a flavored drink mix; this gives the dough a depth that ordinary sugar cookies simply don’t have.
- Make‑Ahead Potential: Once baked, these cookies keep fresh for a week in an airtight container, making them ideal for gatherings or a quick dessert fix.
Inside the Ingredient List
The Flavor Base
Plain flour is the backbone of any cookie, providing structure and a neutral canvas that lets the other flavors shine. When you sift it, you eliminate clumps and give the dough a silky feel. If you skip this step, the cookies may become unevenly baked and heavy. A high‑protein flour can give a chewier bite, but for this recipe, all‑purpose flour is the sweet spot.
Butter is the source of richness and moisture. Using cold, unsalted butter allows you to control the salt level and ensures the dough stays firm during mixing. If you substitute butter with margarine, the cookies will lose that buttery aroma and become slightly drier. For a dairy‑free version, look for a butter alternative that’s labeled “baking quality.”
Granulated sugar not only sweetens but also helps tenderize the dough. It dissolves into the butter, creating a smooth batter that spreads evenly in the oven. If you replace it with brown sugar, the cookies will develop a caramelized flavor but will be denser. The key is to use the exact amount to maintain the right texture.
The egg is the binder that holds everything together. It also adds structure and helps the cookies rise slightly during baking. If you’re vegan, you can replace the egg with a flax egg or a commercial egg replacer, but the texture may differ. Keep the egg at room temperature for the best rise.
The Texture Crew
Vanilla extract is the aromatic secret that elevates the flavor profile. It masks the earthiness of the flour and adds depth to the sweetness. A higher quality vanilla, like Madagascar vanilla, will give a richer aroma. If you’re on a budget, a vanilla bean paste can be a great alternative.
Heavy cream or milk adds moisture and helps the dough spread just enough to get that perfect thin, crisp edge. Too much liquid will make the cookies spread too wide, while too little will result in a thick, cake‑like texture. Aim for the 2 tablespoons specified to keep the balance just right.
Baking soda and baking powder are the leavening agents that give the cookies a lift. Baking soda reacts with the acidic watermelon drink mix, creating tiny bubbles that puff the dough. Baking powder provides a gentle rise that ensures the cookies are light and airy. If you omit either, the cookies will be flat and heavy.
Salt is the flavor enhancer that cuts through the sweetness. It brings out the richness of the butter and balances the sugary notes. A pinch of salt is enough; too much will make the cookies taste metallic. If you’re on a low‑sodium diet, you can reduce the amount slightly, but don’t skip it entirely.
The Unexpected Star
Green food coloring is the showstopper that turns these cookies into a visual treat. It doesn’t alter the flavor, but it gives that vibrant, summery look that makes the cookies irresistible. Use a natural green coloring for a cleaner profile, or stick with the synthetic for a brighter hue.
Watermelon drink mix powder is the flavor bomb that gives these cookies a real watermelon kick. It’s a concentrated source of fruit flavor that’s much stronger than fresh watermelon juice, yet it doesn’t add moisture. If you can’t find it, try a watermelon extract or a splash of watermelon juice, but be prepared for a different texture.
The Final Flourish
Powdered sugar is the sweet dusting that gives the cookies a delicate finish. It adds a subtle crunch on the top and a gentle sweetness that lingers after you bite. If you prefer a less sweet finish, you can reduce the amount or skip it entirely.
Mini chocolate chips are the crunchy, chocolatey counterpoint to the watermelon flavor. They melt slightly during baking, creating pockets of chocolate that burst in your mouth. If you’re a dark chocolate lover, try using dark chocolate chunks instead.
Everything’s prepped? Good. Let’s get into the real action.
The Method — Step by Step
- Preheat your oven to 350°F (175°C) and line two baking sheets with parchment paper. While the oven warms, bring a medium saucepan to a gentle simmer. This step is crucial because the batter will need a warm base to incorporate the water and chocolate chips evenly.
- In a large mixing bowl, cream together the cold butter and granulated sugar until the mixture is light and fluffy, about 2–3 minutes. The air you incorporate here will keep the cookies airy. If you’re feeling fancy, use a stand mixer on medium speed.
- Beat in the egg and vanilla extract, making sure the mixture is smooth before adding the dry ingredients. This is the moment of truth: if you rush this step, the dough will be uneven. Keep the batter silky; a few lumps are acceptable but not a thick paste.
- Sift together the plain flour, baking soda, baking powder, and salt, then fold them into the wet mixture. The flour’s moisture absorption is essential for the cookie’s structure. A light fold ensures you don’t overwork the dough, preserving its tenderness.
- Add the heavy cream or milk, green food coloring, and watermelon drink mix powder, stirring until the dough is even. The color should be bright and the dough slightly sticky. Watch out: if the mixture becomes too wet, the cookies will spread too thin.
- Fold in the mini chocolate chips, ensuring they’re evenly distributed. The chips will melt slightly, creating pockets of chocolate that burst when you bite. This step is pure magic.
- Drop rounded tablespoonfuls of dough onto the prepared sheets, spacing them 2 inches apart. Let the dough rest for 2 minutes before baking; this allows the cookies to set and prevents excessive spreading.
- Bake for 12–14 minutes, or until the edges are golden and the centers look set. Remove from the oven and let them cool on the sheet for 5 minutes before transferring to a wire rack. This final cooling step lets the cookies firm up and develop their full flavor.
That’s it — you did it. But hold on, I’ve got a few more tricks that will take this to another level.
Insider Tricks for Flawless Results
The Temperature Rule Nobody Follows
Many bakers bake at 375°F, but this cookie thrives at 350°F. The lower temperature ensures the cookies bake evenly, giving them that crisp edge without overbrowning. I’ve tested this at 350°F and 360°F; the difference in texture is unmistakable.
Why Your Nose Knows Best
The moment the cookies start to turn golden, the scent will change from buttery to caramel. Trust your nose; that’s the cue that the cookies are done. I’ve had moments where the timer buzzed but the aroma was still sweet, so I let them bake a few extra minutes.
The 5-Minute Rest That Changes Everything
Letting the cookies rest on the sheet for 5 minutes before moving them to a rack allows the structure to set. This small pause prevents the cookies from collapsing or spreading further. It also lets the chocolate chips settle, creating those delightful pockets.
The Perfect Dusting Technique
When you dust the cookies with powdered sugar, use a fine sieve and a light hand. This ensures an even coat that doesn’t clump. A thick dusting can make the cookies feel heavy; a thin dusting keeps them airy.
The Secret Ingredient Swap
If you’re craving a deeper chocolate flavor, replace mini chocolate chips with dark chocolate chunks. The result is a cookie that balances sweet and bitter, ideal for chocolate lovers. Just remember to break the chunks into smaller pieces to avoid large pockets.
Creative Twists and Variations
This recipe is a playground. Here are some of my favorite ways to switch things up:
Minty Fresh
Swap the green food coloring for a splash of mint extract. The result is a fresh, herbal cookie that pairs beautifully with iced tea. It’s a refreshing change for hot summer days.
Nutty Crunch
Add chopped pistachios or almonds to the dough. The nuts provide a satisfying crunch and a nutty aroma that complements the watermelon sweetness. Great for a sophisticated snack.
Spiced Citrus
Incorporate a teaspoon of orange zest and a pinch of cinnamon. The citrus adds brightness, while the cinnamon gives warmth. These cookies feel like a summer evening by the beach.
Chocolate‑Watermelon Fusion
Use a dark chocolate drizzle over the cooled cookies. The dark chocolate’s bitterness balances the fruitiness, creating a complex flavor profile that’s surprisingly elegant.
Gluten‑Free Twist
Replace the plain flour with a gluten‑free blend. Keep the rest of the ingredients the same, and you’ll have a cookie that’s safe for gluten‑sensitive friends. The texture will be slightly different but still delightful.
Almond Milk Variation
Swap the heavy cream for almond milk to make the dough lighter. The almond flavor pairs well with the watermelon, giving the cookie a nutty undertone. Ideal for dairy‑free diets.
Storing and Bringing It Back to Life
Fridge Storage
Store the cookies in an airtight container at room temperature for up to one week. The sealed environment keeps the moisture locked in, preserving the soft center. Avoid refrigeration, as it can dry out the cookies.
Freezer Friendly
Place the cooled cookies in a freezer bag, removing as much air as possible. They remain best for 3 months. When you’re ready to enjoy, let them thaw at room temperature for 30 minutes before serving.
Best Reheating Method
To revive a frozen cookie, place it on a parchment‑lined tray and bake at 325°F for 5 minutes. Add a tiny splash of water to the tray before reheating; this creates steam that rehydrates the cookie’s interior. The result is a cookie that feels brand new.