Remember that night when the kitchen turned into a battlefield and the only thing that saved the dinner was a handful of flour tortillas? I was in a rush, a deadline looming, and the only thing I could find was a bag of tortillas that had been sitting in the back of the pantry for months. I tossed them into a skillet, and the sizzling sound sounded like a triumphant drumroll. The aroma that followed was a mix of toasted corn and something sweet and savory that made my mouth water. That moment was the spark that set me on a mission to turn that humble staple into the ultimate game‑day snack.
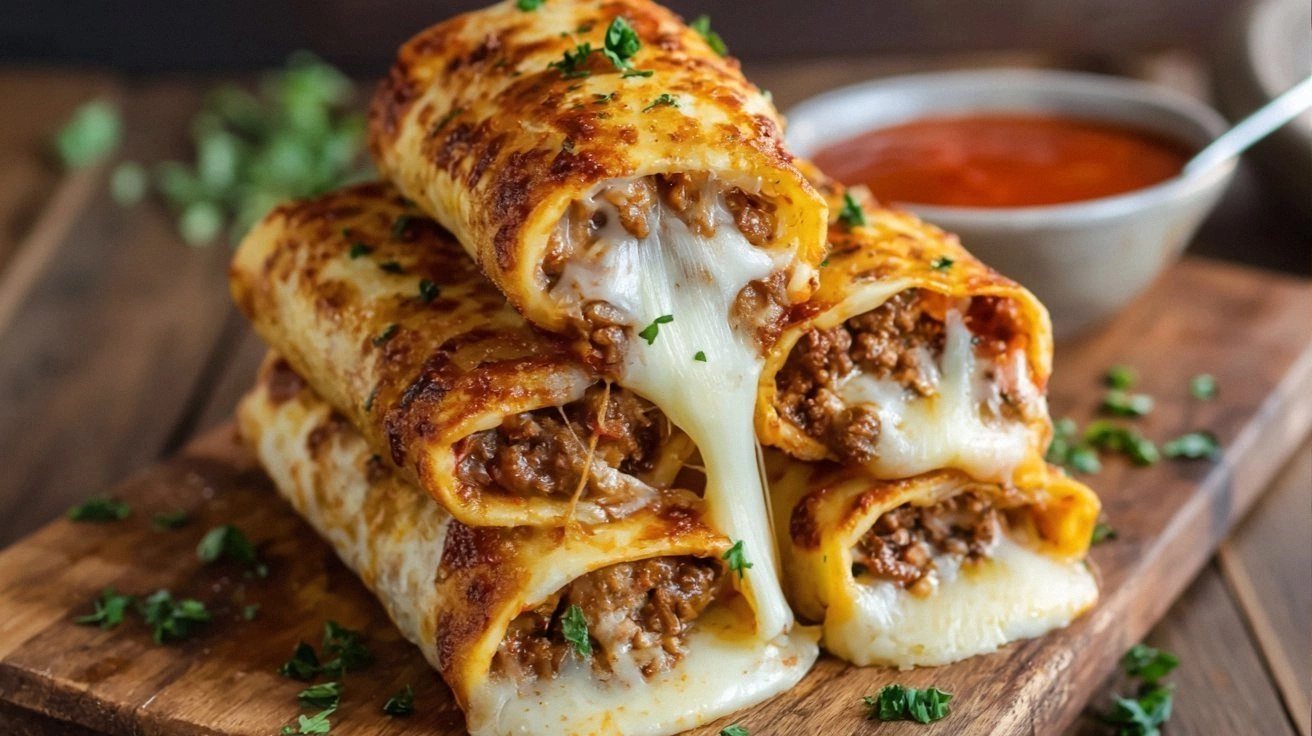
Imagine the first bite: a crisp, golden shell that cracks like a shellac record, followed by a molten river of cheddar and Monterey Jack that oozes over the edges. The salsa adds a bright, acidic punch that cuts through the richness, while a drizzle of sour cream brings a cool, velvety finish. The crunch of the tortilla gives way to a tender, seasoned meat center that feels like a warm hug. The whole experience is a symphony of textures, each bite delivering a new layer of flavor. It’s the kind of dish that makes your taste buds dance and your eyes light up.
This isn’t just another taco roll; it’s a masterclass in flavor balance and mouth‑watering convenience. I’ve taken the classic taco filling and elevated it with a blend of two cheeses that melt into a silky coating, then wrapped it in a tortilla that turns into a crisp, handheld bite. The secret lies in the seasoning blend, where a touch of cumin and smoked paprika give depth without overpowering. The result is a bite that’s both satisfying and shareable, perfect for parties, game nights, or a quick weeknight win. It’s a dish that feels indulgent yet simple, and it has become a staple in my kitchen.
Now, here’s the kicker: I discovered that adding a splash of beer to the meat mixture gives it an extra layer of flavor that’s almost impossible to resist. The carbonation lifts the spices and adds a subtle maltiness that pairs beautifully with the cheese. I’ll walk you through every single step, from the initial seasoning to the final bake, and by the end, you’ll wonder how you ever made it any other way. Trust me, this is hands down the best version you'll ever make at home. Let me walk you through every single step — by the end, you'll wonder how you ever made it any other way.
What Makes This Version Stand Out
- Taste: The blend of cheddar and Monterey Jack creates a creamy, slightly nutty profile that balances the sharpness of salsa. This combination elevates the classic taco flavor into a gourmet experience without the need for fancy ingredients. The subtle smoky notes from the beer-infused meat add depth that keeps the palate engaged.
- Texture: The tortilla’s exterior crisps to a satisfying crunch, while the interior remains soft and chewy, creating a delightful contrast. The cheese melt forms a glossy, velvety coating that clings to the meat, giving each bite a luxurious mouthfeel. The salsa’s chunky bits provide a refreshing burst of freshness that breaks up the richness.
- Simplicity: Every component of this recipe can be found in a typical grocery store aisle, and the cooking process takes less than an hour from start to finish. The method requires only a skillet and a baking sheet, so you can whip this up on a busy weekday or a relaxed weekend. No elaborate prep or fancy equipment needed.
- Crowd‑pleaser: Whether you’re hosting a game night or a casual get‑together, these sticks are guaranteed to be devoured. Their bite‑size nature makes them perfect for sharing, and the cheesy, tangy flavors appeal to both kids and adults. They’re the kind of snack that people keep asking for, even after the last bite.
- Ingredient Quality: By choosing fresh ground beef and premium cheeses, you elevate the flavor profile and ensure a tender, juicy interior. The use of real salsa and fresh cilantro adds a burst of freshness that contrasts with the richness. High‑quality ingredients translate to a dish that tastes like a restaurant favorite.
- Cooking Method: The combination of stovetop searing and oven baking locks in juices while achieving a golden crust. This two‑step process ensures even cooking and a consistent texture across all sticks. The method is versatile enough to accommodate variations like adding extra spices or different cheeses.
- Make‑ahead Potential: The sticks can be assembled ahead of time and refrigerated, making them perfect for last‑minute gatherings. They reheat beautifully in a toaster oven or microwave without losing their crispness. This flexibility makes them a reliable go‑to for busy households.
- Customizability: Swap the beef for turkey, pork, or a plant‑based alternative to suit dietary preferences. Add jalapeños, black beans, or corn for extra flavor layers. The recipe’s structure allows for endless experimentation while keeping the core concept intact.
- Nutritional Balance: With a balanced mix of protein, carbs, and healthy fats, these sticks offer a satisfying snack that keeps you fueled. The cheese provides calcium, while the tortillas deliver complex carbohydrates. The salsa adds antioxidants, making it more than just a comfort food.
- Visual Appeal: The golden, cheese‑laced surface glistens under the oven’s heat, creating an irresistible visual lure. The vibrant colors of salsa and cilantro add a pop of freshness that makes the dish Instagram‑ready. Presentation matters, and these sticks deliver.
Inside the Ingredient List
The Flavor Base
The foundation of this dish starts with the ground beef, which should be a lean 80/20 blend to keep the meat juicy while preventing it from drying out during the sear. Adding a splash of beer not only tenderizes the meat but also infuses a subtle malt flavor that complements the cheddar. If you’re looking for a healthier twist, swap the beef for ground turkey or a plant‑based crumble that still holds the seasonings well.
Seasoning is the heartbeat of any taco‑style dish, and I’ve combined taco seasoning, cumin, smoked paprika, and a touch of garlic powder for depth. The taco seasoning brings the classic Tex‑Mex punch, while the cumin adds earthiness and the smoked paprika introduces a hint of smoke that elevates the overall profile. If you prefer a fresher taste, replace the smoked paprika with regular paprika and add a dash of lime zest at the end.
Salsa is the bright counterpoint to the richness of the cheese and meat. Choose a chunky, fresh‑made salsa for a burst of tomato flavor, or opt for a smoky chipotle salsa if you’re feeling adventurous. The acidity in the salsa cuts through the heaviness and balances the dish, ensuring each bite is refreshing. Skipping salsa would leave the sticks bland; it’s the secret sauce that makes them unforgettable.
The Texture Crew
Flour tortillas are the structural backbone, providing the chewy, pliable base that holds everything together. Look for tortillas that are slightly pliable but not too thick; the right thickness ensures they crisp on the edges while remaining soft inside. If you’re using frozen tortillas, thaw them in a warm oven for a minute to avoid cracking during the bake.
Cheddar and Monterey Jack cheeses are chosen for their melting qualities and distinct flavors. Cheddar adds sharpness and a creamy depth, while Monterey Jack offers a buttery smoothness that coats the meat without overpowering. If you’re a cheese lover, feel free to sprinkle a little Parmesan or pepper jack for an extra kick.
Sour cream is optional but highly recommended for a cooling contrast. It adds a silky texture that balances the heat from the salsa and the richness of the cheese. A small dollop on top before serving can elevate the dish from simple to decadent. If dairy is a concern, try a coconut‑based yogurt for a plant‑friendly alternative.
The Unexpected Star
Cilantro, though often overlooked, provides a fresh, citrusy brightness that lifts the entire flavor profile. Adding a handful of chopped cilantro after baking gives a burst of herbal aroma that pairs beautifully with the savory elements. If cilantro is off your list, a squeeze of fresh lime juice or a sprinkle of parsley can provide a similar lift.
A splash of beer is the unexpected star that sets this recipe apart. The carbonation and malt flavors subtly infuse the meat, giving it a unique depth that you won’t find in standard taco rolls. If you’re avoiding alcohol, a bit of beef broth or a dry white wine can mimic the moisture and flavor profile without the alcohol content.
The Final Flourish
Olive oil or cooking spray is essential for achieving a golden crust. Lightly oil the skillet before searing the meat, and brush the tops of the sticks with a bit of oil before baking to promote browning. If you’re looking for a lower‑fat version, try a non‑stick spray that still delivers a crisp finish.
Optional garnishes like diced avocado, extra salsa, or a drizzle of hot sauce allow you to personalize each bite. Avocado adds creaminess and healthy fats, while hot sauce introduces a fiery kick. These additions are perfect for tailoring the dish to your taste or your guests’ preferences.
Everything's prepped? Good. Let's get into the real action, and trust me, the first bite will change the way you think about tacos forever.
The Method — Step by Step
- Heat a large skillet over medium‑high heat and add a tablespoon of olive oil. When the oil shimmers, crumble the ground beef into the pan and season with the taco seasoning, cumin, smoked paprika, garlic powder, and a pinch of salt. Stir the meat until it’s browned and crumbly, about 5 to 7 minutes. Let the mixture cool slightly; this will help the flavors meld before rolling. While the meat rests, set your oven rack to the middle position and preheat to 400°F (200°C).
- Lay out your flour tortillas on a clean surface. If they’re a bit stiff, warm them in a dry skillet for 10–15 seconds on each side to make them more pliable. Spoon an even layer of the seasoned beef onto each tortilla, leaving about an inch from the edges. Sprinkle a generous amount of cheddar and Monterey Jack over the meat, ensuring a thick, melty coating. Finish with a spoonful of salsa on top to keep the filling moist.
- Fold the tortilla in half, then roll it tightly from the bottom, sealing the edge with a dab of water or a small amount of beaten egg. The seal ensures the filling stays inside during baking. Place each rolled stick seam‑side down on a parchment‑lined baking sheet. For a crispier edge, lightly brush each stick with a little olive oil before baking. This step is crucial for that golden crust we’re after.
- Slide the sheet into the preheated oven and bake for 12 to 15 minutes, or until the cheese is bubbling and the tortilla edges are golden brown. The internal temperature of the meat should reach 160°F (71°C) for safety. While the sticks bake, keep an eye on the edges; if they brown too quickly, tent them loosely with foil. The result should be a crisp exterior with a gooey, cheesy center.
- Watch Out: When removing the sticks from the oven, be careful not to let the cheese spill over onto the baking sheet, as it can burn and create a nasty mess. Use tongs or a spatula to lift them gently. If any cheese has hardened on the sheet, wipe it clean with a paper towel before it becomes stubborn. This small step keeps your kitchen clean and your sticks pristine.
- Let the sticks cool for about 3 minutes; this allows the cheese to set slightly, making them easier to handle. While they’re still warm, drizzle a thin layer of olive oil over the tops to add shine and extra crispness. For an extra burst of flavor, sprinkle chopped cilantro and a squeeze of lime over each stick. The citrus brightens the dish and balances the richness.
- Serve the sticks hot, straight from the oven, with extra salsa, sour cream, or your favorite hot sauce on the side. If you’re hosting a crowd, arrange them on a platter for easy grabbing. Pair them with a cold beer or a sparkling lemonade to complete the game‑day vibe. The combination of textures and flavors will have everyone asking for more.
- Optional: For a healthier version, replace the ground beef with ground turkey or a plant‑based protein. Swap the cheddar for a reduced‑fat cheese or a blend of vegan cheeses. These tweaks maintain the dish’s core appeal while catering to dietary preferences.
- If you’re preparing ahead, assemble the sticks and refrigerate them for up to 24 hours. Reheat in a 350°F (175°C) oven for 10 minutes, or until heated through and the cheese is melty again. The sticks retain their crispness and flavor, making them a convenient option for busy days.
- Remember, the key to perfection is the balance between the crispy exterior and the molten interior. If the cheese is too runny, increase the bake time by a minute or two. If the edges are too hard, reduce the heat slightly and monitor closely. With a little practice, you’ll nail the ideal texture every time.
That's it — you did it. But hold on, I've got a few more tricks that'll take this to another level. The next section will dive into insider secrets that even seasoned chefs swear by.
Insider Tricks for Flawless Results
The Temperature Rule Nobody Follows
Many cooks assume that a single oven temperature is sufficient, but the secret lies in a two‑stage bake. Start at 400°F to crisp the exterior, then lower to 350°F for the last few minutes to finish the cheese without burning. This technique prevents the edges from becoming too hard while keeping the interior creamy. I once tried baking everything at 400°F, and the cheese exploded before the sticks were done; the lesson was clear.
Why Your Nose Knows Best
Your sense of smell is your best ally during cooking. As soon as the cheese starts to brown, a caramelized aroma will signal that the sticks are almost ready. If you’re unsure, lightly press the top of a stick; if the cheese feels slightly firm yet still gooey, you’re in the sweet spot. This olfactory cue saves you from overcooking and gives you a professional edge.
The 5‑Minute Rest That Changes Everything
After removing the sticks from the oven, let them rest for exactly five minutes before cutting. This short pause allows the cheese to set, preventing a sticky mess when you slice through. I used to cut right away and ended up with cheese sliding off; the rest trick turned the sticks into a clean, elegant snack. Try it, and you’ll see the difference.
Keep the Crispy Edge
If you’re prone to soggy edges, lightly dust the sticks with a fine layer of cornstarch before baking. This absorbs excess moisture and promotes a crisp crust. The trick is subtle; too much cornstarch can make the sticks taste chalky, so use just enough to coat the surface. It’s a small tweak that yields a noticeable crunch.
The Sauce‑Squeeze Secret
A quick squeeze of lime over the freshly baked sticks amplifies the flavor profile. The acidity cuts through the cheese, brightening the dish and giving it a fresh finish. For an extra kick, rim the sticks with a thin layer of hot sauce before serving. This simple step turns a good snack into an unforgettable one.
Avoiding the Sticky Mess
When you’re rolling the sticks, use a small amount of beaten egg to seal the edge. The egg creates a barrier that keeps the filling inside and gives a shiny finish. If you’re vegan, a splash of water or a non‑dairy milk works just as well. This technique is a game‑changer, especially when you’re preparing a large batch.
The Quick Chill Trick
If you need to store the sticks before baking, place them on a parchment sheet and chill in the refrigerator for 30 minutes. This short chill hardens the cheese slightly, making the sticks less likely to collapse when you roll them. It’s a small step that saves you from a messy assembly.
The Final Touch
Finish the sticks with a drizzle of olive oil or a light dusting of smoked paprika for an extra layer of flavor and visual appeal. The oil adds a glossy sheen, while the paprika introduces a subtle smoky sweetness that pairs with the beef. This final touch elevates the dish from great to spectacular.
Creative Twists and Variations
This recipe is a playground. Here are some of my favorite ways to switch things up:
Smoky Chipotle Crunch
Swap the standard salsa for a chipotle‑infused salsa and sprinkle smoked paprika on top. Add a handful of crushed tortilla chips for an extra crunch. This variation brings a smoky depth that pairs beautifully with the cheese.
Mediterranean Delight
Use ground lamb instead of beef, add chopped olives, and season with oregano and thyme. Replace the cheddar with feta for a tangy twist. The Mediterranean herbs give the sticks a fresh, herby flavor profile.
Vegan Victory
Replace the ground beef with crumbled tempeh or lentils, and use a dairy‑free cheese blend. Add sautéed mushrooms for umami. This version keeps the texture and flavor while being plant‑based.
Breakfast Burrito Rolls
Fill the sticks with scrambled eggs, diced ham, and shredded cheddar. Bake until the eggs are set and the cheese is melted. Serve with a side of pico de gallo for a breakfast‑style twist.
Mexican Street Food
Top the sticks with guacamole, diced red onion, and a squeeze of lime. Add a sprinkle of cotija cheese for extra crunch. This version mimics the flavors of a street‑market taco.
Spicy Jalapeño Explosion
Add sliced jalapeños to the beef mixture and finish with a drizzle of hot sauce. Use a blend of cheddar and pepper jack for a fiery cheese profile. The heat level can be adjusted to suit your taste.
Southwestern Fiesta
Incorporate black beans and corn into the meat mixture, and season with cumin and coriander. Top with a dollop of sour cream and chopped cilantro. This variation adds a hearty, fiber‑rich element.
Cheesy Veggie Roll
Replace the meat with sautéed spinach, bell peppers, and zucchini. Add a sprinkle of mozzarella for a gooey finish. This veggie‑filled version is both colorful and nutritious.
Storing and Bringing It Back to Life
Fridge Storage
Store assembled sticks in an airtight container in the refrigerator for up to 24 hours. Keep them flat to prevent the cheese from sliding off. When ready to serve, reheat briefly to restore crispness.
Freezer Friendly
Wrap each stick individually in plastic wrap and place them in a freezer bag. Freeze for up to 3 months. Thaw in the refrigerator overnight before reheating in the oven at 350°F for 10 minutes.
Best Reheating Method
The oven is the gold standard for reheating; it preserves the crisp exterior while melting the cheese evenly. If you’re in a hurry, a toaster oven works well. Add a splash of water before reheating to keep the sticks from drying out, creating steam that restores moisture.